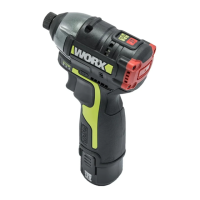
9
Driver bits 1
We recommend that you purchase your
accessories from the same store that sold you
the tool. Choose the type according to the work
you intend to undertake. Refer to the accessory
packaging for further details. Store personnel can
assist you and offer advice.
OPERATING INSTRUCTIONS
NOTE: Before using the tool, read the instruction
book carefully.
Intended use:
This tool is intended for the fastening and loosening of
bolts, nuts and various threaded fasteners. This tool is
not intended for use as a drill.
BEFORE PUTTING INTO OPERATION
A) BATTERY CHARGING
The battery charger supplied is matched to the Li-ion
battery installed in the machine. Do not use another
battery charger.
The Li-ion battery is protected against deep discharging.
When the battery is empty, the machine is switched off
by means of a protective circuit: The chuck no longer
rotates.
In a warm environment or after heavy use, the battery
pack may become too hot to permit charging. Allow time
for the battery to cool down before recharging.
When the battery is charged for the first time and
after prolonged storage, the battery will only accept
approximately 60% charge. However, after several charge
and discharge cycles the battery will accept a 100%
charge.
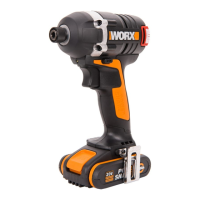
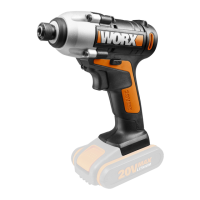
B)TO REMOVE OR INSTALL BATTERY PACK (SEE A)
Depress the battery pack release button to release
and slide the Battery Pack (4) out from your tool. After
recharge, slide it back into your tool. A simple push and
slight pressure will be sufficient.
OPERATION
1.HOW TO INSTALL AND REMOVE A
SCREWDRIVER BIT AND SOCKET
TO INSTALL BITS:
A). When installing the screwdriver bit, pull the socket in
the direction of the arrow and insert the screwdriver bit
all the way to the bottom of the socket. Then, release the
socket to lock the screwdriver bit. (See Fig. B)
B). When installing the screwdriver bit, pull the socket
in the direction of the arrow and insert the screwdriver
bit element and the screwdriver bit all the way to the
bottom of the socket. Then, release the socket to lock the
screwdriver bit.(See Fig. C)
Note: Use only the screwdriver bits with the
illustrated inserts
For tools with a deep hole for screwdriver bits
B=17mm
B=14mm
When using this type of screwdriver
bits, follow the installation steps shown
in Fig. B.