10
EN
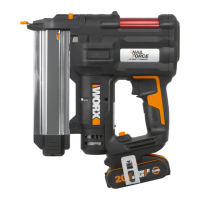
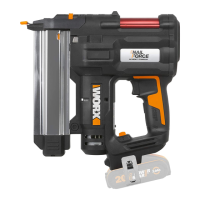
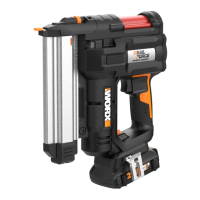
20V Cordless 18 gauge Nail/Staple Gun
OPERATING INSTRUCTIONS
NOTE: Before using the tool, read the
instruction book carefully.
Intended Use
This tool is intended for nailing decoration of board
line, skirting line and wooden frame, etc.
WARNING: Do not point the nail gun to
people or animals. Always remove the
nails and the battery pack when not using the
tool.
ASSEMBLY AND OPERATION
ACTION FIGURE
BEFORE OPERATION
Removing the battery pack See Fig. A1
Charging the battery pack See Fig. A2
Installing the battery pack See Fig. A3
ASSEMBLY
Installing the belt hook
NOTE: The belt hook can be
installed on the left or right side
of the nail gun.
See Fig. B
Loading the brad nails/crown
staples
NOTE: Keep pressing the
magazine release button
when opening or closing the
magazine.
WARNING: Keep the tool
pointed away from
yourself and others when
loading nails. Failure to do so
could result in possible serious
personal injury.
See Fig. C1,
C2, C3
OPERATION
Selecting the nailing mode
Single sequential actuation
mode:
Contact actuation mode:
WARNING: The nail gun
will not function properly
if the selector is not securely
seated in either position. Always
assure the selector is seated
properly to avoid an unexpected
nail discharge and possible
serious personal injury.
See Fig. D
Using the on/off switch in two
different modes
Keep pressing the on/off switch
when moving the tool in the
contact actuation mode as
shown in Fig. E2.
NOTE: The nail gun will be
functioned only when pressing
the switch and pushing the
workpiece contact against the
work surface at the same time.
Warning: Never wedge or hold
back the workpiece contact
mechanism during operation of
the tool. Doing so could result in
possible serious injury.
See Fig. E1, E2
Drive depth adjustment
NOTE: Drive a test nail after
each adjustment until the
desired depth is set.
See Fig. F
LED worklight
NOTE: The LED Worklights
provide feedback to indicate
whether the battery pack is
charged sufficiently and/or if the
tool is functioning properly.
See Fig. G
Removing a jammed nail
Try to operate the tool for two
more times to confirm the nail is
jammed.
WARNING: Always
remove the battery pack
first.
• Remove the nail and keep the
magazine open.
• The nail jam can be freed by
inserting a flat blade screwdriver
into the tip of the driving
mechanism and push it back.
• Be sure the cover is closed and
the screws are tighten before
using the tool again.
See Fig. H1,
H2, H3
MAINTENANCE
Remove the battery pack from the tool before
carrying out any adjustment, servicing or
maintenance.
There are no user serviceable parts in your power
tool. Never use water or chemical cleaners to clean
your power tool. Wipe clean with a dry cloth. Always
store your power tool in a dry place. Keep the motor
ventilation slots clean. Keep all working controls free
of dust. Occasionally you may see sparks through
the ventilation slots. This is normal and will not
damage your power tool.
 Loading...