23
Western Shotcrete Equipment, Inc.
14 Thoroughly clean the outlet cavity on the back of the hopper.
15 Thoroughly clean the 5” outlet flange.
16 Use a chipping gun to remove concrete build-up around the Wear-plate.
17 Remove the four Wear-plate bolts. (85132)
18 Tighten the Wear-plate push-bolt (85134) until the Wear-plate pops free. The push-bolt is located on the
front of the hopper, operator side, near one of the side Wear-plate bolts. Do not use an impact gun! Use hand
tools only.
19 Loosen, but do not remove, the Wear-plate push-bolt almost all the way out.
20 Remove the Wear-plate. Care must be used because the edges are sharp.
21 Thoroughly clean the hopper surface where the Wear-plate mounts using a medium grit rotary sanding
disk. This surface must be free of concrete and slurry so that the Wear-plate does not crack.
22 Remove the chip-rings (85405) from the material cylinder openings, clean and replace. The chip-rings
must fit slightly below the surface of the hopper.
Note: This is a good time to replace the piston cups and cup adapter o-rings
If necessary. Refer to the cup change procedure.
23 Determine if the back of the Wear-plate is usable. Both sides of the Wearplate are usable. If both sides
are worn then have the plate Blanchard ground flat, or replace with a new Wear-plate. (85131)
24 Test fit the Wear-plate against the surface: it must sit flat and not rock back and forth. If the Wear-plate
does not sit flat, determine why. (Piece of dirt, Metal chip?)
25 Install Wear-plate. Make sure that the push-bolt has been retracted almost all the way back. If the plate
has a used side, seal it with silicone. Exercise care when tightening the four Wear-plate bolts. Tighten the
center bolts first then the outer bolts. Tighten the bolts incrementally to about 25 lbs. Of torque. Do not over
tighten! The Wear-plate is very hard and brittle. It will crack if you over tighten the bolts.
26 Hand tighten the push-bolt.
27 Place S-tube valve in Western Shotcrete Equipment S-tube stand. (87103)
28 Remove old Wear-ring and discard.
29 Remove old rubber seal strip and with a chipping gun or hammer and chisel thoroughly clean seal strip
recess out.
30 Install new rubber seal strip. (85332) Trim if necessary to fit.
31 Install new Wear-ring. (85331)
32 Remove old seals and bearing from the outlet seal housing. (85171)
33 Thoroughly clean outlet seal housing. Make sure that the two grease passages are free of obstructions.
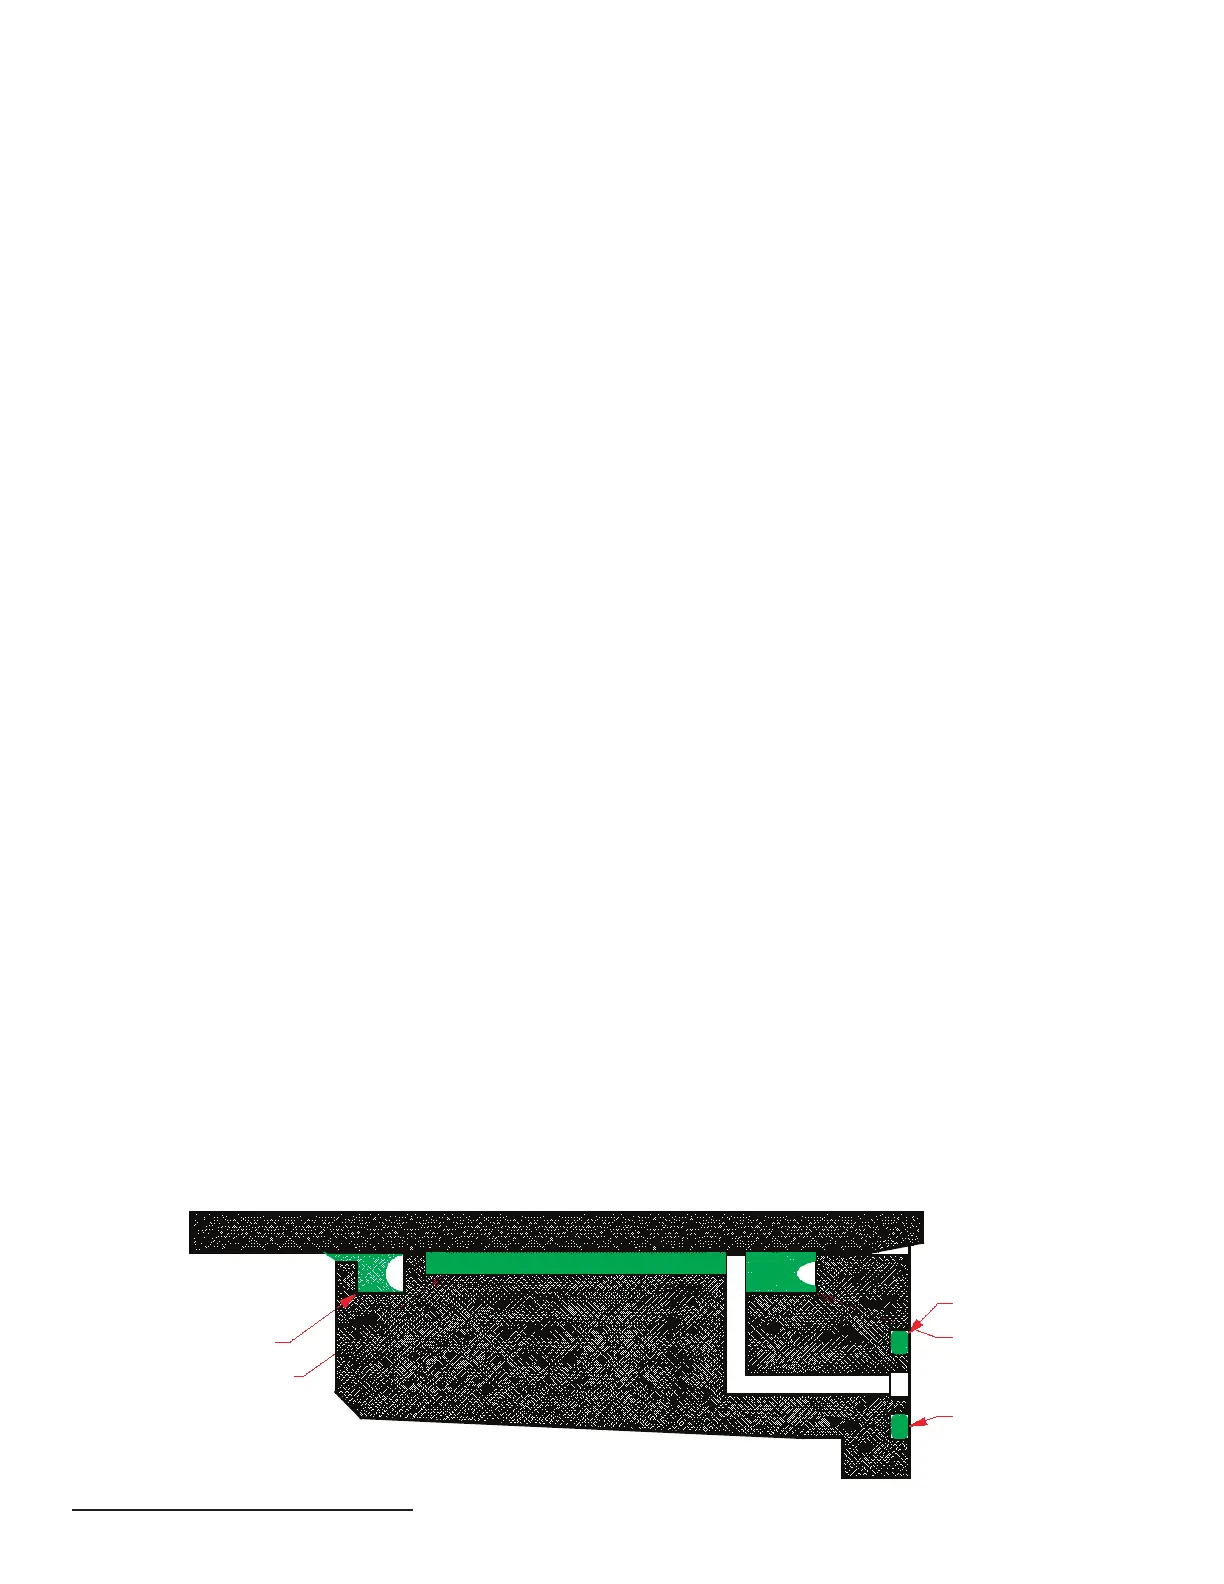
34 Install new seals, o-rings, and fiberglass bearing (kit# 85170) into the outlet seal housing as shown. Use
a little grease to hold the o-rings in place.
85175 o-ring -264
85176 o-ring -260
85174 Loaded Lip Seal
witho-ring expander
removed
85172 Fiber-Glass Bearing
85172 Double Lip Seal
Installed with the Lip out
 Loading...