- 10 -
Installation
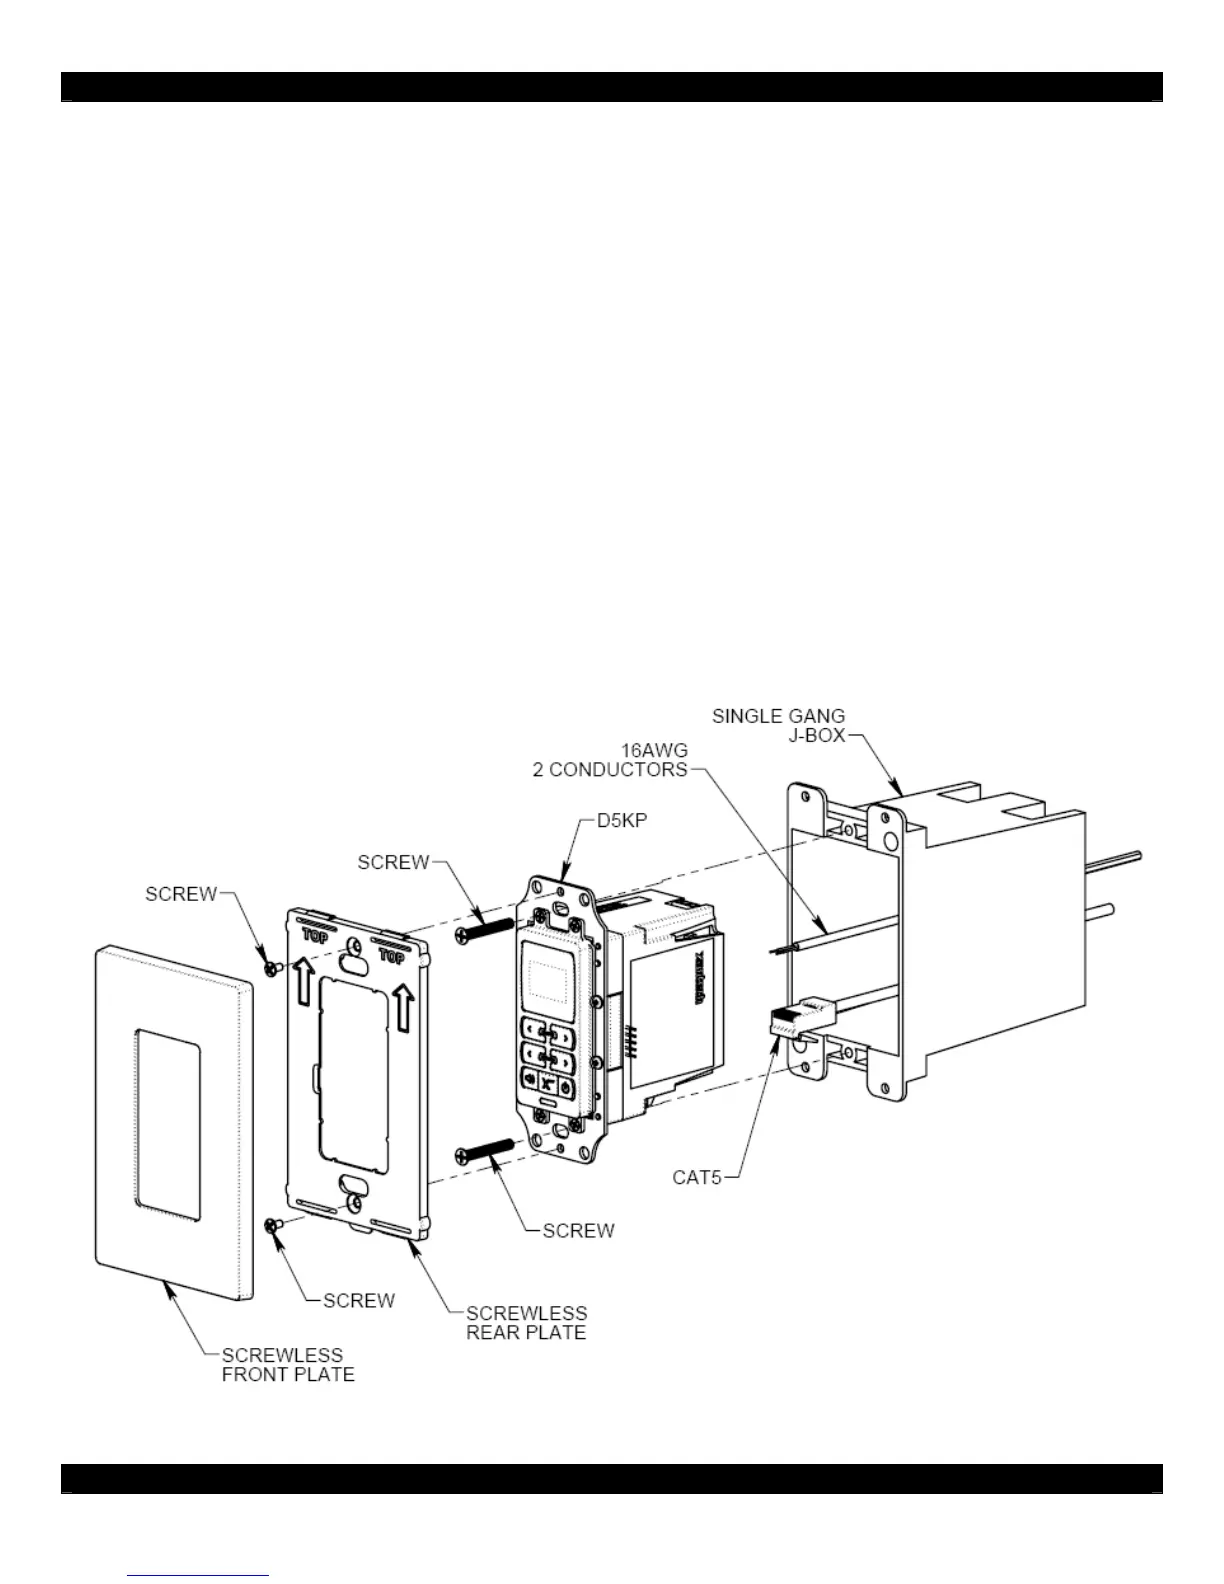
The D5KP is designed to mount in a standard single-gang rough-in box (J Box). Typical mounting
height is 56-60” from the floor to the bottom of the frame. This provides optimum viewing for the
largest number of people.
Note: Do not mount the D5KP in the same rough-in box as high voltage devices such as electrical
outlets or switches.
After running CAT-5 and terminating the ends, route the wires from the D5RH, D5SH, or D5SH4 and
D5IP (if applicable) into the back of the rough-in box, then connect them to the appropriate RJ-45
connectors on the rear of the D5KP. Connect all 16 AWG 2 conductor speaker wires. If using an IR
Receiver, strip the ends of three conductors of the CAT-5 and insert into the screw terminals of the IR
Input Jack. Specific connections are detailed in the Connections section.
Once connections are made, mount the D5KP in to the rough-in box using the 2 provided screws.
Mount the Trim Plate Bracket as shown in the figure below, and then snap the Screw-less Trim Plate
in place.
Make sure that the arrows on both the Trim Plate Bracket and the Trim Plate are pointed UP.
Figure 2.3: D5KP Keypad Installation