commands to the Arduino.
Example usage (send these commands from your computer terminal):
w#nnn - analog WRITE pin # to nnn
e.g. w6088 - write pin 6 to 88
d#v - digital WRITE pin # to v
e.g. ddh - Write pin 13 High
r# - digital READ digital pin #
e.g. r3 - Digital read pin 3
a# - analog READ analog pin #
e.g. a0 - Read analog pin 0
- Use hex values for pins 10-13
- Upper or lowercase works
- Use 0, l, or L to write LOW
- Use 1, h, or H to write HIGH
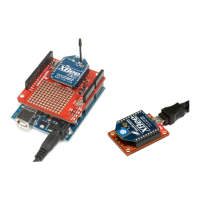
Hardware Hookup:
The Arduino shield makes all of the connections you'll need
between Arduino and XBee. Make sure the SWITCH IS IN THE
"DLINE" POSITION.
Development environment specifics:
IDE: Arduino 1.0.5
Hardware Platform: SparkFun RedBoard
XBee Shield & XBee Series 1 1mW (w/ whip antenna)
XBee USB Explorer connected to computer with another
XBee Series 1 1mW connected to that.
This code is beerware; if you see me (or any other SparkFun
employee) at the local, and you've found our code helpful, please
buy us a round!
Distributed as-is; no warranty is given.
*****************************************************************/
// SoftwareSerial is used to communicate with the XBee
#include <SoftwareSerial.h>
SoftwareSerial XBee(2, 3); // Arduino RX, TX (XBee Dout, Din)
void setup()
{
// Initialize XBee Software Serial port. Make sure the baud
// rate matches your XBee setting (9600 is default).
XBee.begin(9600);
printMenu(); // Print a helpful menu:
}
void loop()
{
// In loop() we continously check to see if a command has been
// received.
if (XBee.available())
{
char c = XBee.read();