Do you have a question about the Xblue Networks IP5g and is the answer not in the manual?
Enter phone number before lifting handset for corrections and quick dialing.
Dial number then press speakerphone button for handsfree calls.
Dial number then press headset button for headset calls.
Pick up handset, press speakerphone, or headset button to answer.
Place calls on Exclusive Hold (personal) or System Hold (shared).
Transfer calls via Attended (with announcement) or Blind (direct) methods.
Connect up to three people into one conference call.
Temporarily mute your microphone during an active conversation.
Forward calls based on Unconditional, Busy, or No Answer settings.
Check messages by pressing [Vmail] or key, inputting password.
View recent calls and manage contact entries for quick dialing.
Activate DND to block incoming calls and silence the ringer.
Press the Redial key to automatically redial the last dialed number.
Details of included items such as phone, handset, cords, and power supply.
Explanation of various icons displayed on the phone screen.
Overview of phone keys, softkeys, and idle shortcuts.
Instructions for attaching the desk stand at desired angles.
Steps for mounting the phone on a wall using a wall mount kit.
Identifies ports for power, network, PC, headset, and handset.
How to access and change phone settings via a web browser.
Steps to navigate and select the desired display language.
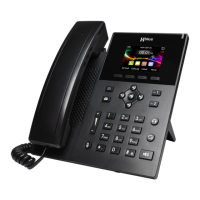
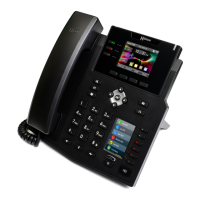
This document describes the Xblue IP5g, a desktop IP phone designed for business communication, offering a range of calling, conferencing, and contact management features.
The Xblue IP5g serves as a primary communication device, enabling users to make and receive calls, manage multiple conversations, and access voicemail. It supports various call handling options, including hold, transfer, and three-party conferencing. The device integrates with a network to provide internet-based telephony and offers features like call forwarding and a "Do Not Disturb" mode for managing incoming calls. It also includes a directory for contacts and a call log for tracking recent communications. The phone features a display with interactive softkeys that adapt to the current context, providing intuitive access to functions.
Calls can be initiated using pre-dialing, which allows users to enter a number and then choose to dial via handset, handsfree (speakerphone), or headset. Corrections can be made using the [Delete] softkey before dialing. The phone supports faster call sending if the dialing method (handset, headset, or speakerphone) is selected after the number is entered.
Incoming calls can be answered by picking up the handset, pressing the speakerphone button, or pressing the headset button.
While connected to a call, pressing the [Conf] softkey places the first call on exclusive hold. The user then dials the second number (using '#' to send faster). Once the second call is established, pressing the [Conf] softkey again connects all three parties (the user and the two called parties) into a conference.
During a call, the mute button can be pressed to mute the microphone and pressed again to unmute it.
Call forwarding is configured via [Menu] > Features > Call Forward. Users select their extension, choose a forward type (Unconditional, Busy, No Answer), and use navigation keys to enable/disable it. A destination number is then entered, and [OK] or a navigation key confirms the setting.
A red lamp at the upper-right corner of the phone indicates waiting voicemail messages. To access voicemail, users press the voicemail button or [Vmail] softkey, enter their password (default is 1111), and follow the voice prompts.
The call list is accessed by pressing the call list key or [CallLog]. Users can scroll through lists using navigation keys. To dial an entry, [Dial] softkey, picking up the handset, or pressing the speakerphone or headset button can be used.
Contacts are accessed via the contacts key or [Menu] > Contact. Users can select Local Contacts, All Contacts, or add a new group. To dial an entry, navigate to it and press [Dial] softkey, pick up the handset, or press the speakerphone or headset button. To add a new entry, select Contact, then All Contact or another group, press [Add], enter the name and number, and press [OK] softkey.
DND is activated by pressing [DND] (or [More] if not visible). Pressing [DND] again removes DND.
The redial button can be pressed to redial the last number dialed.
The display shows various icons indicating the phone's status: Handsfree Mode, Headset Mode, Handset Mode, Mute ON, Ringer OFF, Call on Hold, Auto-Answer ON, Call Forward, Do Not Disturb OFF (Blue), Do Not Disturb ON (Red), New SMS, Missed Call(s), Received Calls, No IP Address, Dialed Calls, Internet Connected, New Voicemail, Keypad Locked, Internet Not Connected, VLAN Active, VPN Active, and Voice Quality.
The desk stand allows for two angles: Low (A) or High (B). Users select the appropriate slots on the back of the phone and slide the stand in from left to right.
A Wall Mount kit (sold separately) is required. First, the handset retaining tab is removed by pushing it up and out, spun so the hook is upward, and slid back into the socket. The Wall Mount kit is then mounted to the wall, and the IP5g phone slides onto the kit from left to right, mating the slots on the back of the phone (slot pairs A or B).
IP5g settings can be changed via a web browser.
Several languages are available for the telephone display prompts.
| Protocols | SIP |
|---|---|
| Ethernet Ports | 2x 10/100 Mbps |
| PoE Support | Yes |
| Headset Port | RJ9 |
| Speakerphone | Full Duplex |
| Supported Codecs | G.711, G.729 |
| Power Supply | 5V DC (Optional) |