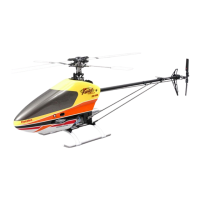
Do you have a question about the XCell Fury Extreme and is the answer not in the manual?
Discussion on the safe operation and construction of radio-controlled helicopters.
A list of safety guidelines for flying R/C helicopters.
Lists necessary supplies for assembling the kit.
Lists all the tools required for assembling the helicopter.
Provides guidance and tips for the assembly process.
Explains how to use the fastener guide for identification.
Details parts for 8:18 gear ratio.
Lists components for the 8:45 gear ratio.
Lists the main frame components for the left side assembly.
Instructions for assembling the left frame, Part 1.
Instructions for installing the drive train components.
Step-by-step guide to assemble the constant drive unit.
Lists all components for the clutch assembly.
Detailed steps for assembling the clutch unit.
Lists the main frame component for the right side.
Steps for assembling the right frame.
Lists all parts for the control bellcranks.
Steps to assemble the aileron and pitch bellcranks.
Lists the lower frame components.
Lists all engine-related components.
Steps to prepare the engine for installation.
Steps for mounting the engine onto the frame.
Steps for assembling and installing the fan shroud and mounts.
Lists all components for the fuel tank assembly.
Step-by-step guide to assemble the fuel tank.
Lists components for the swashplate assembly.
Steps for assembling the swashplate.
Lists all components for the washout mixer.
Steps for assembling the washout mixer.
Lists components for servo mounts.
Instructions for installing servos and radio equipment.
Lists all control rods and associated hardware.
Lists components for canopy mounts.
Instructions for preparing the canopy before installation.
Lists components for the head block assembly.
Steps for assembling the head block.
Lists components for the blade grips.
Steps for assembling the bell mixer.
Lists all components for the head axle.
Steps for assembling the blade arms.
Lists all components for the flybar.
Steps for installing the main rotor head assembly.
Lists components for the tail rotor hub.
Steps for assembling the tail rotor hub.
Lists components for the tail rotor pitch yoke.
Steps for assembling the tail rotor bellcrank.
Lists components for the tail boom, bagged for protection.
Lists components for tail boom mounts.
Instructions for installing the vertical fin mount and fin.
Steps for installing the tail rotor assembly.
Lists components for the tail rotor pushrod.
Steps to assemble the tail rotor pushrod.
Lists components for tail boom supports.
Steps for installing the main rotor blades.
Instructions for installing the canopy.
| Scale | 1/10 |
|---|---|
| Motor Type | Brushless |
| Battery Type | LiPo |
| Chassis Material | Aluminum |
| Drive Type | 4WD |
| Radio System | 2.4GHz |