EasyManuals Logo

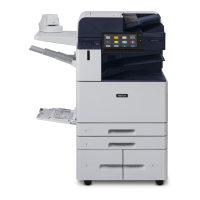
Xerox AltaLink B8170 Getting Started Guide

Xerox AltaLink B8170
13 pages
To Next Page IconTo Next Page
To Previous Page IconTo Previous Page
Page #7 background imageLoading...
Page #7 background image
www.xerox.com/office/support
2
USB
4
3
For Email, touch Manual Entry,
type the email address using the
touch screen keypad, then touch
Add. To add more than one email
address to the list, touch Add
Recipient. To type a subject line
for the email, touch Subject. To
select saved email addresses, use
the Device Address Book or select
from Favorites.
For Workflow Scanning, touch
Default Public Mailbox, or insert
your USB Flash Drive.
For Scan To, touch a destination
type, then enter the appropriate
information. To add more than
one destination to the list, touch
Add Destination.
Scanning and Emailing
Change the settings as needed, then touch Scan, or for Email,
touch Send.
Note: Settings from previous users remain
onscreen for a short time. To restore the
default settings in an app, scroll to the
bottom of the feature list, then touch Reset.

Other manuals for Xerox AltaLink B8170

Questions and Answers:

Question and Answer IconNeed help?

Do you have a question about the Xerox AltaLink B8170 and is the answer not in the manual?

Xerox AltaLink B8170 Specifications

General IconGeneral
CategoryAll in One Printer
Memory (Standard)8 GB
Energy Star CertifiedYes
FunctionsPrint, Copy, Scan, Fax
Hard Drive320 GB
Duplex PrintingYes
ConnectivityEthernet
Scan Resolution600 x 600 dpi
Copy Resolution600 x 600 dpi
Network ConnectivityEthernet
Operating System CompatibilityLinux
Print Speed (Black)Up to 70 ppm
Copy SpeedUp to 70 ppm
Mobile PrintingApple AirPrint, Google Cloud Print, Xerox Print Service Plug-in for Android, Mopria

Related product manuals