3. Rotate counterclockwise to remove the post-filter.
24h
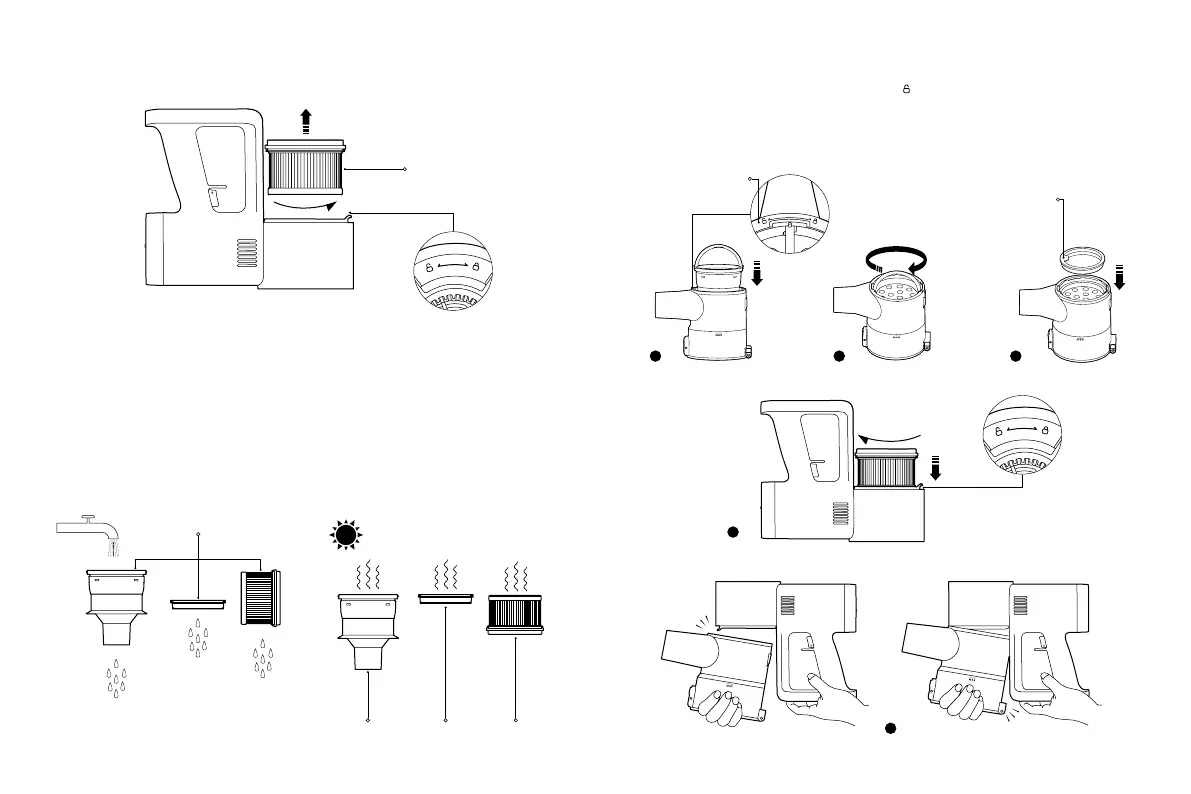
Installing the Filter Assembly
1. Align one end of the filter's handle with the unlocking mark " " and place the filter vertically into the dust
compartment.
2. Hold the handle and turn the filter clockwise until it is secured in place.
3. Insert the pre-filter into place with its front side up.
4. Insert the post-filter into the vacuum cleaner, and turn the post-filter clockwise into position.
5. Reinstall the dust compartment and make sure it is secured into place.
1 2 3
4
Click
This is the front side
of the pre-filter.
5
Post-filter
Filter Assembly
Filter Pre-filter Post-filter
4. Rinse the filter, pre-filter, and post-filter under running tap water until clean, then set them aside to fully dry for at
least 24 hours.
Notes:
• Never soak the pre-filter and post-filter.
• When cleaning the post-filter, rinse it repeatedly and tap its edge lightly to remove any dust and debris until it
is clean.
• Do not clean the pre-filter and post-filter with your hands, a brush, or a sharp object to prevent damage.
• If the suction power is still significantly reduced after the pre-filter and post-filter are cleaned, you can try to
purchase and replace them with genuine ones.
Unlocking Mark