13
14
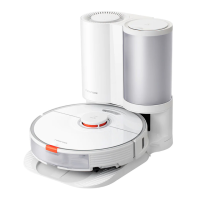
2. Remove the dust and debris from the filter with a dry cloth.
3. Insert the board into the slot, and make sure it is installed securely in place.
4. Press down on the cover of the auto-empty station to make sure it is
completely closed.
Board
Sensors and Charging Contacts
* Monthly cleaning is recommended.
Use a soft cloth to clean all sensors and charging contacts in the robot vacuum:
·
The cliff sensors and the charging contacts at the bottom of the robot vacuum.
·
The bumper and the docking sensor on the front of the robot vacuum.
·
The LDS laser sensor on the top of the robot vacuum.
Cliff Sensor
Charging Contacts
Docking Sensor
Bumper
LDS Laser Sensor
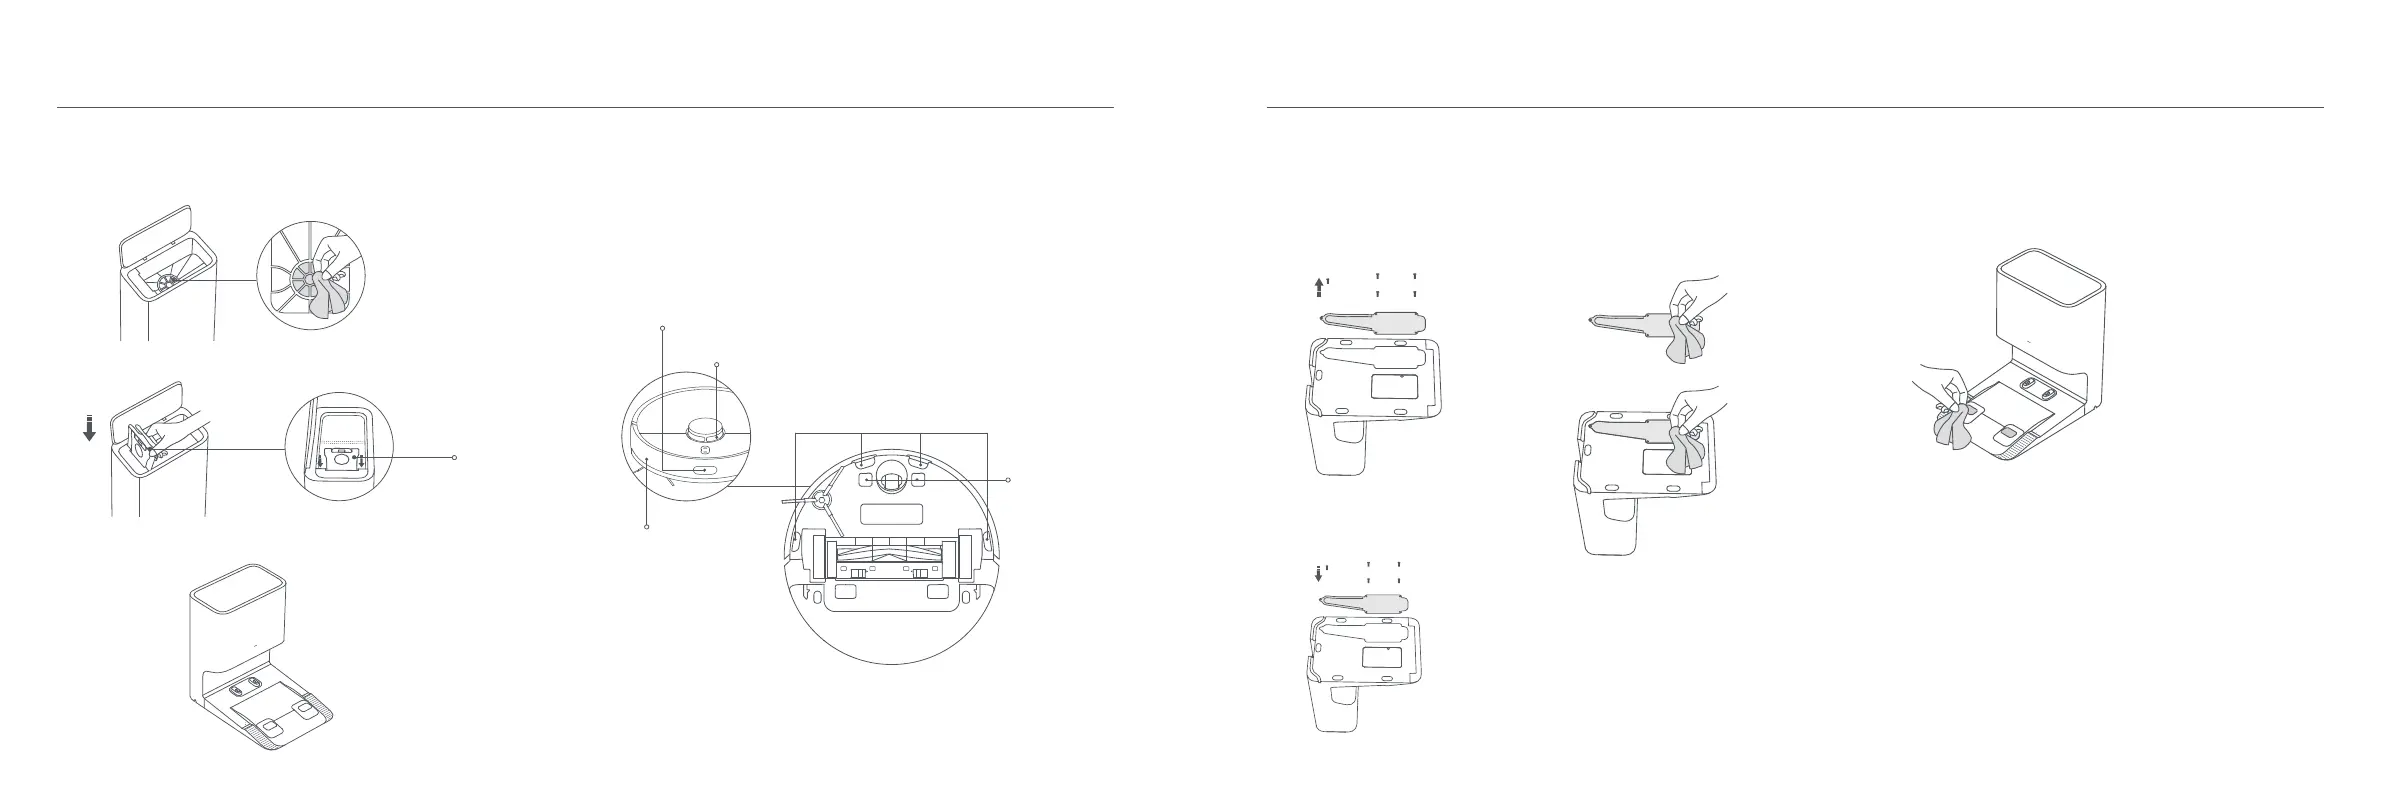
If the air duct is blocked, follow the steps below to clean it.
2. Check whether the air duct is
blocked by foreign objects, and
remove the objects if necessary.
3. Install the air duct cover back and screw it.
1. Unscrew the air duct cover to
remove it.
Air Duct on the Auto-empty Station
* Clean it as needed.
Battery
The robot vacuum contains a high-performance lithium-ion battery pack. Please
ensure that it remains well-charged during daily use to maintain optimal battery
performance.
Charging Contacts & Auto-empty Vents
* Clean it as needed.
Clean the charging contacts and the auto-empty vents with a soft, dry cloth.
Note: If the robot vacuum is not used for an extended period, turn it off and put it away. To
prevent damage from over-discharging, the robot vacuum should be recharged at least once
every three months.
Warning: Make sure the auto-empty station is turned off and unplugged before cleaning.