NetDisk User Manual Network Direct Attached Storage / NDAS
—————————————————————————————————————————————
XIMETA, Inc. www.XIMETA.com
—————————————————————————————————————————————
8
How to Use NetDisk
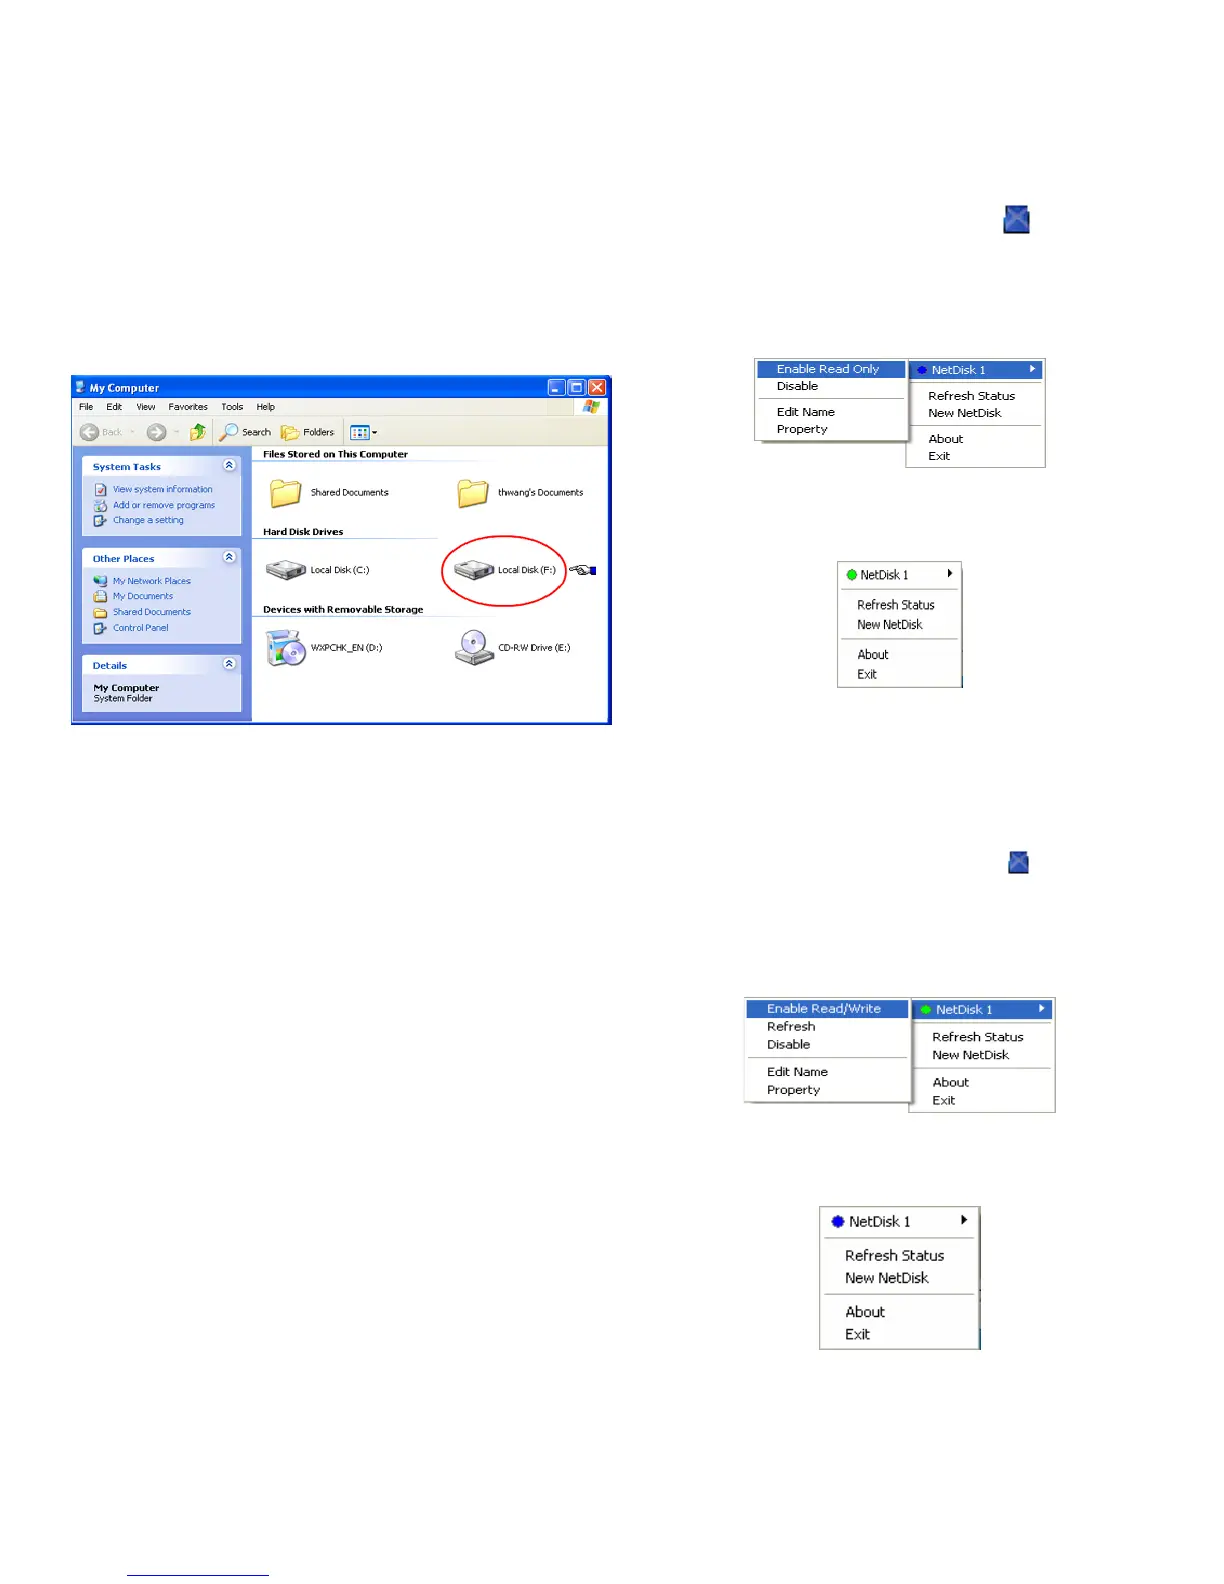
Now that you have successfully installed NetDisk, it’s time to
familiarize yourself on using the NetDisk. NetDisk is located
in My Computer as a local drive. Driver name and driver
letter will be different for each PC.
Here are examples of uses for NetDisk.
• You can use NetDisk like a local drive on your PC.
• Drag and drop files to NetDisk.
• Copy and paste data to NetDisk.
• Make and delete folders.
• Share files and folders.
• Backup files to NetDisk.
NetDisk provides users with two basic functions; Read Only
and Read/Write.
• Read Only Mode
- Any number of users can read from a NetDisk.
• Read/Write Mode
- Only one user can write to a specific NetDisk at a
time.
- No other users can write to NetDisk, until the current
Read/Write access owner passes the Read/Write
access to another user.
Changing from Read/Write to Read Only
• Click NetDisk™ Administrator Tool
and select the
NetDisk you want to change from Read/Write to Read
Only.
• Select Enable Read Only.
- The Blue Circle will change to a Green Circle
indicating Read Only Mode.
Blue Circle indicates Read/Write Mode
Green Circle indicates Read Only Mode
Changing from Read Only to Read/Write
• Click NetDisk™ Administrator Tool
and select the
NetDisk you want to change from Read Only to
Read/Write.
• Select Enable Read/Write.
- The Green Circle will change to a Blue Circle
indicating Read/Write Mode.
Blue Circle indicates Read/Write Mode
Green Circle indicates Read Only Mode