XR-2425H Q uic k Insta lla tio n Guid e
- 7 -
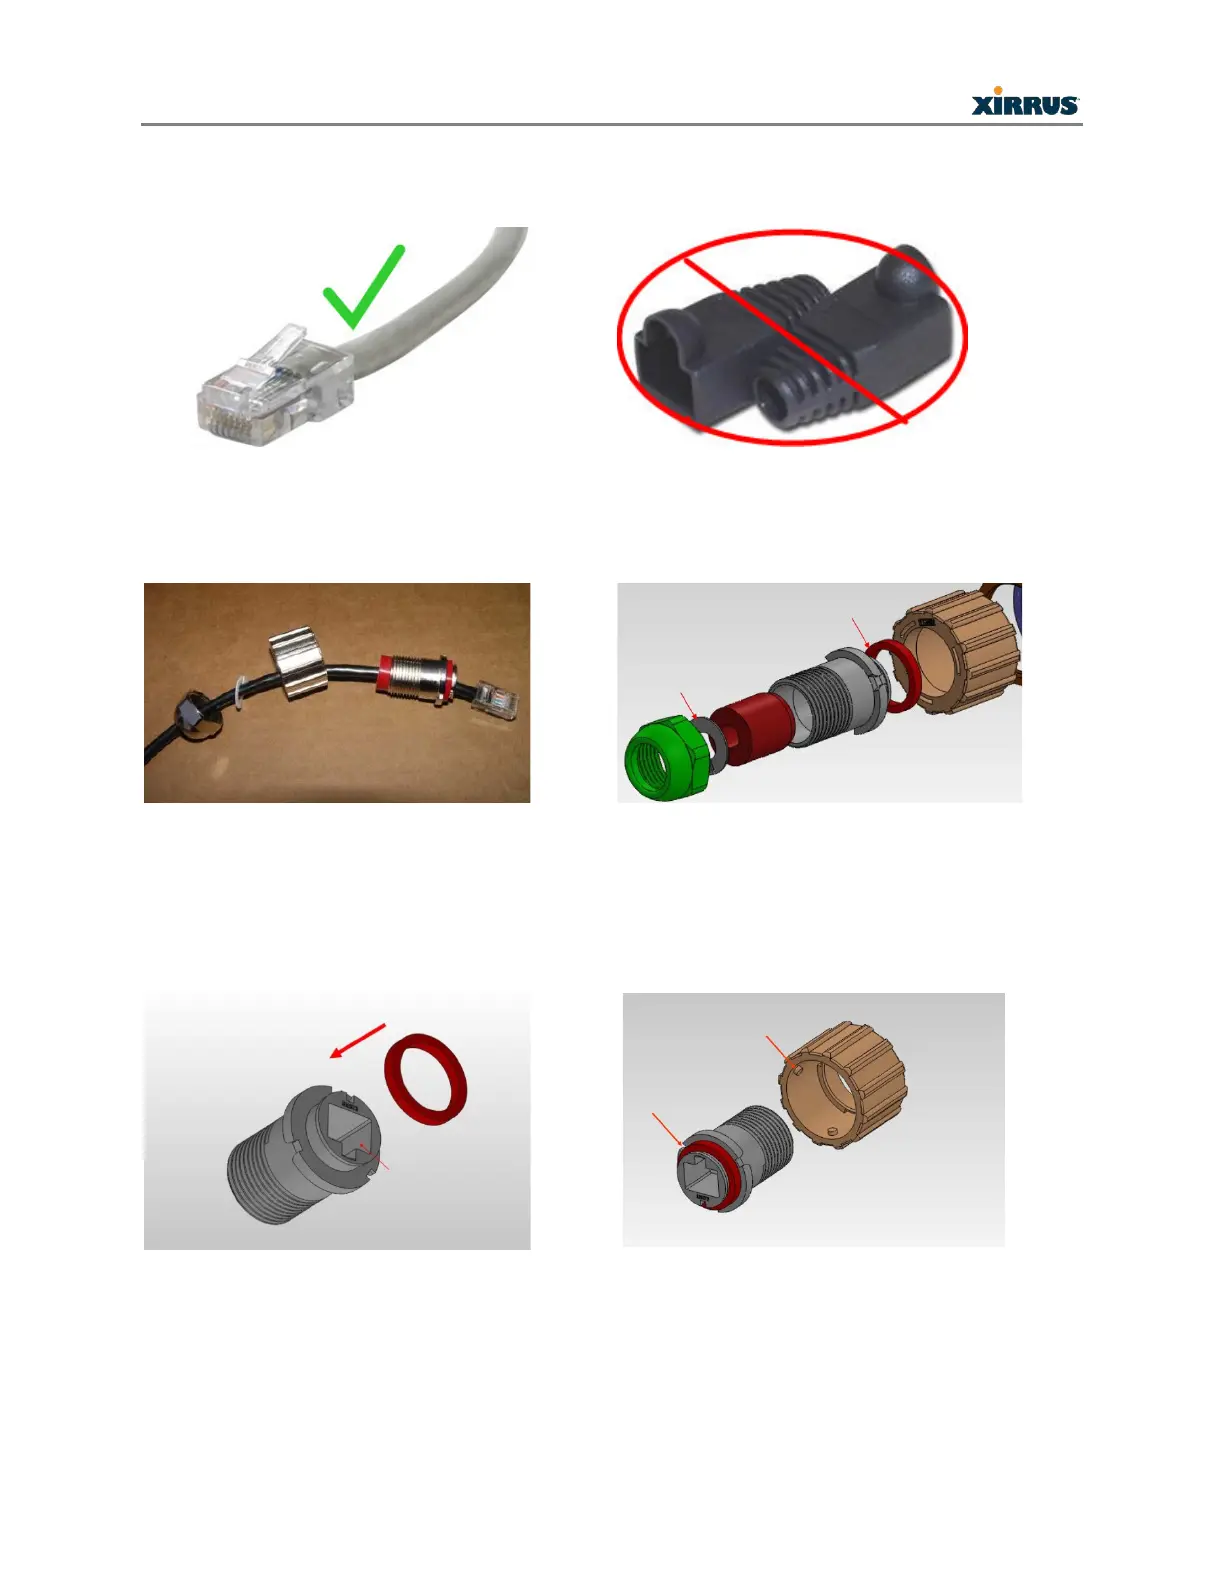
This will not seat properly in the waterproof connector, and the assembly will not be
watertight.
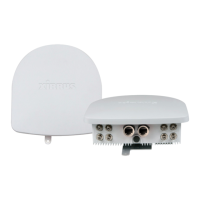
The components of the connector are shown in the photo below in the order that they are
placed onto the Ethernet cable, and also shown in more detail as a color-coded drawing.
You will perform a few assembly steps below before sliding the parts onto the cable.
Seat the O-ring (shown in red) on the connector body (gray) at its RJ45 jack side.
Note the slots in the collar of the connector body and the matching tabs inside the connector
ring. Insert the connector body into the connector ring so that they mate.
Slide the sealing nut (shown in green) and the connector body assembly over the Ethernet
cable as shown.
Attach the split washer and split rubber grommet over the cable.
Seat the washer in the sealing nut and slide the grommet into the connector body.
 Loading...