There is enough space between each arm of the MINI WING 105 to install the MINI BAG as a
repair storage option. A full MINI BAG requires at least 6.5cm (2.5in) between the
cages to properly install.
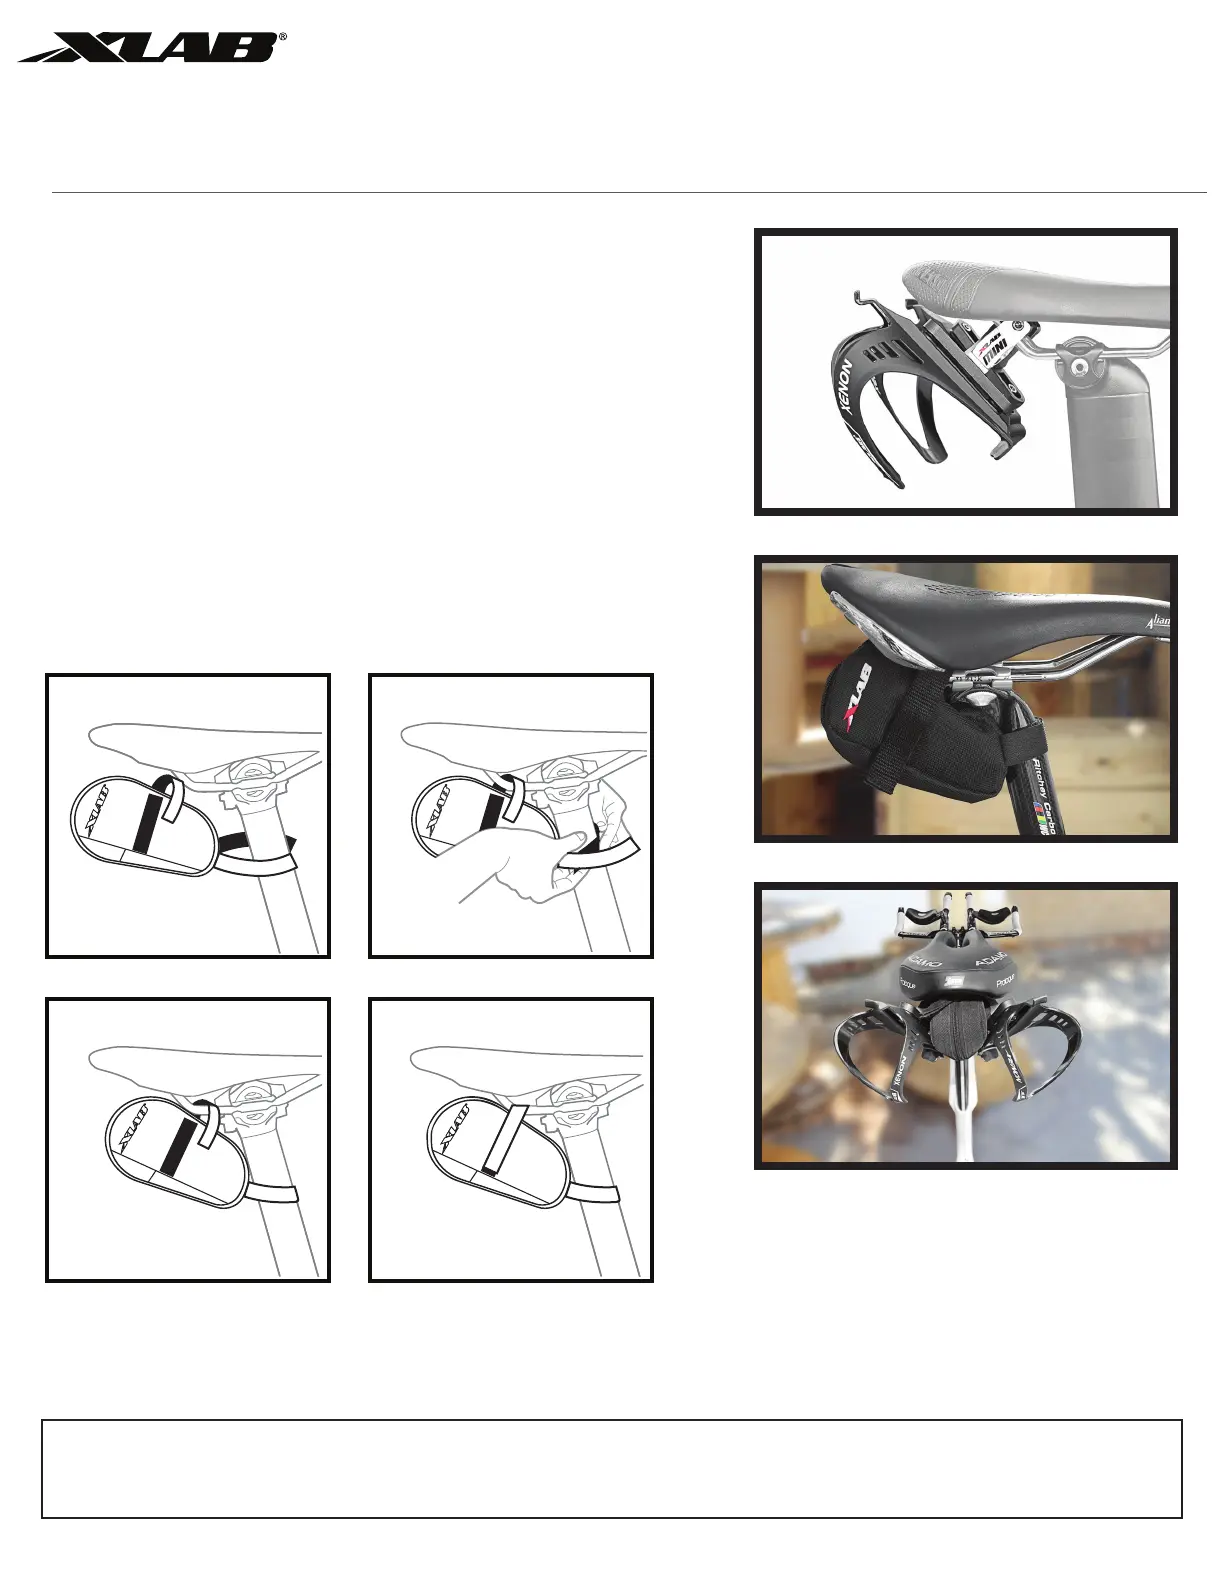
Properly installed, your MINI BAG should look like Image 2
Properly installed, your MINI WING 105 shoud look like Image 1
page 3
Warranty
MINI BAG
Rev 2.24
www.xlab-usa.com
3 year limited
OPTIONAL: INSTALLING MINI BAG STORAGE
STEP 5: FINISHED
STEP 6: LOOSEN YOUR SADDLE RAIL MOUNTS
Image 1
Image 2
Image 3
A B
C D
Loosen your Saddle Rail Mounts and rotate them away from the seatpost.
There is no need to remove them fully.
STEP 7: INSTALL MINI BAG
Follow steps 7a-d below.
STEP 8: ROTATE SADDLE MOUNTS BACK AND TORQUE TO SPEC.
Rotate saddle mounts until they touch the sides of the MINI BAG. Torque bolts to spec
(refer to step 4.) Properly installed, your MINI WING 105 and MINI BAG should look like Image 3.