Do you have a question about the Xtant 4.4 and is the answer not in the manual?
Active Resonance Control (ARC) circuitry compensates for unwanted resonance frequencies in midbass or midrange speakers.
Provides high efficiency and consistent output performance even when battery voltage is less than optimum.
Allows selection of low-pass or high-pass frequency range for optimal amplifier performance.
Eliminates 'system noise' from ground loops and accepts up to 17V input signal.
Incorporates Thermal and Overcurrent protection to reduce power and maintain operation during issues.
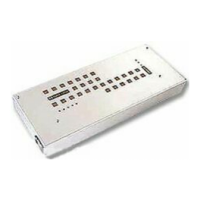
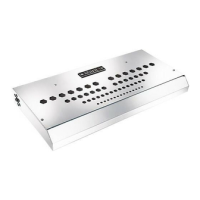
Three LEDs indicate amplifier operational status: ON, overcurrent protection, and thermal protection.
High Level Adapters allow connecting source units with speaker level outputs to the amplifier.
RCA type input connections for source units with output signal levels of 100mV-17V.
RCA type output connections send full range signals to additional amplifiers, avoiding 'Y' connectors.
Switch to eliminate signal path noise by isolating ground and setting proper input voltage range.
Feature to fine-tune the amplifier's input sensitivity to match the source unit's output level.
Active Resonance Control level adjustment to improve mid-range sound quality by reducing resonant frequencies.
Switch to select preferred frequency range for amplifier output: high-pass, low-pass, or full range.
Allows selection of exact low-pass or high-pass frequency range for optimal amplifier performance.
Adds up to 12dB of low frequency impact, centered at 45Hz, for enhanced audio system bass.
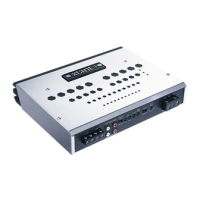
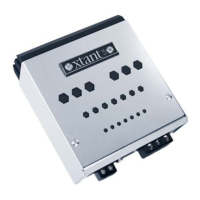
Output terminals for proper speaker connections. Bridging requires left positive and right negative terminals.
Main power connection terminals. Power and ground wire size should be the same gauge.
Power wire connects to an inline fuse, then to the positive side of the vehicle battery.
Amplifiers are not fuse protected; an inline fuse must be installed within 18" of the battery for safety.
Mount amplifier horizontally or vertically on a firm, flat surface away from heat sources and moisture.
Key installation oversights include disconnecting battery ground, avoiding drilling guides, and routing wires properly.
Step-by-step guide for safely connecting and mounting the amplifier, including pre-installation checks.
Selects the amplifier's output type: High-pass for tweeters, Low-pass for woofers, or Full Range.
Adjustable between 40-120Hz to match speaker component specifications or user preference.
Sets input sensitivity for RCA or High Level inputs based on source unit voltage output.
Fine-tunes input sensitivity by adjusting gain clockwise until distortion, then slightly counter-clockwise.
Selects boost level (0-12dB) to enhance bass performance, adjusted after final gains are set.
Adjusts Active Resonance Control to improve mid-range sound quality by reducing resonant frequencies.
Troubleshooting steps for amplifier not powering on, checking connections, voltage, and fuses.
Diagnosing no sound with red LED on by checking connections, signal cables, and speaker short circuits.
Addresses the orange LED indicating thermal protection, requiring the unit to cool down.
Troubleshooting one-sided sound by checking balance, speaker cables, RCA cables, and their connections.
Investigating low sound issues by checking fader, amplifier level settings, and active filter position.
Resolving frequent sound cutouts caused by overheating, poor ventilation, or incorrect impedance loads.
Checks battery connection, cable routing, and battery voltage for fluctuations in the power indicator.
Referral to page 3 for detailed specifications related to amplifier installation.