13
Need help or have any questions? Call us at 1-714-963-0329 or send us an Email at service@globalhobby.net
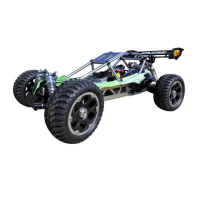
SECTION 8: INSTALLING THE BODY
❑ Not much to installing the body. Begin by peeling away the thin plastic protective layer from the top of the body, then install the body
onto the chassis, using four body clips to hold it in place.
The body mounts are adjustable and can be lowered or raised if you decide to purchase and install a different body.
✦✦
✦✦
✦IMPORTANT
✦✦
✦✦
✦ After the body is installed, double-check that no part of the body interferes with the chassis, tuned exhaust system
or tires. This is especially true in the case of the front tires. When they are turned from lock-to-lock, they should not hit the body.
SECTION 9: MAKING CHASSIS ADJUSTMENTS
Chassis alignment and geometry are important if you want your Mammoth RTR Nitro Monster Truck to perform well. A good performing
truck means a truck that is easier to drive, too. Follow our guidelines in this section to get the most out of your Mammoth RTR Nitro
Monster Truck.
✦✦
✦✦
✦IMPORTANT
✦✦
✦✦
✦ It's very important when making changes to the settings of your truck that you make the settings the same for each
side. For example, if you change the camber angle on the right front tire, you should change the camber angle on the left front tire
the same amount. If you change the spring tension on the left front shocks, you should change the spring tension on the right front
shocks the same amount, and so on.
Do not make any changes that are more than 3 degrees from the initial settings listed or the handling characteristics of your truck will
become very poor.
RECOMMENDED INITIAL SETTINGS:
●
0 degrees toe-in on the front and rear for overall best 4WD driveability on most surfaces.
☞
Adding more than 3 degrees of toe-in or toe-out will result in excessive loss of speed
and erratic handling.
✦✦
✦✦
✦IMPORTANT
✦✦
✦✦
✦ For more precise toe-in adjustments, use the R.P.M. Toe-in Gauge
part # 708049.
The toe angle is the angle of both front tires (or rear tires) to each other, when viewed from above. Toe-in is when the front of both tires
point toward each other and toe-out is when the front of both tires point away from each other.
●
For the front tires, toe-in will make your truck track straighter, but the steering will be more sensitive. Toe-out will desensitize the
steering, making the truck a little more driver-friendly.
●
For the rear tires, if you're running on a smooth surface, we suggest no toe-in. If you are running on a rough surface, we suggest about
1 - 2 degrees of toe-in. This will give the rear end a little more "bite."
Step 1: Adjusting the Toe Angle
To adjust the toe-in on the rear tires, use one of the different composite toe angle blocks
provided in your kit to set the desired toe angle. For convenience, the degree of toe angle
in each block is molded into the back of the blocks.
To change the rear toe angle block, first remove the rear bumper by removing the two
bumper-retaining screws on the bottom of the chassis. Second, carefully remove the two
C-Clips holding the rear hinge pins in place. Next, remove the two screws that hold the
toe angle block in place. Replace the toe-angle block with the desired one. Installation is
the reverse of the disassembly procedure.
PRO TIP
To adjust the toe-angle of the front tires, turn the tie-rods (steel rods connecting each wheel to the steering arm) in or out with an
adjustable wrench. To adjust the toe angle of the rear tires, you need to replace the toe angle block, using the reference below: