www.XtremeAirUsa.com PAGE
7
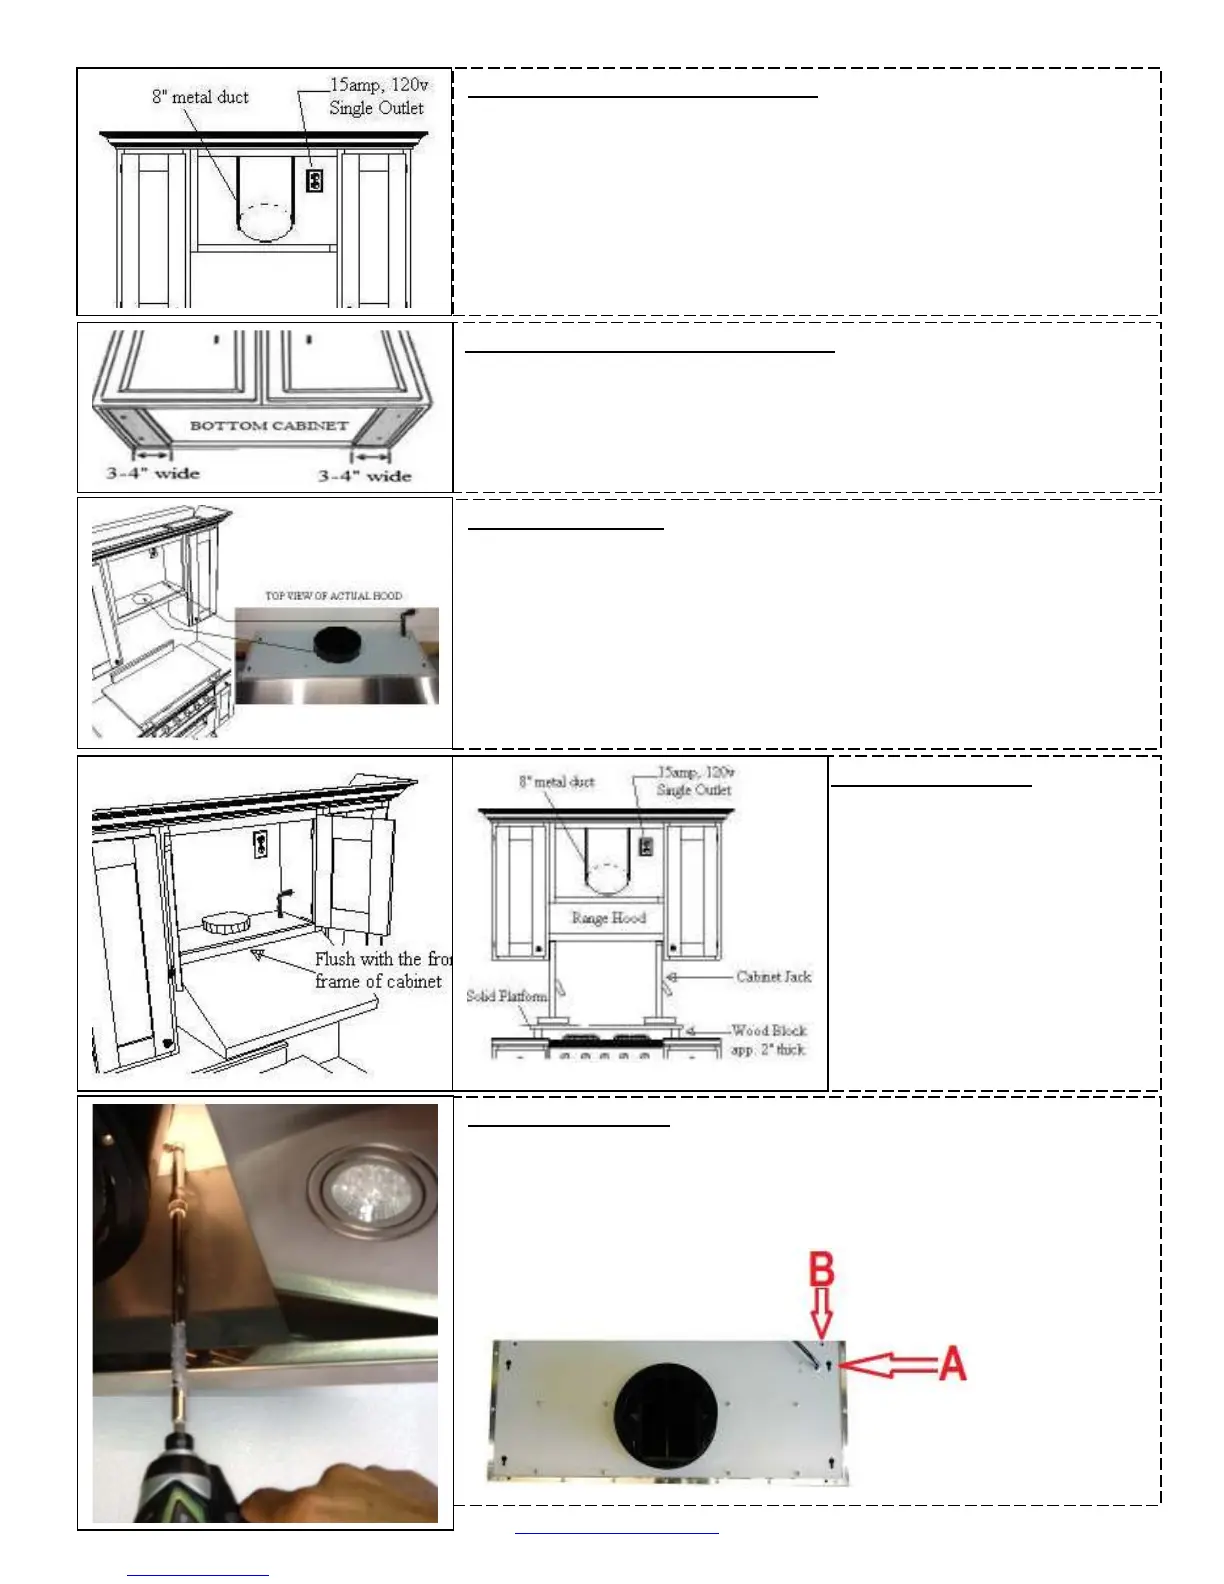
Step 7: Secure the hood
From inside of the hood, place 1 ¼” provided screw into each key holes (A) OR
Pre-holes (B) and secure to cabinet bottom. There are total of 8 holes (4
keyholes, 4 pre-holes-EXCEPTED UL14) available, you can use either key or
pre-hole as long as minimum 1 screw at each corner of hood body.
Step 6: Attach the hood
Lift the hood up and have it place
below the cabinet. Make sure center
the hood beneath the cabinet and flush
with the front of the cabinet.
TIP (optional): since the hood is
heavy, use cabinet jack is highly
recommended.
Step 3: Prepare ductwork & single outlet
Make sure you have a 15amp, 120V, 60Hz, single outlet on the left or
right of the duct pipe (usually is on ¼ of cabinet width).
Make sure duct pipe is ready to hook up to the range hood before
beginning installation (8” diameter duct, and roof or wall cap, depending
on where you will be venting your hood)
Step 5: Create accesses
•Create or cut access opening for electrical wires and hood exhaust under the
cabinet.
Step 4: attach 4-inch wide wood filler strips
• For installing under the cabinet with recessed bottom, attach 4-inch wide
wood filler strips (not provided) on each side.
 Loading...