Do you have a question about the XtremeAIR Ultra Series and is the answer not in the manual?
Observe safety guidelines to reduce risks of fire, electric shock, or injury.
Take precautions to prevent and manage range top grease fires by keeping the hood clean.
Steps to prevent injury during a range top grease fire, including smothering flames.
Use rigid metal ductwork, 8" round recommended for optimal airflow.
Avoid using plastic vent material or 4" laundry-type wall caps.
Seal exterior openings and ensure the vent system has a damper.
Requires a 120V, 60Hz, AC only, 15-amp fused electrical circuit.
Customer must hire a qualified installer and ensure code compliance.
Cover the cook top and range to protect from damage or dirt during installation.
Set up an optional work station for easier installation.
Prepare ductwork and ensure a 15A, 120V outlet is available.
Attach filler strips and cut access openings for wires and exhaust.
Lift, position, and secure the hood flush with the cabinet using screws.
Connect the hood exhaust to the ductwork and secure joints with tape.
Install the oil tunnel and baffle filters correctly.
Operate functions like smoke detection, blower speed, lights, and timer.
Control blower, speed, lights, and timer using touch buttons.
Control blower speed, power, and lights with soft press buttons.
Check power, fuse, wiring, or defective bulbs if unit is not operating.
Ensure hood is secured and check motor and blower wheel for damage.
Check duct size, clogs, damper unit, or wall cap for airflow restrictions.
Contact support if blower is jammed, scraping, or motor is defective.
Verify height, reduce elbows/duct length, and check joint connections.
Check duct security and ensure correct duct size is used.
Check auto function status or ensure remote control plastic film is removed.
Read instructions, keep safety grills/filters in place, never leave cooking unattended.
Clean filters periodically to prevent fire risk; do not operate without them.
Clean with mild soap and water; avoid abrasive cleaners to protect finish.
Clean metal filters with degreaser every 30 hours of use.
Two-year parts warranty, extended eight years for motor. One-year labor warranty.
Contact company for malfunctions, provide proof of purchase within 7 days.
Excludes commercial use, misuse, acts of God, and normal maintenance.
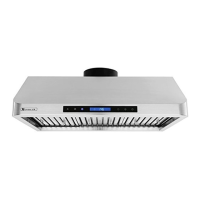
This document serves as an installation guide and user's manual for XtremeAIR under-cabinet range hoods, specifically covering the PRO-X and ULTRA Series. The primary function of these devices is to ventilate kitchen spaces by extracting smoke, grease, and odors generated during cooking.
The XtremeAIR range hoods are designed to be installed under kitchen cabinets, providing efficient ventilation for cooktops and ranges. They operate by drawing air from the cooking area, filtering out grease and other particulates, and then expelling the exhaust to the outdoors through a duct system. This process helps maintain air quality in the kitchen, reduces the accumulation of greasy residues on surfaces, and minimizes the spread of cooking odors throughout the home. The hoods are equipped with powerful blowers to handle various levels of cooking intensity, from light simmering to heavy frying. Some models incorporate advanced features like smoke detectors for automatic operation and touch-sensitive controls for ease of use.
The range hoods offer several features designed to enhance the user experience and optimize ventilation.
Control Systems: The manual details two main types of control systems:
Optimal Performance: For best results, it is recommended to start the range hood a few minutes before cooking and allow it to operate for several minutes after cooking is completed to ensure all smoke and odors are effectively cleared from the kitchen.
Proper maintenance is crucial for the longevity and efficient operation of XtremeAIR range hoods. The manual provides detailed instructions for cleaning and care.
The manual also includes important safety instructions, warnings regarding fire and electric shock risks, and troubleshooting tips for common issues such as non-operational hoods, vibrations, weak blower performance, non-spinning blowers, improper venting, increased noise, and unresponsive controls. It also provides guidance on replacing light bulbs.
| Series | Ultra Series |
|---|---|
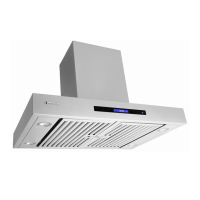
| Material | Stainless Steel |
| Venting Type | Ducted |
| Filter Type | Baffle Filter |
| Lighting | LED |
| Mounting Type | Wall Mount |