Do you have a question about the Xvico X3S and is the answer not in the manual?
Set nozzle and hot bed temperatures in the preheating interface. Switch to hot bed mode using the nozzle icon.
Load 1.75mm filament by holding the extruder lever and feeding it through the small hole until it exits the nozzle.
Heat extruder to temperature, then draw back filament until it exits the nozzle for replacement.
Adjust platform height at four points using A4 paper to ensure the nozzle lightly scratches the surface.
Monitor print progress, time, nozzle height, temperatures, and fan speed via the operation interface.
Change nozzle/hot bed temperature, fan speed, and movement/extrusion rates in the operation interface.
Lubricate axis rods to reduce friction and clear filament blockages in the extruder.
Adjust belt tightness to prevent transmission errors and ensure optimal printing and service life.
Follow warranty regulations and contact customer service for any product issues or repairs.
The XVICO X3S is a 3D printer designed for ease of use and reliable performance, suitable for both beginners and experienced users. This operation manual provides comprehensive instructions on its setup, operation, and maintenance, ensuring users can achieve optimal printing results and prolong the device's lifespan.
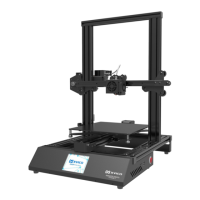
The X3S is a Fused Deposition Modeling (FDM) 3D printer that creates three-dimensional objects by extruding heated thermoplastic material layer by layer onto a build platform. It features a user-friendly interface with a touchscreen display, allowing for intuitive control over various printing parameters. The printer supports standard 1.75mm filament and is equipped with a heated print bed, which is crucial for printing with a variety of materials and ensuring good adhesion of the first layer.
Key functions accessible through the touchscreen interface include:
During an active print, the operation interface provides real-time monitoring and control options:
The X3S is designed with user convenience in mind, offering straightforward procedures for common operations:
ReadyPrint > Tool > Preheat. The interface allows for independent adjustment of nozzle and hot bed temperatures. Users can click the nozzle icon to switch between controlling the nozzle and the hot bed heating modes. Buttons are provided to increase or decrease the set temperature, and the current temperature is displayed for monitoring.ReadyPrint > Tool > Extrusion menu allows for performing single pull-back or extrusion operations, adjusting the extrusion length, and changing the extrusion speed to facilitate this process.Tool > Leveling. The printer will guide the nozzle to four specific points on the platform (Point1, Point2, Point3, Point4). At each point, the user needs to adjust the platform height by turning the knob underneath the build plate. A piece of A4 paper is used as a gauge: the nozzle should lightly scratch the paper when it's correctly leveled. This process should be repeated 1-2 times if necessary to ensure accurate leveling across all corners.Printing > Operation interface allows for dynamic adjustments. Users can change the nozzle and hot bed temperatures, modify the fan speed, and alter the print speed and extrusion rate. These real-time controls are valuable for optimizing print quality based on observations during the printing process.Regular maintenance is crucial for the longevity and consistent performance of the X3S 3D printer. The manual outlines several key maintenance tasks:
X, Y, Z Axis Maintenance: To reduce friction and noise, especially when the machine operates noisily or with slight shaking, it is recommended to add lubricants to the rods of the X, Y, and Z axes. A clean cloth with some oil should be used to slide back and forth along the slide bars. This helps ensure smooth movement of the print head and build platform.
Extruder Outlet Maintenance: Filament can sometimes melt and cool within the extruder outlet, making it difficult to remove. In such cases, an iron wire can be used to dredge the outlet. However, the best practice is to empty the extruder as much as possible after each print job to prevent such blockages. This proactive measure is a fundamental aspect of 3D printer maintenance.
Belt Tightness Adjustment: The tightness of the printer's belts significantly impacts its service life and printing accuracy.
Product Warranty and Support: The X3S comes with a "Product Warranty Card," and users are advised to contact the supplier or customer service for any problems encountered with the product. Attempting self-repair is discouraged, as it may void the warranty and lead to further complications, for which the user would bear all consequences. Support channels include Amazon support, eBay support, Skype, and a dedicated XVICO 3D Printer Owners Facebook Group, along with the official website.
By adhering to these operational guidelines and maintenance recommendations, users can maximize the performance and lifespan of their XVICO X3S 3D printer, consistently producing high-quality prints.
| Nozzle Diameter | 0.4 mm |
|---|---|
| Filament Diameter | 1.75 mm |
| Frame Material | Aluminum |
| Connectivity | USB, SD Card |
| Extruder Temperature | Max 260°C |
| Machine Weight | 8 kg |
| Supported Materials | PLA, ABS, TPU |
| Bed Temperature | Max 100°C |
| Power Supply | 24V, 15A |