en - Original instructions
37
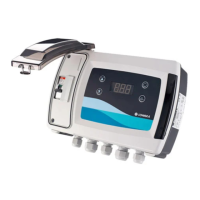
and turn the main switch (2) OFF.
3. Unfasten the 4 screws M4x25
and open the REAR cover (see
Figure
6).
4. Use a proper tool to remove
fuse F1 (alarm A01) or F2
(alarm A02).
5. Replace the Fuse according to
the correct
6. Technical data, see
Tab 1.
7.
fasten the screws if no other
cables have been connected.
4.4
Analogue sensor
An analogue sensor with 0/4-20mA output is re-
quired to show the pressure, level or temperature
of the system (refer to figures
7 and 9).
A sensor offers the possibility of additional func-
tions.
See section
5.3 Start-up and programming.
4.5
Cable glands and terminals
4.5.1 Q-SMART 10/bS set for pressur-
isation
Refer to figures 5, 7 and 9
The following values are recommended
(Figure
5)
ection
(Figures 7, 9)
phy Q-
SMART
(Figures
7
(mm)
supply
switch P1
- Common
S COM
pressure
switch
- Minimum
level probe
- Multiwire
probe ca-
ble
(1)
S MIN
pressure
switch
G MIN
P MAX
switch
- Maximum
pressure
(1) Connect the multiwire cable to a junction box,
and then each probe with its cable.
4.5.2
Q-SMART 20/bS set for pressur-
isation
Refer to figures 5, 7 and 9
(Figure
5)
ction
(Figures 7, 9)
Q-SMART
(Figures
7
cable
diameter
(mm)
switch P1
- Multiwire
pressure
switch ca-
ble
(1)
- Multiwire
probe ca-
(1)
P 2
P MAX
S COM
S MIN
S 1
S 2
S MAX
- Pressure
P 2
pressure
switch
- Minimum
level Float
switch
- Multiwire
probe ca-
ble
(1)
- Multiwire
pressure
switch ca-
(1)
P MAX
G MIN
S COM
S MIN
S MAX
4.5.3
Q-SMART 10/SE sewage
drain/filling set
Refer to figures 5, 7 and 9
(Figure
ction
Q-SMART
cable dia-
 Loading...