Do you have a question about the Yaesu FT-65 and is the answer not in the manual?
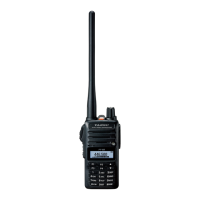
Radio requires SMA female antennas; Nagoya NA-702 is suggested.
Toggle between VFO and Memory modes using the *V/M button.
Use #BAND button in VFO to switch bands; in Memory mode for offset tuning.
Cycle to FM Broadcast mode by pressing #BAND in VFO mode.
Turn Weather mode on/off by pressing and holding the 1 button.
Access settings via FUNCTION key, navigate to menu item 38, choose On/Off, confirm with FUNCTION, exit with PTT.
Activate the flashlight by pressing the orange button next to the volume knob.
Hold FUNCTION key, navigate with arrows, press FUNCTION to select, use PTT to exit.
This radio does not have the Roger beep feature.
Lock/unlock buttons with number 6; adjust lockouts via menu item 15.
Tune in VFO, cycle bands with #BAND, use keypad or arrows; adjust steps via menu item 30.
Configure repeater settings via menu item 24, including ARS, shift mode, and MHz shift.
Set CTCSS, DCS codes, and SQL TYPE via menu items 8, 11, and 29.
Select frequency, press and hold *V/M, choose channel, input tag using letter buttons.
Name memories during saving or change names via menu item 20.
Recall channels in Memory mode using arrow buttons or by typing the channel number.
Manage 10 memory banks for 200 channels: recall, exit, add, and remove memory banks.
Initiate scanning by holding arrow buttons; stop with an arrow button; RESUME sets behavior.
Use menu item 28 SKIP to mark channels for skipping during scan sequences.
Change power levels (0.5, 2.5, 5W) via menu item 32 or FUNCTION+P2.
Check battery status on screen at power-on or via menu item 10 DC VOLT.
Utilize P1-P4 buttons for preassigned functions like HOME channel, TX PWR, SQL TYPE, and REV.
Software reset via PTT+MONI on power-on to enable extended transmit; repeat to disable.
Perform SET RESET, MEM RESET, BANK RESET, ALL RESET, MEM-ONLY, VHF-ONLY, UHF-ONLY, DUAL DISP, or CLONE.
Turn on dual display by holding PTT+MONI, turning on radio, navigating to F8:DUAL DISP.
Set VFO.SPL to ON in menu 34 for split mode, separating receive and transmit frequencies.
Select between VFO A/B main display, memory display, or dual display for a memory channel.
Access menu item 34 VFO.SPL in F8:DUAL DISP mode to set VSP.ON or VSP.OFF.
Transmit on main band; settings apply to main band; receive on both A & B.
View VFO A/B main band displays or memory information with alpha tags.
Press *V/M until B is top, then #BAND to cycle to FM broadcast frequency.
| Output Power | 5 W/2.5 W/0.5 W |
|---|---|
| Operating Modes | FM |
| Supply Voltage | 7.4 V DC |
| IP Rating | IP54 |
| Frequency Range | 136-174 MHz, 400-480 MHz |
| Battery Capacity | 1950 mAh |
| Channels | 200 |
| Channel Steps | 5, 6.25, 10, 12.5, 15, 20, 25, 50 kHz |
| Weight | 260g with SBR-25LI and antenna |