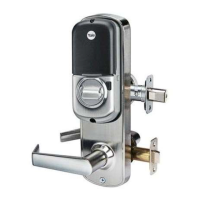
Do you have a question about the Yale real Living YRC226 and is the answer not in the manual?
| Brand | Yale |
|---|---|
| Model | real Living YRC226 |
| Category | Door locks |
| Language | English |
Review necessary components, tools, and door requirements before starting installation.
Mark precise reference lines on the door for accurate lock installation.
Drill holes and prepare the door according to template specifications for lock installation.
Install strike plates on the door frame for proper latch and deadbolt engagement.
Identify the correct door handing (left, right, inward, outward) for lock setup.
Adjust internal lock components to match the determined door handing configuration.
Review visual configurations for left and right handed lockset installations.
Verify that the lever and thumbturn rotate freely after adjusting handing.
Install fire cups into the door for fire rating compliance.
Adjust the deadbolt latch to the correct backset (2-3/8" or 2-3/4").
Install the deadbolt latch and latchbolt assembly into the door.
Mount the exterior deadbolt assembly onto the door.
Secure the main lock chassis to the interior side of the door.
Fasten the back plate to the door, ensuring proper alignment and pilot holes.
Verify the latchbolt operates smoothly and correctly.
Access the battery compartment by removing the cover.
Connect the internal cable assembly to the lock components.
Mount the interior lock mechanism onto the door.
Attach the interior lever to the lock mechanism.
Confirm the deadbolt extends and retracts correctly.
Install the network module if applicable for smart home connectivity.
Insert batteries and secure the battery cover.
Configure the lock's handing through the keypad interface.
Diagnose and resolve common hardware issues encountered during installation.
Procedure for replacing the lock cylinder.
Restore the lock to its original factory settings.
Guide to setting up and customizing lock features.
Steps to activate the lock for programming.
Set up the essential Master PIN code for programming.
Add and manage user PIN codes for access.
Learn how to unlock the door using a programmed PIN code.
Glossary of terms used in the lock's operation and programming.
Menu mode programming guide for YRC226 model.
Menu mode programming guide for YRC620 model.
Solutions for common programming and operational issues.
Regulatory compliance details for FCC and Industry Canada.
Details on Z-Wave Plus product information, device type, and role type.
Procedures for adding and removing devices from a Z-Wave network.
Add Z-Wave devices using SmartStart by scanning a QR code.
Add Assure Lock devices via Classic Inclusion mode.
Add Assure 2 Lock devices using Classic Inclusion mode.
Remove devices from the Z-Wave network using Exclusion Mode.
Reset the Z-Wave module to factory default settings.
Overview of Z-Wave command classes supported by the lock.
Reports Z-Wave Plus device information like role and node type.
Provides manufacturer and product IDs for differentiation.
Details on the Z-Wave security command class.
Details on the Z-Wave Security 2 command class.
Procedure for performing a local device reset.
Allows controllers to set transmit power for the lock.
Provides information about firmware versions for different targets.
Reports the lock's battery status and low battery alarms.
Supports three door lock modes: Secured, Unsecured, and Timeout.
Enables logging of door lock operations.
Allows setting year-day and daily repeating schedules for users.
Manages user codes, including extended ranges and status.
Sets time parameters necessary for scheduled access.
Manages the lock's time setting for schedule functionality.
Supports over-the-air (OTA) firmware upgrades for the lock.
Enables device association for communication within the Z-Wave network.
Supports multi-channel association for advanced Z-Wave communication.
Provides information on association groups, including lifeline.
Handles various alarm and notification events from the lock.
Allows configuration of lock parameters like volume and auto-relock.
Reports the application status of the Z-Wave device.
Manages the transport of Z-Wave messages.
Ensures reliable communication through supervision commands.
Controls and reports the lock's indicator status (LEDs).
Provides basic Z-Wave commands mapped to door lock operations.



 Loading...