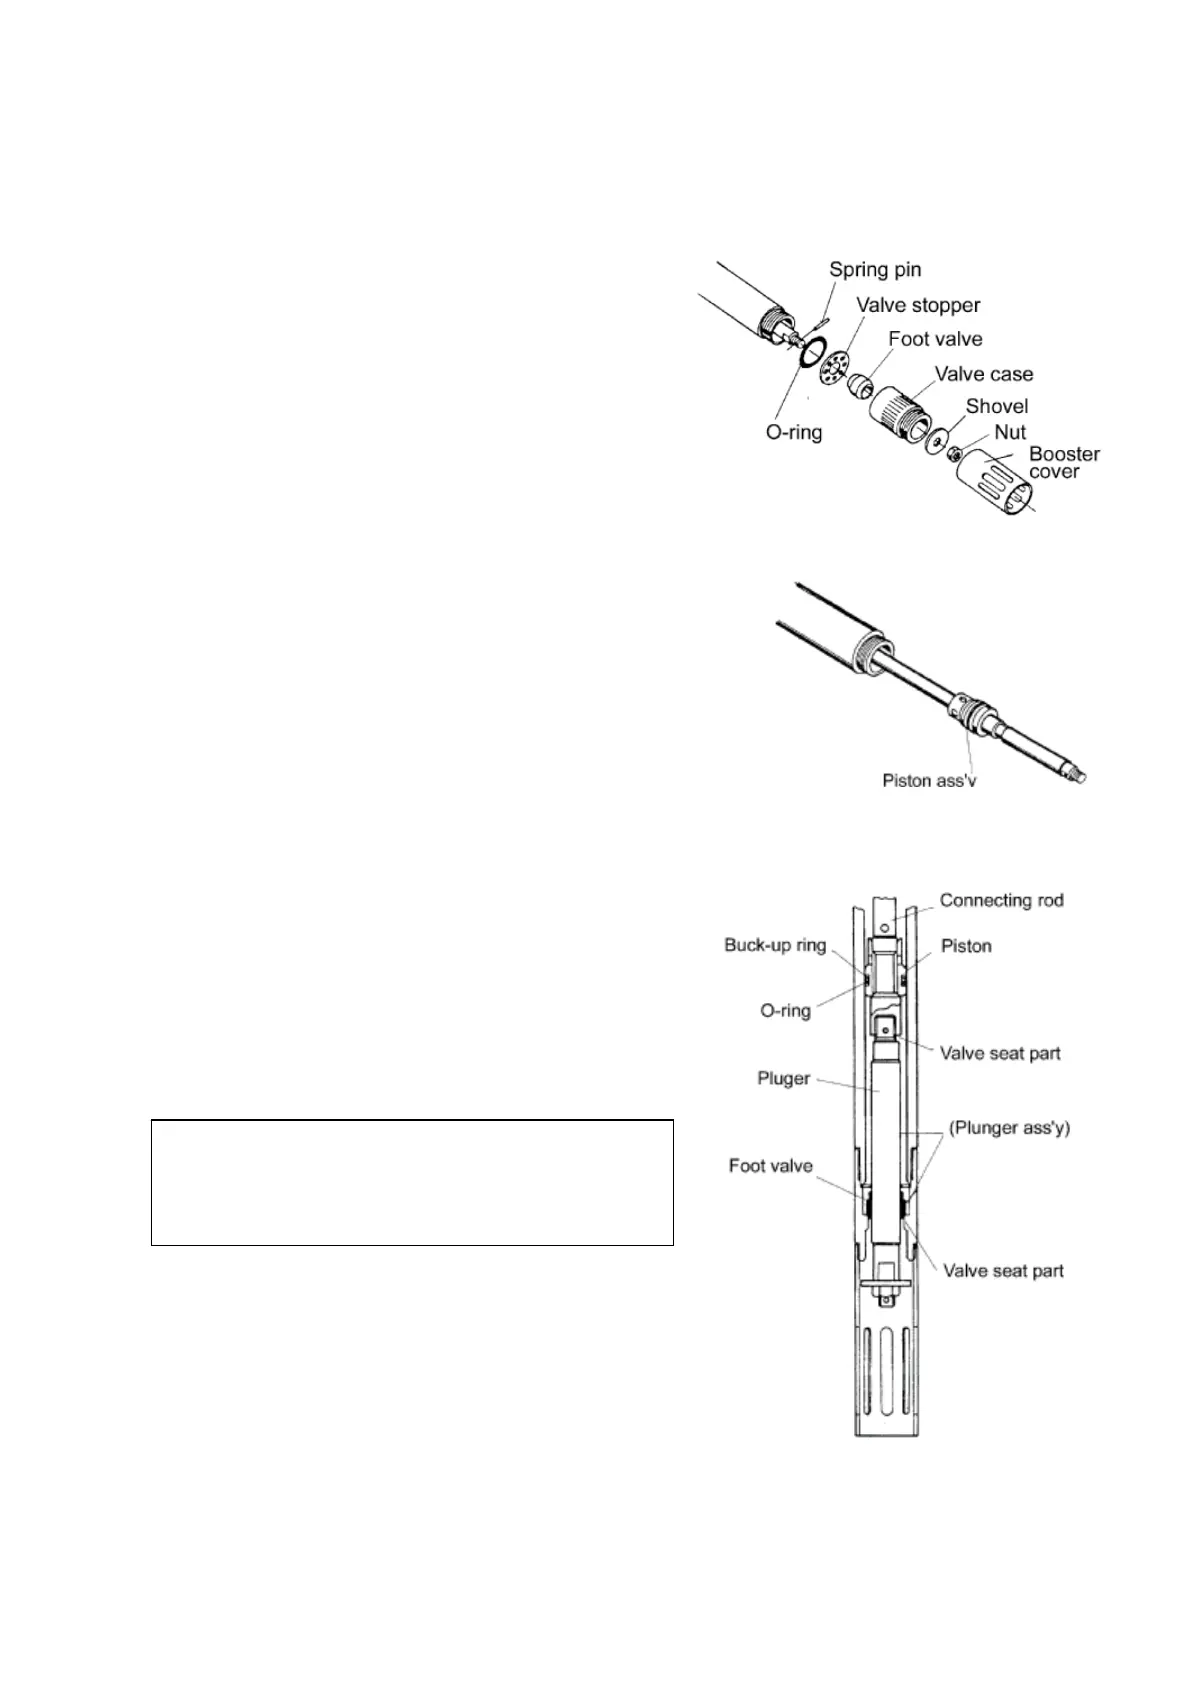
9
5.3.2 Disassembling and inspecting the lower pump
1) Fix the suction tube on the vise and set a pipe wrench on
the booster cover. Unscrew the suction tube and remove
the spring pin, nut, and shovel. (Fig. 11)
2) Likewise, set a pipe wrench on the valve case and unscrew
it. The valve stopper and the foot valve (a part of the
plunger Ass’y) can be removed.
3) Pull out the plunger rod from the suction tube by holding it.
The piston and connecting rod Ass’y can be pulled out.
(Fig. 12)
4) Pull out the spring pin that connects between the
connecting rod and the plunger, and take out the plunger.
Wash the plunger and check it for blemish and wear.
<Note>
The plunger is an assembly for mating with the valve. Insert
the foot valve in the plunger, and check if it can smoothly
slide. These two parts, if they are blemished, must be
replaced as an assembly.
5) The portions with which the lower part of the piston and the
connecting stud come into contact form a seat surface.
Check them for blemish.
6) Wash and check each disassembled part. If any blemish or
wear is found, replace the part with a new one.
7) For assembling, reverse the disassembling procedure.
(Fig. 13)
In particular, perform assembling taking care about the
directions of the valve seat and the foot valve.
[Inspection]
The air motor is not easily adjusted at assembly. If an air
motor failure is found at maintenance and inspection, ask
the dealer to repair the air motor.
Fig. 11
Fig. 12
Fig. 13
 Loading...