EasyManua.ls Logo

Yamaha Clavinova CLP-250 User Manual

Yamaha Clavinova CLP-250
17 pages
To Next Page IconTo Next Page
Page #1 background imageLoading...
Page #1 background image
Owner's
Manual
Bedienungsanleitung
Mode
d'emploi
Manual
de
instrucciones
IMPORTANT
Check
your
power
supply
Make
sure
that
your
local
AC
mains
voltage
matches
the
voltage
specified
on
the
name
plate
on
the
rear
panel.
In
some
areas
a
voltage
selector
may
be
provided
on
the
rear
panel
of
the
main
unit.
Make
sure
that
the
voltage
selector
is
set
for
the
voltage
in
your
area.
WICHTIG
Uberprufen
der
Netzspannung
Sicherstellen,
dal3
die
ortliche
Netz¬
spannung
den
Angaben
zur
Betriebs-
spannung
auf
der
Riickseite
des
Keyboards
entspricht.
Die
Modelle
fur
einige
Bestimmungslander
wei-
sen
einen
Spannungswahler
auf
der
Riickseite
auf.
In
diesem
Fall
darauf
achten,
daB
die
Einstellung
des
Spannungswahlers
der
Netzspan¬
nung
entspricht.
IMPORTANT
Controler
la
source
d’alimentation
S’assurer
que
la
tension
secteur
locale
correspond
a
la
tension
indi
quee
sur
la
plaque
d’identification
situee
sur
le
panneau
arriere.
Les
modeles
destines
a
certaines
regions
peuvent
etre
equipes
d’un
selecteur
de
tension
situe
sur
le
panneau
arriere
de
l’unite
principale.
Verifier
que
le
selecteur
est
bien
regie
pour
la
tension
secteur
utilisee.
IMPORTANTE
Verifique
la
alimentacion
de
corriente
Asegurese
de
que
el
voltaje
local
de
CA
concuerde
con
el
especificado
en
la
placa
de
identification
del
panel
trasero.
En
algunas
areas,
la
unidad
viene
provista
de
un
selector
de
voltaje
en
el
panel
trasero.
Asegu¬
rese
de
que
este
selector
este
en
la
position
correspondiente
al
voltaje
de
su
area.
Question and Answer IconNeed help?

Do you have a question about the Yamaha Clavinova CLP-250 and is the answer not in the manual?

Yamaha Clavinova CLP-250 Specifications

General IconGeneral
Number of Keys88
Keyboard TypeGH (Graded Hammer) keyboard
Sound SourceAWM (Advanced Wave Memory) Stereo Sampling
Amplifiers20W x 2
Touch SensitivityHard, Medium, Soft, Fixed
EffectsReverb, Chorus
Pedals3 (Damper, Sostenuto, Soft)
ConnectivityHeadphone Jack x 2, MIDI In/Out
Included AccessoriesBench

Summary

Important Safety and Installation Instructions

Read and Follow All Instructions

Review all safety, installation, and assembly instructions before use. Check unit weight.

Main Power Supply Verification

Ensure local AC mains voltage matches unit specifications. Check voltage selector if applicable.

Power Cord and Placement Warnings

Avoid placing objects on or near the power cord. Prevent tripping hazards or cord damage.

Water and Moisture Precautions

Do not use near water, pools, spas, or in wet basements.

Service When Required

Refer servicing to qualified personnel for damaged cords, spills, or product malfunctions.

Keyboard Stand Assembly

Unpack and Verify Parts

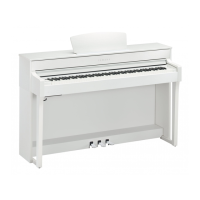
Open the box, remove all parts, and check for completeness.

Assemble Side Panels and Base Boards

Connect side panels to base boards using joint connectors and gold screws.

Attach Side Panels to Pedal Box

Secure side panels to the pedal box using short black screws.

Attach Rear Panel to Side Panels

Connect the rear panel to the side panels using joint connectors and long black screws.

Main Unit and Pedal Assembly

Install the Main Unit

Place the main unit on side panels, align holes, and secure with short black screws.

Connect the Pedal Cords

Attach pedal cords to holders and insert plug into the rear panel connector.

Set the Adjuster

Rotate adjuster on pedal box for stability and proper pedal operation.

Controls and Connections

Sustain Pedal

Sustains notes like an acoustic piano. Has two modes: Sustain and Sostenuto.

MIDI Functions

Troubleshooting

No Sound After Power On

Check power connection, volume, and ensure unit is properly plugged in.
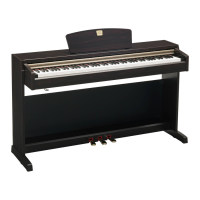
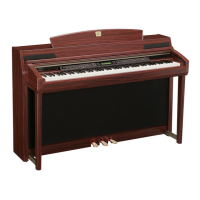
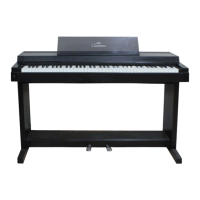
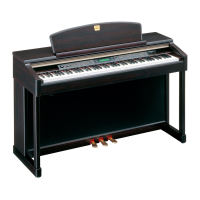
Related product manuals