EasyManua.ls Logo

Yamaha Clavinova CVP-202 - User Manual

Yamaha Clavinova CVP-202
178 pages
Print Icon
To Next Page IconTo Next Page
Loading...
Owner’s Manual
IMPORTANT
Check Your Power Supply
Make sure that your local AC mains voltage matches
the voltage specified on the name plate on the bottom
panel. In some areas a voltage selector may be
provided on the bottom panel of the main keyboard
unit near the power cord. Make sure that the voltage
selector is set for the voltage in your area. The voltage
selector is set at 240V when the unit is initially shipped.
To change the setting use a “minus” screwdriver to
rotate the selector dial so that the correct voltage
appears next to the pointer on the panel.

Table of Contents

Other manuals for Yamaha Clavinova CVP-202

Questions and Answers

  • M
    Michael HuntJul 29, 2025
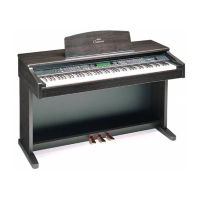
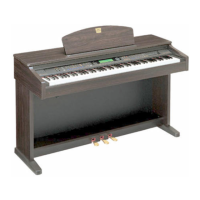
    Why is the overall volume low, or why is no sound heard from my Yamaha Clavinova CVP-202?
    • J
      Jordan BoydJul 29, 2025
      The low overall volume or absence of sound from your Yamaha Clavinova may be due to several reasons. First, check if the [MASTER VOLUME] is set too low and increase it. Second, ensure that headphones are not connected, as they will mute the speakers. Finally, verify that the Local Control function is turned on.
  • L
    Louis KelleyAug 2, 2025
    Why is the keyboard volume low compared to the auto accompaniment on my Yamaha Musical Instrument?
    • J
      Jerry MartinezAug 2, 2025
      If the keyboard volume is too low compared to the auto accompaniment, it may be because the overall keyboard volume or the keyboard part's independent volume level is set too low. Try increasing the overall keyboard level or use the VOLUME function in the appropriate KEYBOARD display to raise the volume of the keyboard part.
  • M
    markbestAug 6, 2025
    Why is the volume of auto accompaniment low on my Yamaha Clavinova CVP-202 Musical Instrument?
    • C
      Christopher RodgersAug 6, 2025
      If the Auto Accompaniment or song playback volume is too low compared to the keyboard, it could be because the [ACMP/SONG VOLUME] is set too low. Increase the [ACMP/SONG VOLUME] level. Alternatively, the volume level of one or more accompaniment parts or song tracks may be set too low. In this case, raise the part or track levels in the appropriate MIXER display.
  • H
    hubbardjohnAug 11, 2025
    What to do if the maximum of 60 songs cannot be recorded on Yamaha Clavinova CVP-202 Musical Instrument?
    • J
      Jeremy RamirezAug 11, 2025
      If you cannot record the maximum of 60 songs, the memory capacity is likely full because the playing time of existing songs is too long, or many functions were used. Delete unnecessary songs or record to a new disk.
  • C
    Christina SimsAug 15, 2025
    Why does the desired chord is not recognized by my Yamaha Clavinova CVP-202?
    • P
      Patricia RichardsonAug 15, 2025
      If the desired chord is not recognized by the Auto Accomiment, the keys are not being played correctly, or the keys are not being played according to the selected accompaniment mode.
  • J
    Jamie Kim MDAug 19, 2025
    How to fix the display if it is too bright or too dark on my Yamaha Musical Instrument?
    • V
      Valerie WilliamsAug 19, 2025
      If the display is too bright or dark, it might be affected by the surrounding temperature. Adjust the contrast of the display using the [CONTRAST] control.
  • J
    Joshua LewisAug 23, 2025
    What does it mean if a click or pop is heard when the power is turned on or off on Yamaha Musical Instrument?
    • B
      Brandon CrawfordAug 23, 2025
      A click or pop sound when turning the power on or off is normal, as electrical current is being applied to the instrument. This is no cause for concern.

Summary

Special Message Section

Product Safety Markings

Explains safety labels and symbols on the product enclosure for user awareness.

Important Notices

Important safety and operational advisories, including warranty and modification notices.

Environmental Issues & Battery Info

Information on environmental considerations, battery handling, and disposal regulations.

Name Plate Location

Indicates the location of the product's name plate for model and serial number information.

Precautions

Warnings and Cautions

Essential safety guidelines to prevent injury, shock, fire, and damage to the instrument.

Bench Usage and Data Saving

Instructions for safe bench use and data backup recommendations for preserving settings.

Accessories

Copyright Notice

Legal notice regarding unauthorized copying of copyrighted software and contents.

Features of the Clavinova

LCD Display and Controls

Describes the easy-to-use LCD display and panel buttons for comprehensive operation control.

Voices and Accompaniment

Highlights the variety of realistic voices and dynamic automatic accompaniment styles available.

Learning and Recording Features

Details guide functions for learning songs and easy-to-use recording features for performance capture.

Computer Connectivity

Explains convenient TO HOST terminals for direct connection to computers and MIDI equipment.

CHAPTER 1: Getting Ready

About This Manual

Explains notation conventions and general information about the manual's structure and content.

Floppy Disk Handling

Provides precautions for handling floppy disks and the disk drive to prevent damage.

Setting Up the Clavinova

Step-by-step instructions for setting up the instrument, including music rest and key cover.

Panel Controls and Terminals

Identifies and explains the various controls and terminals located on the Clavinova panel.

Playing Demo Songs

Guides users on how to play the built-in demo songs to explore the Clavinova's capabilities.

CHAPTER 2: Basic Operation

Using LCD Display Controls

Tutorial on reading the LCD display and using related controls for basic instrument operation.

Adjusting Volume

Explains how to adjust master, accompaniment, song, and keyboard volumes using sliders and controls.

Metronome and Help

Details how to use the metronome and access the instrument's help mode for assistance.

CHAPTER 3: Voices

Selecting Voices

Explains how to select voice groups and individual voices from the VOICE SELECT display.

Dual Mode Operation

Guides on playing two voices simultaneously in Layer (Dual) mode for richer textures.

Split Mode Operation

Instructions on playing different voices with each hand using Split mode for versatile performance.

CHAPTER 4: Reverb and Other Effects

Reverb Settings

Details on applying and adjusting reverb effects, including type and depth settings for ambiance.

Chorus Settings

Explains how to change chorus type and depth settings to add warmth and richness to the sound.

Voice Effects

Covers various effects beyond reverb and chorus, allowing sound enhancement and special effects.

CHAPTER 5: Accompaniment Styles

Style Selection and Playback

Guides on selecting and playing various musical styles for accompaniment, including variations.

Auto Accompaniment Features

Explains how to use Auto Accompaniment modes, chord input, and synchronize playback.

Database, Harmony, and One Touch

Details on using Music Database, Harmony, and One Touch Setting for convenient music creation.

CHAPTER 6: Registrations

Using Registrations

Instructions on saving and recalling complete panel setups (registrations) for instant access.

Protecting Panel Settings

Explains the Registration Freeze function to prevent panel settings from changing during recall.

CHAPTER 7: Song Control

Song Playback Operations

Guides on playing back recorded songs and commercial music data, including lyrics.

Guide Functions for Practice

Describes guide methods (Easy Play, Next Note, Sound Repeat) for practicing songs with visual and auditory cues.

Song Recording Methods

Details on recording performances using Quick, Track, and Chord Sequence methods to floppy disks.

Chord Sequence Recording

Step-by-step process for entering accompaniment data via chord names for song creation.

Other Record Edit Functions

Covers advanced editing functions like Setup Memory, Song Name, Track Edit, and Initial Edit.

CHAPTER 8: The Utility Functions

Keyboard Settings

Explains Tune and Transpose functions for adjusting keyboard pitch and transposition.

Pedal and Disk Functions

Details on assigning functions to the left pedal and managing disk operations like copy and format.

MIDI and Backup Settings

Covers MIDI send/receive channels, filters, synchronization, and backup settings for customization.

Tuning Functions

Describes Micro Tuning and Scale Tuning features for adjusting keyboard pitch and temperament.

CHAPTER 9: Connections

Audio Connections

Instructions for connecting headphones, external audio devices via AUX IN/OUT jacks.

Data Connections

Guides on connecting to computers and other MIDI devices via USB, TO HOST, and MIDI terminals.

APPENDICES

Effect Type Lists

Lists and describes various reverb, chorus, and effect types available on the Clavinova.

Troubleshooting and Messages

Provides solutions for common problems and explanations of system messages encountered during operation.

Data Compatibility

Information on MIDI and disk data compatibility for playback and data transfer between devices.

Index

Alphabetical listing of topics and their corresponding page numbers for quick reference.

Yamaha Clavinova CVP-202 Specifications

General IconGeneral
TypeDigital Piano
Number of Keys88
Polyphony64
Sound SourceAWM (Advanced Wave Memory)
DisplayLCD
Amplifier40W x 2
EffectsReverb, Chorus
Recorder16-track
ConnectivityMIDI, USB to Host
KeyboardGraded Hammer Standard
Touch SensitivityHard, Medium, Soft, Fixed
Speakers12cm x 2 + 5cm x 2

Related product manuals