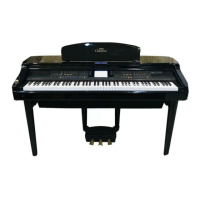
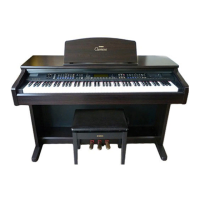
Do you have a question about the Yamaha Clavinova CVP-59S and is the answer not in the manual?
Explains graphic symbols and cautions for product safety.
Covers battery notice, warnings, and disposal regulations.
Indicates the location of the name plate for model and serial number.
Includes product approval, specification changes, and environmental issues.
Explains the Master Volume and ABC/Song Volume controls.
Covers Style Selectors, Harmony, and One Touch Setting buttons.
Details buttons for ABC accompaniment control.
Covers buttons for starting and stopping accompaniment.
Explains buttons for display and contrast adjustments.
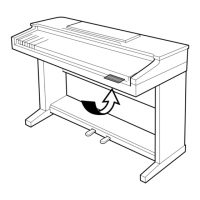
Instructions for raising and lowering the music stand.
Guidance on opening and closing the key cover.
How to turn the instrument on and off.
Information on connecting headphones and automatic speaker shut-off.
Adjusts overall sound and headphone volume.
Controls volume for auto-accompaniment and song playback.
Accessing individual part volumes via the MIXER button.
Using an optional foot controller for expression.
Explains how LCD buttons select and edit parameters on the display.
Function to keep pop-up displays on the LCD screen.
Used to select different display "pages" within functions.
Accesses individual part volumes via the MIXER button.
Returns to the previous display or initial play mode.
Adjusts the LCD display contrast for optimum legibility.
Provides on-demand assistance for instrument functions.
Retains favorite settings in memory even when the power is off.
Steps to turn on the power and set initial volume.
Options for playing demos (ALL, RANDOM, SINGLE).
How to choose specific demo tunes using LCD buttons.
Using MASTER VOLUME control to adjust demo playback volume.
Methods to stop demo playback and return to normal mode.
Using voice group buttons and PAGE buttons to choose a voice.
Playing drums and percussion instruments on the keyboard.
Explains the number of notes playable simultaneously and touch response.
Steps to activate Dual Mode and choose the second voice.
Adjusting the volume balance between the two voices.
Adjusting the detune depth for a thicker sound.
How to split the keyboard and assign voices.
Selecting voices for the left-hand section.
Adjusting volume balance between left and right hand voices.
Setting the key where the keyboard splits.
How to turn the reverb effect on and select reverb types.
Adjusting the overall depth of the selected reverb type.
Individually adjusting reverb depth for accompaniment parts.
How to turn the effect on and select effect types.
Adjusting the depth for selected effects for main/2nd or left/right voices.
Instantly recalling preset effect type and DEPTH1(R) settings.
Functions like a damper pedal on an acoustic piano for sustain.
Sustains notes played while the pedal is held, not affecting subsequent notes.
Details the various functions assignable to the left pedal.
How to select accompaniment styles from the 11 groups.
Setting the tempo for selected accompaniment styles.
Methods to start accompaniment playback (Straight, Intro, Synchronized, Tap).
Automatic fill-in patterns triggered by specific buttons.
Using the left pedal to create a break in the accompaniment.
Ways to stop accompaniment playback.
Using the metronome for practice timing.
Explains the three modes for ABC accompaniment input.
How to activate the ABC mode.
Choosing between Single Finger, Fingered Chord, or Full Keyboard modes.
An electronic chord book to show fingerings and assist chord entry.
Feature to automatically add harmony notes to melodies or chords.
How to activate the One Touch Setting feature.
Adjusting parameters after selecting a One Touch Setting setup.
Steps to activate the Custom Style recording mode.
Choosing a preset style as a base for custom creation.
Choosing the section (MAIN A, B, INTRO, etc.) to program.
Modifying time signature or number of measures for a section.
Choosing the part (Rhythm, Bass, Chord, etc.) and voice for recording.
Aligning recorded notes to specified beats for timing accuracy.
Entering a name for the custom style (up to 12 characters).
Saving the created custom style to internal memory.
Additional functions for custom style creation and editing.
Clearing the current custom style data.
Setting volume, reverb, effect, and pan for each part of a custom style.
Instructions for inserting a Style File disk.
Selecting a style file from the disk for loading.
Loading the selected style file into memory.
Selecting and playing loaded style files.
Making desired control settings to be memorized.
Selecting the bank containing the desired registration.
Storing panel settings into a registration memory location.
Recalling memorized panel settings.
Prevents accompaniment parameters from changing when recalling memory.
How to activate Song Play mode by inserting a disk.
Choosing songs from the disk or selecting ALL/RANDOM playback.
Starting and stopping song playback.
Turning individual orchestra parts or tracks on/off.
Using keyboard guide lamps and sound to learn pieces.
Playing back data from Disklavier, ESEQ, and SMF formats.
Preparing a disk for recording.
Recording a single part or simple accompaniment.
Recording up to 16 separate parts independently.
Recording over specific sections of a track.
Entering chord sequences and style changes for accompaniment.
Advanced functions like Track Mix, Delete, Quantize, and Initial Edit.
Combining data from two tracks into a third track.
Deleting all data from a specified track.
Aligning notes to specified beats for timing accuracy.
Changing initial data for tracks or the entire song.
Changing the name of recorded song files.
Recording directly to internal RAM memory when no disk is loaded.
Adjusting Transpose, Octave Shift, Touch Sensitivity, Tune, Pan, Left Pedal, and Damper Range.
Configuring MIDI transmission, reception, filtering, and clock settings.
Formatting disks, managing Registration and Song files, and Micro Tuning.
Managing parameter backups, recalling factory settings, and display/alert options.
Prompts and errors related to disk insertion, formatting, reading, and writing.
Messages regarding memory capacity, file limits, and data backup.
Prompts for confirmation, warnings, and hardware error notifications.
Inputs for external synthesizers or tone generator modules.
Outputs for connecting to amplifiers or recording equipment.
MIDI connectors for communication with other MIDI devices.
Jack for connecting an optional FC7 Foot Controller for expression.
Checks for no sound, interference, distorted sound, and static noise.
Lists optional items like benches, headphones, and key covers.
Lists voices in Piano, E.Piano, Harpsichord, and Vibes categories.
Lists various guitar and string instrument voices.
Backup status for voice-related settings like volume and effects.
Backup status for style-related settings like tempo and harmony.
Backup status for song recording and playback settings.
Backup status for MIDI transmission and reception settings.
Backup status for Tune, Pedal, Popup, Alert, and ABC Mode settings.
Details Key On/Off, Control Change, Bank Select, Modulation, etc.
Covers Universal Realtime, Non-Realtime, and XG Native messages.
Covers Active Sensing, MIDI Clock, and Start/Stop messages.
Details keyboard type, voices, styles, and Auto Bass Chord functions.
Covers song functions, registration memory, display, disk drive, and pedals.
Information on connections, audio output, and physical specifications.
Opening the box, checking parts, and safely leaning the main unit.
Mounting the speaker box, pedal assembly, and securing the speaker box.
Instructions for unpacking and checking all parts.
Securing the feet to the side panels using screws.
Mounting the speaker box to the side panels.
Instructions for unpacking and checking all parts.
Securing the side panels to the pedal box.
Screwing the center panel to the side panels.
FCC compliance notice, warnings against modification, and interference.
Instructions for connecting the mains plug and cord according to wire colors.
Statement on digital apparatus not exceeding Class B radio noise limits.
Covers reading instructions, power supply verification, plug usage, and ventilation.
Warnings about wet locations, proper stands, and avoiding damage.
Guidance on qualified servicing and preventing hearing damage from volume.
Ensuring stability of benches and optional fixtures before use.
| Type | Digital Piano |
|---|---|
| Display | LCD |
| Speakers | 16cm x 2 + 5cm x 2 |
| Pedals | 3 (Damper, Sostenuto, Soft) |
| Effects | Reverb, Chorus |
| Sequencer | Yes |
| Connectivity | MIDI In/Out |
| Connections | MIDI In/Out |
| Keyboard | 88-key GH (Graded Hammer) keyboard |