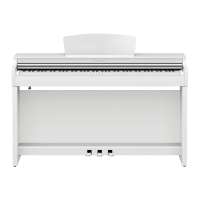
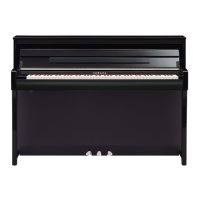
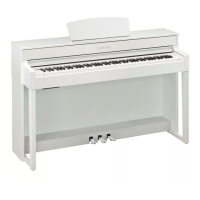
This document outlines the process for updating the firmware on several Yamaha Clavinova CLP series digital pianos, specifically the CLP-735, CLP-745, CLP-765GP, CLP-775, CLP-785, and CLP-795GP models. The guide provides clear, step-by-step instructions for preparing the update, executing the installation, and verifying the new firmware version, along with troubleshooting tips for common issues.
Function Description
The primary function of this guide is to enable users to update the firmware of their Yamaha Clavinova digital pianos. Firmware updates are crucial for maintaining the optimal performance of the instrument, potentially introducing new features, improving existing functionalities, resolving bugs, and ensuring compatibility with other devices or software. By providing a structured update process, Yamaha ensures that users can keep their instruments current and functioning at their best. The update process involves transferring a specific firmware file to the instrument via a USB flash drive, initiating a special boot mode, and confirming the installation through the instrument's display. This method is designed to be user-friendly, allowing owners to perform essential maintenance without requiring specialized technical assistance.
Usage Features
The firmware update process is designed with several key usage features to guide the user effectively:
- Clear Preparation Steps: The guide begins by detailing the necessary preparations, which include preparing a USB flash drive with sufficient free space and identifying the correct firmware file for the specific instrument model. A table clearly lists each supported model and its corresponding firmware file name (e.g., CLP-735SETUP.PRG for CLP-735), eliminating ambiguity and reducing the risk of using an incorrect file. This upfront preparation ensures that users have all the necessary components before starting the update.
- Step-by-Step Installation Instructions: The core of the guide consists of a series of numbered steps that walk the user through the entire installation process.
- Power Off Requirement: The first step emphasizes turning off the instrument before starting, a critical safety measure to prevent damage during hardware interaction.
- USB Insertion: Users are instructed to insert the prepared USB flash drive into the USB [TO DEVICE] terminal, clearly indicating the correct port.
- Special Boot Mode: A specific key combination (pressing and holding the B-1 key while turning on the instrument) is required to enter the firmware update mode. This ensures that the instrument is in the correct state to receive the update. The guide includes a visual representation of the B-1 key's location on the keyboard, enhancing clarity.
- Display Prompts: The guide provides exact text messages that should appear on the instrument's display at various stages of the update (e.g., "Booter ver.1.00 Now Loading...", "Installer [PLAY]:Install [REC]:Delete"). These prompts serve as visual confirmations that the process is proceeding as expected, helping users track their progress and identify any deviations.
- Button Interaction: Users are instructed to press the [PLAY/PAUSE] button at specific points to initiate and confirm the installation. The guide includes diagrams illustrating the location of the [PLAY/PAUSE] button for different CLP series models (CLP-735/745/765GP vs. CLP-775/785/795GP), accommodating variations in control panel layouts.
- Installation Progress Indicator: During the update, the display shows a progress message (e.g., "Installer - Step1- Now installing. 30X"), providing feedback on the installation status and an estimated completion percentage. This helps manage user expectations, especially given the note that large firmware data can take around 10 minutes to install.
- Completion Confirmation: Upon successful completion, the display shows a "Completed." message along with the installed program version, signaling that the update is finished.
- Post-Update Actions: After the update, users are instructed to turn off the instrument and remove the USB flash drive.
- Factory Reset Option: An important step involves pressing and holding the rightmost key (C7) while turning on the instrument to reset it to factory default settings. This is highlighted with a "Notice" box, clearly stating that this operation resets backup settings but does not delete user MIDI songs. A visual aid for the C7 key location is also provided.
- Firmware Version Confirmation: A dedicated section explains how to verify the newly installed firmware version.
- Navigation Steps: Users are guided through the instrument's menu system using the [FUNCTION] and [V] (down arrow) buttons to navigate to "System" > "Utility" > "Version."
- Visual Menu Paths: Screenshots of the instrument's display at each menu level (e.g., "System" menu, "Utility" menu, "Version" display) are included, making it easy for users to follow along and confirm they are in the correct menu.
- Final Verification: The final step is to check the displayed version number against the expected updated version, providing conclusive proof of a successful update.
Maintenance Features
The guide implicitly and explicitly supports device maintenance through its instructions and troubleshooting section:
- Proactive Updates: By providing a clear method for firmware updates, the guide encourages users to perform regular maintenance to keep their instruments running optimally. This proactive approach helps prevent potential issues that might arise from outdated firmware.
- Critical Warnings: The "Notice" boxes throughout the guide serve as crucial maintenance features, highlighting actions that must be strictly followed to prevent damage or data loss.
- "Do not turn off the instrument during the update.": This warning is paramount, as interrupting power during a firmware flash can corrupt the instrument's internal software, potentially rendering it inoperable.
- "Do not remove the USB flash drive from the instrument.": Similar to the power warning, removing the USB drive prematurely can lead to incomplete data transfer and firmware corruption.
- Factory Reset Implications: The notice regarding the factory reset (pressing C7 on startup) clearly explains that backup settings will be reset, but user MIDI songs will be preserved. This informs users about the consequences of this maintenance step, allowing them to make informed decisions.
- Troubleshooting Section: A dedicated "Troubleshooting" section is a vital maintenance feature, designed to help users resolve common issues encountered during the update process.
- Power Interruption/USB Removal: It addresses scenarios where power was turned off or the USB drive was removed prematurely, instructing users to restart the entire process from the beginning. This emphasizes the importance of completing all steps without interruption.
- Installation Aborts/Error Messages: For situations where an error message appears and the installation aborts, the guide provides a checklist of points to investigate:
- USB Flash Drive Insertion: "Is the USB flash drive inserted correctly?" – A basic but often overlooked check.
- USB Terminal Cleanliness: "Is the USB terminal clean and free from dust or dirt?" – Addresses potential physical obstructions affecting connectivity.
- Firmware File Location: "Is the firmware data located in the root of the USB flash drive file system?" – Ensures the instrument can easily locate the update file.
- Correct Firmware Data: "Is the firmware data the correct one for your instrument?" – Reinforces the importance of using the model-specific file.
- USB Drive Integrity: "Is the USB flash drive data corrupt, or is the USB flash drive itself broken?" – Suggests testing with a different USB drive if data integrity is suspected.
- Actionable Advice: For each troubleshooting point, the guide provides clear, actionable advice, empowering users to diagnose and potentially fix problems themselves without needing to contact support immediately. This self-service approach is a significant maintenance benefit.
In summary, this guide is a comprehensive resource for maintaining Yamaha Clavinova digital pianos through firmware updates. Its detailed instructions, visual aids, critical warnings, and robust troubleshooting section collectively ensure that users can confidently and successfully keep their instruments up-to-date and functioning optimally.


 Loading...