6
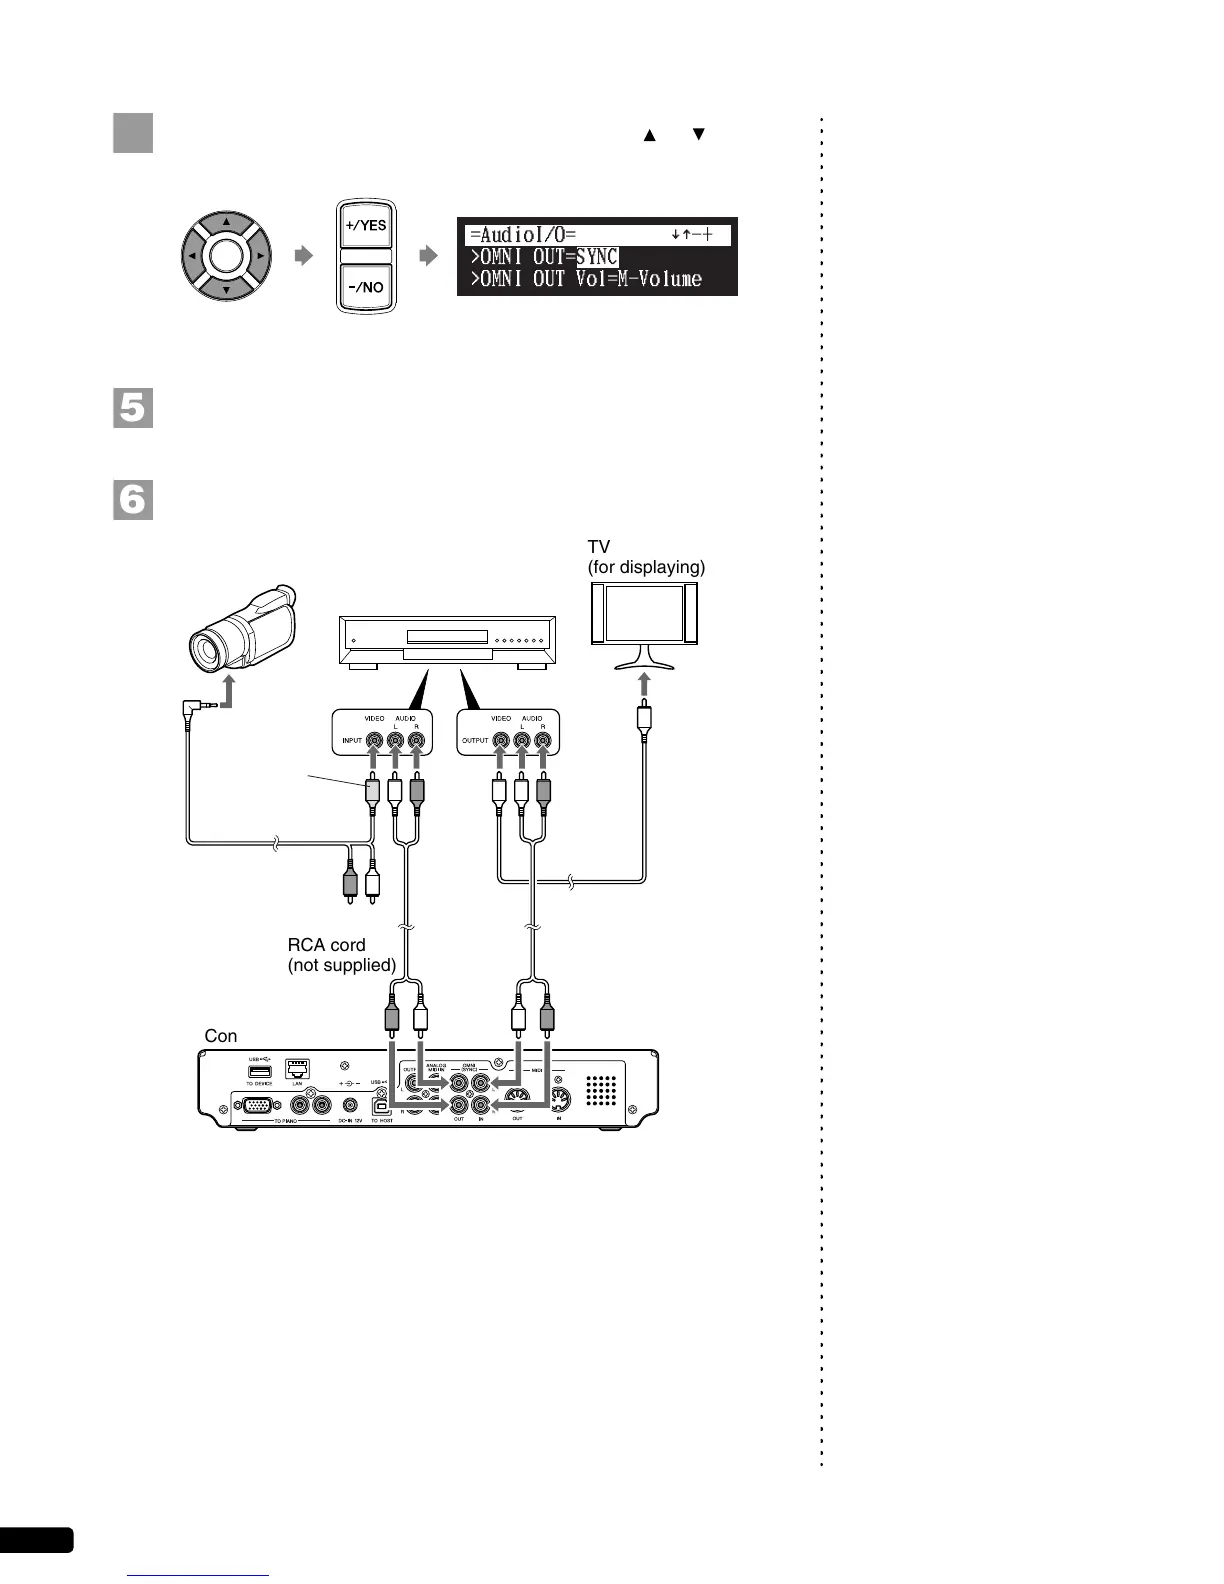
Select “OMNI OUT” with the cursor buttons ([ ] [ ]), then
press [+/YES] and [–/NO] to change setting to “SYNC”.
Press [ENTER] to complete the operation.
Note:
Confirm the shape of input/output
connectors on the camcorder and the
DVD recorder, and prepare the cables
fit to them.
Connect a camcorder and a DVD recorder to the control unit.
]
[
TV
(for displaying)
RCA cord
(not supplied)
Control unit
RCA cord
(not supplied)
To
audio
output
To video
input
To
audio
input
To A/V
output
To video
input
To
video
output
DVD recorder
(for recording and playback)
Video
connector
(yellow)
Video cord
(not supplied)
A/V cord
(supplied with the
camcorder)
Camcorder
(for shooting)