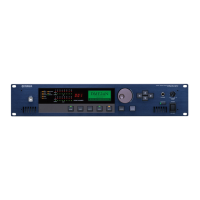
DME Setup Manual 4
●●●●●●●●●●●●●●●●●●●●●●●●●●●●●●●●●●●●●●●●●●●●●●●●●●●●●●●●●●●●●●●●●●●●●●●●●●●●●●●
USB-MIDI Driver Installation
n You can also refer to the installation guide supplied with the driver for detailed installation procedures.
■ Windows Vista
1 Start the computer and log on with
administrator privileges while power to the DME
is off.
2 Connect the computer to the DME unit via a USB
cable.
3 Turn the DME power on: “Found New Hardware”
will be displayed.
4 Select [Locate and install driver software
(recommended)] ➞ [Don’t search online].
5 When a message appears prompting you to
insert the supplied disc, select [I don’t have the
disc. Show me other options.] ➞ [Browse my
computer for driver software (advanced).] ➞
[Browse], specify the downloaded and extracted
“Driver” folder, then click [OK].
6 Click [Next] to start installation.
7 When a message appears indicating that the
driver has been successfully installed, click
[Finish].
The driver has been installed.
■ Windows XP
1 Start the computer and log on with
administrator privileges while power to the DME
is off.
2 Select [Start] ➞ [Control Panel], and then
“Switch to Classic View” in the upper left of the
display to show all control panels and icons.
3 Select [System] ➞ [Hardware] ➞ [Driver Signing]
➞ [File Signature Verification], and check the
radio button to the left of “Ignore—Install all
files, regardless of file signature” and click [OK].
Restore this setting to its original state after the
installation has been completed.
4 While the DME power is still off, connect the
computer to the DME unit via a USB cable.
5 Turn the DME power on, and the “Found New
Hardware Wizard” message will appear
automatically.
6 Select [Install from a list or specific location
(Advanced).] ➞ [Search for the best driver in
these locations], check only [Include this
location in the search], click [Browse] to specify
the downloaded and extracted “Driver” folder,
then click [OK].
7 Click [Next] to start the installation.
8 When a message appears indicating that the
driver has been successfully installed, click
[Finish].
9 Restart the computer when a message appears
prompting you to do so.
The driver has been installed.