EasyManua.ls Logo

Yamaha EZ-220 - User Manual

Yamaha EZ-220
60 pages
Print Icon
To Next Page IconTo Next Page
Loading...
EN
Playing the
Keyboard
Basic
Section
Try out various functions
Computer/
iPad
Appendix
Owners Manual
Thank you for purchasing this Yamaha Digital Keyboard!
We recommend that you read this manual carefully so that you can fully take advantage of the
advanced and convenient functions of the instrument.
We also recommend that you keep this manual in a safe and handy place for future reference.
Before using the instrument, be sure to read “PRECAUTIONS” on pages 4–5.

Other manuals for Yamaha EZ-220

Questions and Answers

  • L
    Laura SmithAug 20, 2025
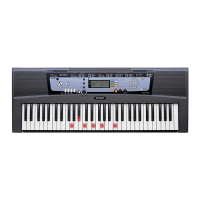
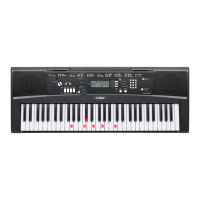
    What to do if there is no sound on my Yamaha EZ-220?
    • S
      starkjamesAug 20, 2025
      First, ensure that nothing is connected to the PHONES/OUTPUT jack on the rear panel, as this will prevent sound output. Also, check the Local Control setting. (See page 41.)
  • E
    Elizabeth HerringAug 22, 2025
    Why do the right-hand keys on my Yamaha Electronic Keyboard not produce sound?
    • C
      Chris NguyenAug 22, 2025
      When using the Chord Dictionary function (page 38) on your Yamaha Electronic Keyboard, the keys in the right-hand area are used for entering the chord root and type only, and will not produce a sound.
  • J
    johnsondonnaAug 25, 2025
    Why is the volume low on my Yamaha EZ-220 Electronic Keyboard and sound quality poor?
    • R
      Richard ReedAug 25, 2025
      If the volume is too soft, the sound quality is poor, the rhythm stops unexpectedly, settings are reset, or songs don't play correctly, it's likely due to low or dead batteries. Replace all six batteries with new or recharged ones, or use an optional AC adapter.
  • H
    hannah46Aug 26, 2025
    How to stop noise when using a mobile phone with my Yamaha EZ-220?
    • K
      krystalserranoAug 27, 2025
      Noise may occur when using a mobile phone close to the Yamaha Electronic Keyboard due to interference. Turn off the phone or move it further away from the instrument to prevent this.
  • W
    wlunaAug 27, 2025
    What to do if the Style does not sound properly on my Yamaha Electronic Keyboard?
    • E
      Emily DeanAug 28, 2025
      To ensure the Style sounds properly on your Yamaha Electronic Keyboard: * Check that the Style Volume is set to an appropriate level. * Verify that the Split Point is set correctly for the chords you are playing. * Confirm that the “ACMP ON” indicator is showing in the display by pressing the [ACMP ON/OFF] button.
  • P
    Patricia CooperAug 30, 2025
    Why doesn't the Style or Song play on my Yamaha EZ-220 when pressing [START/STOP]?
    • D
      David LambertAug 30, 2025
      Ensure that the External Clock is set to OFF. Refer to “External Clock Settings” on page 41.
  • J
    Jessica ZimmermanAug 31, 2025
    Why are some voices cut off on my Yamaha EZ-220 Electronic Keyboard?
    • T
      Tina ParkerSep 1, 2025
      The Yamaha Electronic Keyboard is polyphonic up to 32 notes. If a Style or Song is playing, some notes may be omitted from the accompaniment.
  • T
    Terry AguilarSep 2, 2025
    Why does my Yamaha EZ-220 footswitch have the opposite effect?
    • M
      Mr. Eric Mills MDSep 2, 2025
      If the footswitch seems to produce the opposite effect on your Yamaha Electronic Keyboard, the polarity might be reversed. Ensure the footswitch plug is properly connected to the SUSTAIN jack before turning on the power.
  • B
    Bryan JonesSep 4, 2025
    What to do if part indications don't appear on my Yamaha EZ-220 Electronic Keyboard lesson?
    • C
      Cynthia SpencerSep 4, 2025
      If the part indications do not appear when pressing the [R] or [L] buttons for the Lesson on your Yamaha Electronic Keyboard, ensure that you are not pressing these buttons while a Song is playing. Stop the Song first, then select the desired part and start the Lesson.
  • G
    Gerald YoungSep 6, 2025
    Why doesn't the ACMP ON indicator appear on my Yamaha EZ-220 Electronic Keyboard?
    • S
      Samantha PowersSep 6, 2025
      Always press the [STYLE] button first when you are going to use any style-related function on your Yamaha Electronic Keyboard.

Summary

Precautions and Safety Guidelines

Power Supply and AC Adapter Safety

Guidance on safe use of power adapters and cords, including warnings against damage or misuse.

Instrument Handling and Environmental Precautions

Covers warnings about opening the instrument, water exposure, fire hazards, and battery handling.

Abnormality Detection and Response

Instructions on what to do if the instrument shows unusual behavior, smells, or stops working.

Cautionary Guidelines

Instrument Placement and Operational Cautions

Advice on stable placement, cable management, connections, and handling to prevent damage.

Important Notices and Information

Covers copyrights, bundled functions, and manual disclaimers for user guidance.

Panel Controls and Terminals

Front Panel Controls Overview

Detailed description of the buttons and controls on the front panel of the EZ-220 keyboard.

Rear Panel Connections and Features

Identification and function of ports and terminals located on the rear panel of the instrument.

Setting Up Your Keyboard

Power Requirements and Setup

Instructions on using the AC adaptor or batteries, including connection and battery type selection.

Power Management and Connectivity

How to turn the instrument on/off, manage Auto Power Off, and connect audio equipment.

Playing the Keyboard

Powering On and Adjusting Volume

Steps to turn on the instrument and adjust the master volume level using the control buttons.

Selecting and Playing Voices

How to select different instrument sounds (Voices) and play them on the keyboard.

Listening to Songs and Styles

Listening to Preset Songs

Instructions on how to select and play the built-in demonstration songs.

Playing Along with Styles

Guide to selecting and playing musical Styles for accompaniment.

Practicing and Learning Features

Using the Song Lesson Feature

How to use the interactive lesson feature with lighting keys and guided practice.

Keyboard Lighting and Fingering Guide

Explanation of the lighting keyboard and fingering guide features for learning.

Using the Metronome

How to activate, stop, and adjust the tempo and time signature of the metronome.

Setting Parameters and Fine-Tuning

Making Detailed Instrument Settings

Guide to accessing and adjusting various parameters using the FUNCTION button.

Basic Operation and Display Guide

Basic Operation Procedures

Step-by-step guide on selecting functions and starting playback using number buttons.

Understanding the Display Information

Explanation of the various indicators and information shown on the instrument's LCD display.

Playing and Managing Songs

Selecting and Listening to Songs

How to choose and play specific preset songs, including changing melody voices.

Song Repeat Playback Functions

Details on repeating entire songs or specific sections for practice.

Song Playback Settings and Tempo

Song Playback Controls

Using buttons for fast forward, fast reverse, and pause during song playback.

Adjusting Song Tempo

How to change the tempo of songs and styles, including using tap tempo.

Repeat Playback Functionality

Setting start (A) and end (B) points for repeating specific song sections.

Song Volume and Part Management

Adjusting the Song Volume Balance

How to balance the volume between song playback and keyboard performance.

Muting Song Parts (Left;Right)

Instructions on how to mute the left-hand or right-hand part of a song during playback.

Guide Functions for Learning

Lighting Keyboard Feature

How the keys light up to guide playing, and turning the feature on or off.

Fingering Guide Display

Explanation of the on-screen fingering guide for proper hand positioning.

Lesson Feature Guide

Understanding the Three Lesson Types

Details on Listen & Learn, Timing, and Waiting lesson modes.

Lesson Tempo Adjustment (Your Tempo)

Information on how lesson tempo adjusts to playing speed and how to disable it.

Song Lesson Practice

Trying the Song Lesson Feature

Steps to select songs, parts, and lesson types for practicing.

Confirming Lesson Grade

How to view your performance grade after completing Timing and Waiting lessons.

Changing Keyboard Voices

Selecting and Playing Different Voices

How to browse and select from the wide range of instrument sounds available.

One Touch Settings and Grand Piano Function

Using One Touch Settings and the dedicated Grand Piano function.

Using a Footswitch for Sustain

Connecting and using an optional footswitch for sustain effects.

Playing with Drum Kits

How to select and play different drum kit sounds directly from the keyboard.

Playing With Effects

Adding and Selecting Reverb

How to turn reverb on/off and select different reverb types for sound ambience.

Adjusting Reverb Depth

How to control the intensity or depth of the reverb effect.

Adding Panel Sustain

How to apply a fixed sustain effect to keyboard voices.

Controlling Pitch and Sensitivity

Transposing Pitch in Semitones

Shifting the overall pitch of the instrument up or down in semitone increments.

Fine Tuning the Pitch

Adjusting the overall pitch of the instrument up or down in small increments.

Changing Touch Sensitivity

Adjusting how the keyboard volume responds to playing strength (dynamic range).

Using the Metronome Effectively

Metronome Operation and Volume

How to start, stop, and adjust the volume of the metronome.

Adjusting Metronome Tempo

Setting the tempo for the metronome using number buttons or tap tempo.

Setting the Time Signature

How to set the beat (numerator) and denominator for the metronome's time signature.

Playing with Styles

Selecting and Playing Styles

How to choose musical styles and play chords to create accompaniment.

Style Playback Control

Using Sync Start, Auto Accompaniment, and adjusting tempo during style playback.

Using Style Sections

Recommended Style Playback Method

Step-by-step guide for setting up and playing styles, including intro, main, and ending.

Playing Chords for Style Accompaniment

Basic and Easy Chord Voicings

Reference charts for common chords and simple methods for playing them.

Using the Chord Dictionary

How to look up chord names and play them using the instrument's built-in dictionary.

Style Playback Settings

Adjusting the Style Volume

How to set the volume balance for style playback.

Setting the Split Point

Changing the keyboard split point for auto accompaniment and melody sections.

Connecting to a Computer via USB

Connecting and Driver Installation

Steps for connecting the instrument to a computer and installing the USB-MIDI driver.

Precautions for USB TO HOST Terminal

Important safety and operational warnings when connecting to a computer.

MIDI Settings and Computer Integration

Configuring MIDI settings like Local Control and External Clock for computer use.

iPad Score Page Turner

Using the Page Turner Application

Guide to installing and using the dedicated app for automatic score page turning.

Troubleshooting Common Issues

Voice and Drum Kit Lists

Maximum Polyphony Explanation

Information on the instrument's polyphony limit and how it affects note playback.

Drum Kit Details

Effect Type and Style Lists

Reverb Type Descriptions

List and descriptions of available reverb effects for sound enhancement.

Style List

Specifications

Yamaha EZ-220 Specifications

General IconGeneral
Control typeButtons
MIDI-keyboard number of keys61 keys
Product colorBlack
Volume controlRotary
Sound effects quantity392
InterfaceUSB
Headphone outputs1
Display typeLCD
Battery typeAA
Input voltage12 V
Power source typeDC
Power consumption (typical)7 W
Number of batteries supported6
Weight and Dimensions IconWeight and Dimensions
Depth348 mm
Width945 mm
Height111 mm
Weight4400 g

Videos

How to Find the Headphone Jack on Yamaha EZ-220 Keyboard

Related product manuals