EasyManua.ls Logo

Yamaha MT 400 - User Manual

Yamaha MT 400
50 pages
Print Icon
To Next Page IconTo Next Page
Loading...
MULTITRACK CASSETTE RECORDER
Owner’s Manual
4
4TR4
STEREO
+6
+3
0
–5
–10
+6
+3
0
–5
–10
POWER
AUX SEND
STEREO INPUT
METER SELECTREC SELECT
MONITOR/PHONES
ZERO STOP
PITCH
NOISE REDUCTION SYSTEM
TAPE SPEED CONTROL
321
RL
REC
REC PLAY REW FF STOP PAUSE
OFF
R
3
OFF
L
2
OFF
R
1
OFF
L
ON
OFF
ON
OFF
SYNC
STEREO
ST+CUE
CUE
MULTITRACK CASSETTE RECORDER
M
IC/LINE INPUT
INSERT I/O
INSERT I/O
1
2
1
2
3
4
5
L 6R 8R7L
4.8/ 9.5
+
LEVEL
STEREO
7
L
–8
R
010
LEVEL
5
L
–6
R
010
LEVEL
MIN MAX
10
9
8
7
6
5
4
3
2
1
0
GAIN
HIGH
10
9
8
7
6
5
4
3
2
1
0
LINE MIC
–12 +12
MID
–12 +12
LOW
–12 +12
AUX
1
010
AUX
2
MIX CUE
MIX CUE MIX CUE MIX CUE
010
010
PA N
INPUT-FLIP
TAPE
TAPE
MIC/
LINE
MIC/LINE
to L
LR
1
GAIN
HIGH
10
9
8
7
6
5
4
3
2
1
0
LINE MIC
–12 +12
MID
–12 +12
LOW
–12 +12
AUX
1
010
AUX
2
010
010
PA N
INPUT-FLIP
TAPE
TAPE
MIC/
LINE
MIC/LINE
to R
LR
2
GAIN
HIGH
10
9
8
7
6
5
4
3
2
1
0
LINE MIC
–12 +12
MID
–12 +12
LOW
–12 +12
AUX
1
010
AUX
2
010
010
PA N
INPUT-FLIP
TAPE
TAPE
MIC/
LINE
MIC/LINE
to L
LR
3
GAIN
HIGH
10
9
8
7
6
5
4
3
2
1
0
LINE MIC
–12 +12
MID
–12 +12
LOW
–12 +12
AUX
1
010
AUX
2
010
010
PA N
INPUT-FLIP
TAPE
TAPE
MIC/
LINE
MIC/LINE
to R
LR
4
E

Questions and Answers

  • B
    Brooke GilesAug 17, 2025
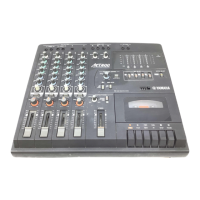
    How to fix recordings that sound dull on Yamaha MT 400 Cassette Player?
    • P
      Pedro KelleyAug 17, 2025
      To address recordings that sound dull, exhibit abnormal tape hiss, wow and flutter, or have a fluctuating output level on your Yamaha Cassette Player, you should clean the record-play head and other parts of the tape transport. Additionally, demagnetize the record-play head.
  • S
    Susan GibsonAug 20, 2025
    What to do if Yamaha MT 400 Cassette Player recordings are distorted?
    • M
      Martin KimAug 20, 2025
      If your Yamaha Cassette Player recordings are distorted, ensure that the recording level is set correctly. A signal level that is too high can cause distortion.
  • T
    Todd HobbsAug 22, 2025
    Why do level meters not indicate signal levels on Yamaha Cassette Player?
    • I
      Isabella DavisAug 23, 2025
      If the level meters on your Yamaha Cassette Player do not indicate signal levels, first check that the [METER SELECT] switch is set correctly. Also, make sure that the recording track is in recording pause mode.
  • J
    James GarzaAug 26, 2025
    How to fix Yamaha MT400 if it cannot be turned on?
    • G
      Gabriel GarciaAug 26, 2025
      If your Yamaha MT400 cannot be turned on, ensure the AC adapter is securely connected to a suitable AC wall outlet and plugged into the DC 12V connector at the rear of the MT400. Also, verify that you are using the correct AC adapter and that the MT400 POWER switch is in the ON position.
  • J
    Jason FoxAug 28, 2025
    How to reduce noise in Yamaha MT 400 Cassette Player recordings?
    • M
      Michael SparksAug 28, 2025
      If your Yamaha Cassette Player recordings are noisy, use the dbx noise reduction feature. Also, ensure that the recording level is set correctly, as a signal level that is too low will cause the tape hiss to be more noticeable.
  • C
    Christina DelgadoAug 31, 2025
    What to do if Yamaha MT 400 cannot record?
    • D
      Diana FuentesAug 31, 2025
      If you cannot record on your Yamaha Cassette Player, verify that the [REC SELECT] switch is not set to “OFF.” Also, ensure that you have assigned the signal you want to record to the track and use the CUE control to confirm the signal is being sent to the track.
  • C
    craig39Sep 3, 2025
    How to troubleshoot Yamaha MT 400 Cassette Player if I cannot listen to a connected music source?
    • N
      Nicole KennedySep 3, 2025
      If you cannot listen to a connected music source on your Yamaha Cassette Player, ensure that the [INPUT-FLIP] switches and the monitor select switch are set to the appropriate positions. When an [INPUT-FLIP] switch is set to “MIC/LINE ( )”, raise the corresponding input channel fader and the STEREO fader, and set the monitor select switch to “STEREO” or “ST+CUE”. When an [INPUT-FLIP] switch is set to “TAPE ( )”, raise the corresponding channel CUE control and the STEREO fader, and set the monitor select switch to “STEREO” or “ST+CUE.”
  • T
    Tanner HicksSep 5, 2025
    What to do if I cannot push the REC button on my Yamaha MT 400 Cassette Player?
    • V
      vmccarthySep 5, 2025
      If you cannot push in the REC button on your Yamaha Cassette Player, make sure that the tape’s write-protect tabs are intact.
  • M
    Michaela HolmesSep 8, 2025
    How to synchronize MIDI sequencer to Yamaha MT400?
    • D
      diazmarySep 8, 2025
      To synchronize a MIDI sequencer to the MT400 Yamaha Cassette Player, ensure that the FSK/MIDI or SMPTE/MIDI converter is set to convert the recorded SYNC signal into MIDI Clock or MTC. Also, make sure that your MIDI sequencer is set to synchronize to an external MIDI Clock or MTC. Refer to the MIDI sequencer’s user manual.
  • M
    Mary HicksSep 12, 2025
    How to send a channel signal to the AUX SEND on Yamaha MT 400 Cassette Player?
    • K
      Kimberly FuentesSep 12, 2025
      To send a channel signal to the AUX SEND on your Yamaha Cassette Player, in addition to turning up the AUX control, you must also raise the channel fader. This is because the AUX SEND signal is source post-fader (i.e., after the fader).

Summary

Important Safety and Operating Information

Warnings and Cautions

Critical safety guidelines regarding operating environment, handling, and potential hazards.

Interference and Legal Notices

Information on potential interference and copyright/trademark details.

Welcome to the MT400

MT400 Features Overview

Details on the MT400's core components: Mixer and Recorder sections, plus utility functions.

Cassette Tape Usage

Buying Cassette Tapes

Guidelines for selecting and purchasing appropriate cassette tapes for the MT400.

MT400 Recording Format

Explanation of how the MT400 records tracks differently from standard cassette recorders.

About dbx Noise Reduction

Glossary of Terms

Touring the MT400 - Input Channels

Input Channel Controls

Explanation of GAIN, EQ, AUX, and CUE controls for input channels 1-4.

Touring the MT400 - Additional Controls

Stereo Inputs and Channel Operation

Details on STEREO INPUT LEVEL controls, INPUT-FLIP, PAN, and Faders.

Touring the MT400 - Monitor Section

Monitor;Master Section Controls

Controls for MONITOR LEVEL, monitor select switch, and STEREO fader.

Recorder Section - Controls

Tape Speed, Pitch, dbx, and Recording Controls

Controls for tape speed, pitch, dbx, REC SELECT, and METER SELECT.

Recorder Section - Transport

Tape Transport Operation

Operation of ZERO STOP, tape counter, and transport buttons (REC, PLAY, REW, FF, STOP, PAUSE).

Meter and I;O Sections

Meter and Indicator Functions

Explanation of Level Meters, REC SELECT indicators, and POWER indicator.

Input;Output Jacks and Connections

Details on MIC/LINE, INSERT I/O, STEREO INPUT, and AUX SEND connections.

Front Panel Controls

PHONES and PUNCH I;O Jacks

Ports for headphone monitoring and footswitch connection.

Rear Panel Connections

Power, Sync, Monitor, and Stereo Outputs

Rear panel connections for power, sync signals, monitor, and stereo outputs.

The First Session

Preparation and Quick-Start System

Initial setup steps and system connection overview for first-time use.

The First Session - Initial Steps

Turning On, Loading Tape, and Recording First Track

Steps for powering on, loading tape, and initial track recording.

Pre-Recording Preparation and Level Checking

Pre-recording checks and setting appropriate input levels for optimal sound.

The First Session - Recording Process

Selecting Tracks and Monitoring Recording

Choosing tracks for recording and adjusting monitoring levels and EQ.

The First Take

Starting and Listening to First Recording

Steps to initiate recording, stop, rewind, and play back the initial take.

Overdubbing Techniques

Selecting Tracks and Monitoring for Overdubbing

Choosing tracks and adjusting monitoring for recording new sounds over existing ones.

Overdubbing Techniques - Recording and Playback

Starting and Listening to Overdubbed Tracks

Procedure for starting and stopping overdub recording and playback.

Mixdown Procedure

Connecting Master Recorder and Sending Playback

Connecting to a master recorder and routing tape tracks for mixing.

Mixdown Procedure - Final Mix

Recording the Final Mix

Steps for recording the final stereo mix onto a master recorder.

Advanced Recording Techniques

Simultaneous Multi-Channel Recording

Mixing multiple input sources into a stereo signal and recording to two tracks simultaneously.

Advanced Recording Techniques - Parameter Adjustment

Adjusting Multi-Channel Recording Parameters

Fine-tuning levels, pan, EQ, and monitoring for multi-channel recording.

Ping-Pong Recording

Technique and Setup

Method for mixing and recording existing tracks onto an empty track to free up space.

Multi-Source Mixing

Mixing External Sources with Tape Tracks

Combining external sources with tape tracks using MIC/LINE and STEREO INPUTS.

Using Effects

INSERT I;O for External Processors

Connecting external processors via INSERT I/O jacks for dynamic and tonal effects.

Using Effects - AUX SENDS

AUX SENDS for Applying Effects

Applying effects to multiple channels by connecting to AUX SEND jacks.

Using Effects - Multi-Channel Recording

Effects on Multiple Channels During Recording

Using AUX SENDs to apply effects to multiple channels during recording.

Using Effects - Monitor Signal

Effects Applied to Monitor Signal Only

Applying effects to monitor signals while recording dry tracks.

Using Effects - Mixdown

Applying Effects During Mixdown

Using AUX SENDs to apply effects to track signals during the mixdown process.

Punch In;Out Recording

Using the REC SELECT Switch

Simple method for punch in/out recording using the REC SELECT switch.

Punch In;Out Recording - Footswitch

Using a Footswitch for Punch In;Out

Performing punch in/out recording hands-free with an optional footswitch.

MIDI Synchronization

Synchronizing with a MIDI Sequencer

Integrating the MT400 with a MIDI sequencer for synchronized playback.

SYNC Signal Formats

Explanation of SMPTE timecode and FSK formats for synchronization.

Connecting to a MIDI System

FSK;MIDI System Setup

Connecting the MT400 to a MIDI system using an FSK/MIDI converter.

Connecting to a MIDI System - SMPTE

SMPTE;MTC System Setup

Connecting the MT400 to a MIDI system using a SMPTE/MTC converter.

Recording a SYNC Signal on Tape

Synchronized Recording

Synchronized Mixdown

Appendix

Troubleshooting Guide

Solutions for common operational problems and symptoms.

Appendix - Maintenance

Maintaining the MT400

Guidelines for cleaning and demagnetizing tape heads for optimal performance.

Specifications

Dimensions

Block Diagram

Mixer Setup Guide

Yamaha MT 400 Specifications

General IconGeneral
BrandYamaha
ModelMT 400
CategoryCassette Player
LanguageEnglish

Related product manuals