PERIODIC MAINTENANCE AND ADJUSTMENT
6-11
6
4. If the engine oil is below the mini-
mum level mark, add sufficient oil
of the recommended type to raise
it to the correct level.
5. Install the oil filler cap.
To change the engine oil (with or
without oil filter element replace-
ment)
1. Remove cowling B. (See page
6-8.)
2. Start the engine, warm it up for
several minutes, and then turn it
off.
3. Install the engine oil drain attach-
ment, provided with the owner’s
tool kit, under the drain bolt of the
crankcase.
4. Place an oil pan under the engine
to collect the used oil.
5. Remove the engine oil filler cap
and the drain bolt along with the
O-ring, compression spring, and
engine oil strainer, to drain the oil
from the crankcase. NOTICE:
When removing the engine oil
drain bolt, the O-ring, compres-
sion spring, and oil strainer will
fall out. Take care not to lose
these parts.
[ECA11002]
6. Clean the engine oil strainer with
solvent.
Skip steps 7–9 if the oil filter element is
not being replaced.
7. Remove the oil filter element cover
by removing the bolts.
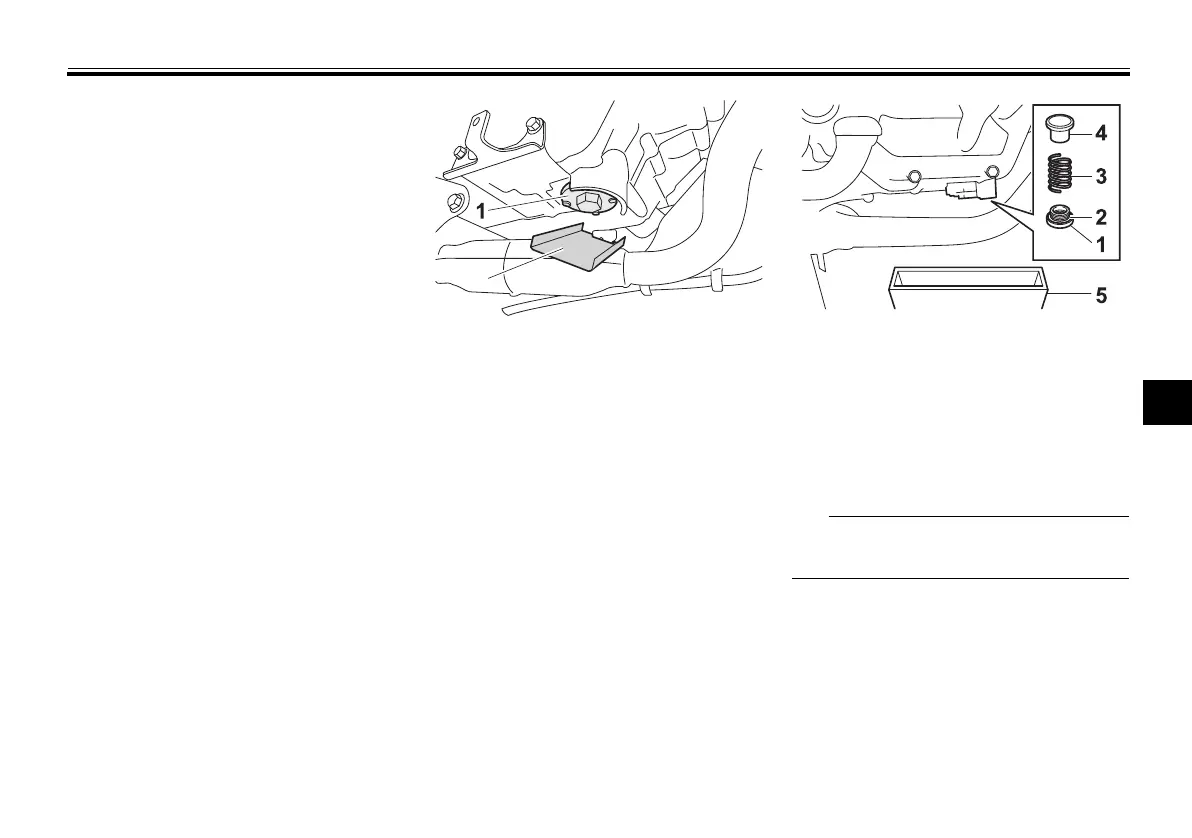
1. Engine oil drain bolt (crankcase)
2. Engine oil drain attachment
1. Engine oil drain bolt
2. O-ring
3. Compression spring
4. Strainer
5. Oil pan
U5D7E4E0.book Page 11 Thursday, July 10, 2014 3:01 PM