Periodic maintenance and adjustment
6-31
6
switch off, then disconnect the
negative lead before discon-
necting the positive lead.
[ECA16304]
2. If the battery will be stored for
more than two months, check it at
least once a month and fully char-
ge it if necessary.
3. Fully charge the battery before
installation. NOTICE: When in-
stalling the battery, be sure to
turn the main switch off, then
connect the positive lead before
connecting the negative lead.
[ECA16842]
4. After installation, make sure that
the battery leads are properly con-
nected to the battery terminals.
ECA16531
Always keep the battery charged.
Storing a discharged battery can
cause permanent battery damage.
EAUB1116
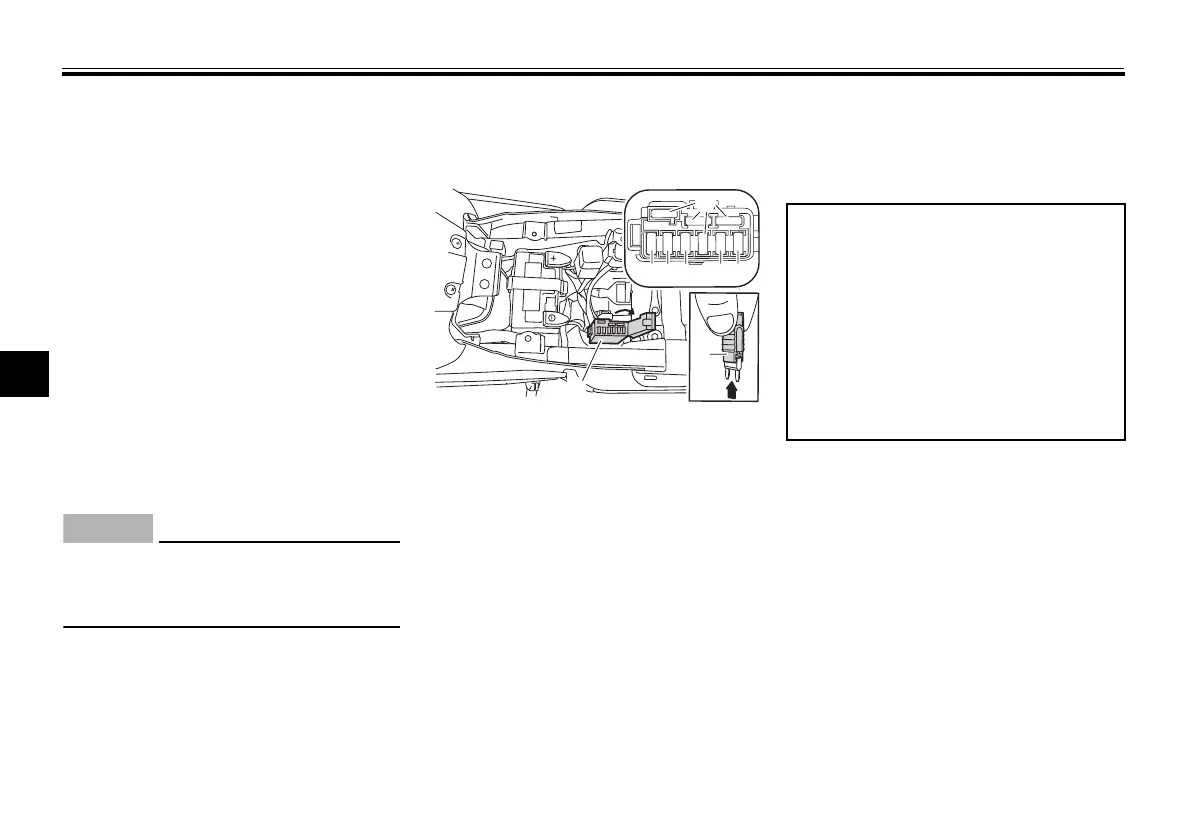
Replacing the fuses
The fuse box is located under the seat.
(See page 3-16.)
If a fuse is blown, replace it as follows.
1. Turn the main switch off and turn
off the electrical circuit in ques-
tion.
2. Remove the blown fuse, and then
install a new fuse of the specified
amperage. WARNING! Do not
use a fuse of a higher amperage
rating than recommended to
avoid causing extensive dam-
age to the electrical system and
possibly a fire.
[EWA15132]
3. Turn the main switch on and turn
on the electrical circuit in question
to check if the device operates.
4. If the fuse immediately blows
again, have a Yamaha dealer
check the electrical system.
1. Fuse box
2. Spare fuse
3. Headlight fuse
4. ABS control unit fuse
5. Main fuse
6. ABS solenoid fuse
7. ABS motor fuse
8. Fuse tongs
ZAUM2045
15
7.5
2
15
7.5
15
30
30
2
1
8
3
4
5
6
7
2
Specified fuses:
Main fuse:
15.0 A
ABS motor fuse:
30.0 A
ABS solenoid fuse:
15.0 A
ABS control unit fuse:
2.0 A
Headlight fuse:
7.5 A
UBFGE0E0.book Page 31 Friday, April 9, 2021 9:25 AM



 To Next Page