d to
be
replaced, then perform the
steps
above and
disconnect
f
he
cable
nee
s . .
1
t
1
\ever
Next
disconnect the cable
at
the engine.
Begin
by
cable
at t1e • '
th
e_
f h cover that houses the
clutch
activating
mechanism
(left
side
taking
of
t
0
•
• ) Looking
at
the inside
of
this
cover, you will see
the
clutch
of
the
engine •
. m Push the arm up and
lift
the cable end
off.
Removing
the
old
actuating
ar
• .
I
d
h
ooking up the new one will
take
but
a
few
moments.
cab
e
an
Clutch
Cable
Adjustment:
There
are
two
clutch
adjustments.
The
first,
located
at
the
handlebar
clutch lever,
is
used
to
take up
slack
from cable
stretch
and
to
provide
sufficient free play so that the
clutch
engages and disengages
completely.
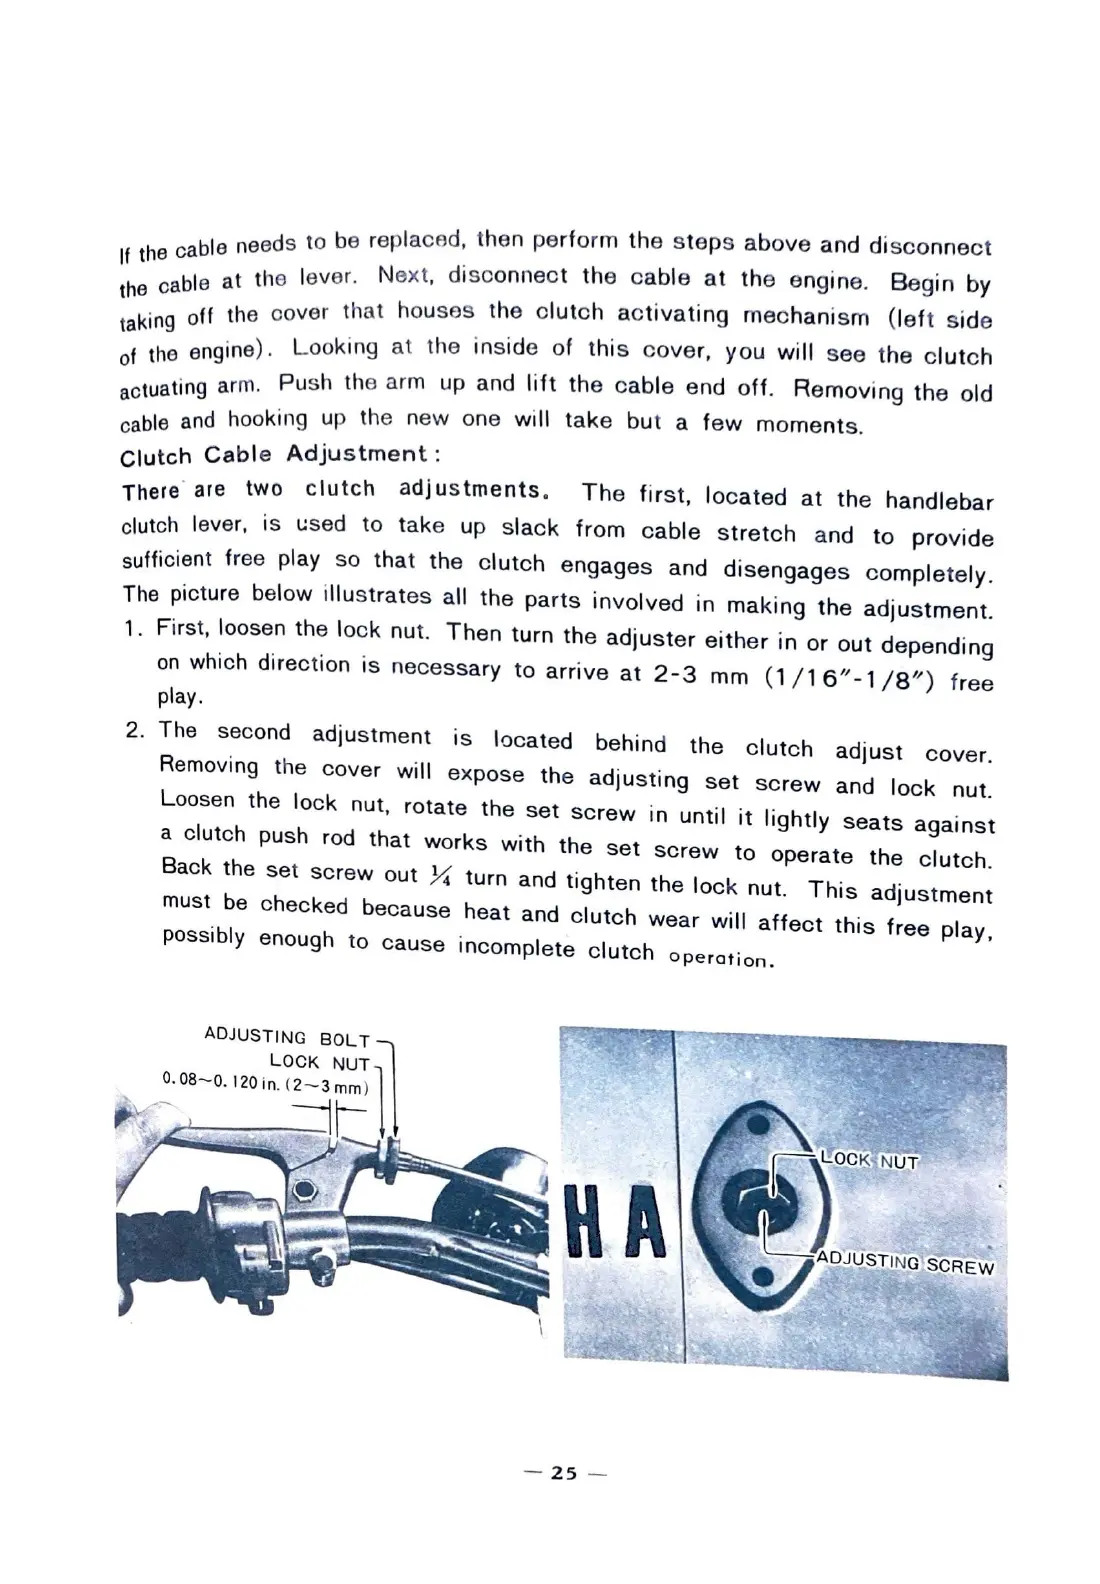
The
picture below
illustrates
all the
parts
involved
in
making
the
adjustment.
1. First, loosen the
lock
nut.
Then
turn the adjuster
either
in
or
out
depending
on
which direction
is
necessary
to
arrive
at
2-3
mm
(1
/16"-1
/8")
free
play.
2.
The second adjustment
is
located behind the
clutch
adjust
cover.
Removing the cover will expose the adjusting
set
screw
and
lock
nut.
Loosen the
lock
nut, rotate the
set
screw in until
it
lightly
seats
against
a clutch push rod that works with the
set
screw to operate the clutch.
Back the set screw out ¼ turn and tighten the
lock
nut.
This
adjustment
must
be
checked because heat and
clutch
wear will
affect
this
free play,
possibly enough to cause incomplete
clutch
operation.
ADJUSTING
SOLT
LOCK NUT
0.08~0.120in.
(2~3mm)
,.\,,
~--'-
__
_
OCK
NUT
" DJlJ.STING
s'cRE~
-25
-