EasyManua.ls Logo

Yamaha R-840 Service Manual

Yamaha R-840
84 pages
To Next Page IconTo Next Page
Page #1 background imageLoading...
Page #1 background image
R-840/NS-BP300
Copyright © 2009 All rights reserved.
This manual is copyrighted by YAMAHA and may not be copied or
redistributed either in print or electronically without permission.
101153
SERVICE MANUAL
IMPORTANT NOTICE
This manual has been provided for the use of authorized YAMAHA Retailers and their service personnel.
It has been assumed that basic service procedures inherent to the industry, and more speci cally YAMAHA Products, are already known
and understood by the users, and have therefore not been restated.
WARNING:
Failure to follow appropriate service and safety procedures when servicing this product may result in personal injury,
destruction of expensive components, and failure of the product to perform as speci ed. For these reasons, we advise
all YAMAHA product owners that any service required should be performed by an authorized YAMAHA Retailer or
the appointed service representative.
IMPORTANT:
The presentation or sale of this manual to any individual or rm does not constitute authorization, certi cation or
recognition of any applicable technical capabilities, or establish a principle-agent relationship of any form.
The data provided is believed to be accurate and applicable to the unit(s) indicated on the cover. The research, engineering, and service
departments of YAMAHA are continually striving to improve YAMAHA products. Modifications are, therefore, inevitable and
speci cations are subject to change without notice or obligation to retro t. Should any discrepancy appear to exist, please contact the
distributor's Service Division.
WARNING:
Static discharges can destroy expensive components. Discharge any static electricity your body may have
accumulated by grounding yourself to the ground buss in the unit (heavy gauge black wires connect to this buss).
IMPORTANT:
Turn the unit OFF during disassembly and part replacement. Recheck all work before you apply power to the unit.
CONTENTS
TO SERVICE PERSONNEL ............................................2
SYSTEM COMPOSITION ................................................3
FRONT PANELS .........................................................4–6
REAR PANELS ......................................................... 7–11
REMOTE CONTROL PANELS ..................................... 12
SPECIFICATIONS ................................................... 13–15
INTERNAL VIEW .......................................................... 16
DISASSEMBLY PROCEDURES ............................. 17–19
UPDATING FIRMWARE ..........................................20–24
SELF-DIAGNOSTIC FUNCTION ............................25–37
CONFIRMATION OF IDLING CURRENT OF AMP UNIT
....38–39
DISPLAY DATA .............................................................40
IC DATA ...................................................................41–44
PIN CONNECTION DIAGRAMS .............................45–47
BLOCK DIAGRAM ........................................................49
PRINTED CIRCUIT BOARDS .................................50–62
SCHEMATIC DIAGRAMS .......................................63–70
REPLACEMENT PARTS LIST ................................71–79
REMOTE CONTROL .....................................................80
SYSTEM CONNECTOR ..........................................81–82
'09.11
P.O.Box 1, Hamamatsu, Japan
RECEIVER/
SPEAKER PACKAGE
R-840/
NS-BP300
When accepting a repair order from the user, it is recommended to receive the R-840 and BD-940/DVD-840/CD-
640 as a set for the repair work.
• The MCR-940 consists of the R-840, BD-940 and NS-BP300.
The MCR-840 consists of the R-840, DVD-840 and NS-BP300.
The MCR-640 consists of the R-840, CD-640 and NS-BP300.
This service manual is for the R-840/NS-BP300. For service manual of the BD-940/DVD-840/CD-640, please refer
to the following publication numbers:
BD-940: 101154 / DVD-840: 101155 / CD-640: 101156
MICRO COMPONENT SYSTEM
MCR-940/MCR-840/MCR-640

Other manuals for Yamaha R-840

Question and Answer IconNeed help?

Do you have a question about the Yamaha R-840 and is the answer not in the manual?

Yamaha R-840 Specifications

General IconGeneral
Amplifier class-
Audio output channels2.1 channels
Peak power per channel130 W
Signal-to-Noise Ratio (SNR)100 dB
Total Harmonic Distortion (THD)0.04 %
Speakers connectivity typeClamp terminals
PurposeHome
Product colorSilver
Connectivity technologyWired
Weight and Dimensions IconWeight and Dimensions
Depth348 mm
Width215 mm
Height111 mm
Weight5700 g

Summary

To Service Personnel

Critical Components Information

Details components marked with 'A' that require exact replacement parts.

Leakage Current Measurement

Explains how to measure and the acceptable limit for leakage current.

Chemical Content Notice

Warns about chemicals in the product and safe handling practices.

Remote Control Panels

Specifications

R-840 Receiver Specifications

Lists technical specifications for the R-840 receiver, including audio and FM sections.

NS-BP300 Speaker Specifications

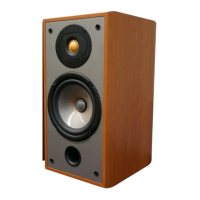
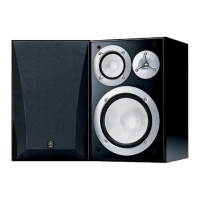
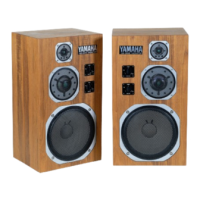
Provides technical specifications for the NS-BP300 speaker, including driver and impedance details.

Disassembly Procedures

Removal of Top Cover Unit

Step-by-step instructions for removing the top cover of the unit.

Removal of Amp Unit

Instructions for removing the amplifier unit, including PCB and rear panel disconnection.

Removal of Front Panel Unit

Guides on how to remove the front panel unit, including screw and hook details.

Updating Firmware

Required Tools for Firmware Update

Lists necessary tools and materials for firmware updates, including software and cables.

Firmware Update Connection Setup

Details the physical connection setup for the firmware update process.

Firmware Update Operation Procedure

Step-by-step guide on how to perform the firmware update using the software.

Firmware Update Operation Steps

Continues the step-by-step guide for firmware updating, covering setting baud rate and erasing.

Finalizing Firmware Update

Concludes the firmware update steps, including final checks and disconnection.

Firmware Update Preparation & Precautions

Outlines steps and precautions before and during firmware updating.

Confirming Firmware Version

Explains how to verify the firmware version and checksum after updating.

Self-Diagnostic Function

Diagnostic Menu Overview

Lists main menu items and their corresponding sub-menu functions for diagnostics.

Starting Self-Diagnostic Function

Explains how to enter the self-diagnostic mode using button combinations.

Navigating Diagnostic Menus

Explains how to navigate through the diagnostic menus using knobs and keys.

VER/DEST/SUM Menu Details

Details the sub-menus for firmware version, checksum, and DAB module version.

AD DATA CHECK - THM, VOLUME, BASS, TBL, BAL

Continues AD Data Check, detailing THM, VOLUME, BASS, TBL, and BAL detection.

AD DATA CHECK - KEY, DST

Completes AD Data Check, covering KEY and DST detection.

PROTECTION HISTORY - DSP/RST & History 1-4

Explains the DSP/RST function and History 1-4 checks.

Firmware & Display Checks

Covers VER/DEST/SUM and DISPLAY CHECK menus.

Protection Cancel Mode Diagnostics

Details how to start diagnostics with protection functions disabled.

AD DATA CHECK - PS1, PS2, DC

Details checking A/D conversion values for PS1, PS2, and DC detection.

Data & History Checks

Includes AD DATA CHECK and PROTECTION HISTORY menus.

Confirmation of Idling Current

Idling Current Measurement Procedure

Outlines the procedure for confirming idling current of the amplifier unit.

Notes on Amplifier Repair and Idling Current

Provides important notes regarding amplifier repair and temperature correction.

IC Data

Microprocessor IC101 Details

Provides pin assignments and internal block diagram for the main microprocessor.

Microprocessor Pin Function Details

Concludes microprocessor pin function details, including key and destination detection.

Pin Connection Diagrams

IC Pin Connection Diagrams

Shows pin connection diagrams for various integrated circuits used in the unit.

Block Diagram

Printed Circuit Boards

Schematic Diagrams

FUNCTION 1/3 Schematic

Part 1 of the schematic diagram for the FUNCTION section.

FUNCTION 2/3 Schematic

Part 2 of the schematic diagram for the FUNCTION section.

FUNCTION 3/3 Schematic

Part 3 of the schematic diagram for the FUNCTION section.

MAIN 1/4 Schematic

Part 1 of the schematic diagram for the MAIN section.

MAIN 2/4 Schematic

Part 2 of the schematic diagram for the MAIN section.

MAIN 3/4 Schematic

Part 3 of the schematic diagram for the MAIN section.

MAIN 4/4 Schematic

Part 4 of the schematic diagram for the MAIN section.

DAB Schematic

Schematic diagram for the DAB module.

Key ICs in FUNCTION Section

Details on significant ICs like LC72725KM, NJM2752RB0, NJW1194V, etc.

Replacement Parts List

P.C.B. FUNCTION Component Details

P.C.B. MAIN Component Details

Overall Assembly (R-840)

Overall Assembly (NS-BP300)

Remote Control Key Layout

System Connector

System Operation Example

Related product manuals