English
11
RM-WAP-16 RM-WAP-8 Owner’s Manual
This unit can be mounted on a wall or ceiling by using the mounting bracket.
Prepare the following.
• This unit
• Mounting bracket (included)
• Commercially available screws × 4
• Commercially available safety wire
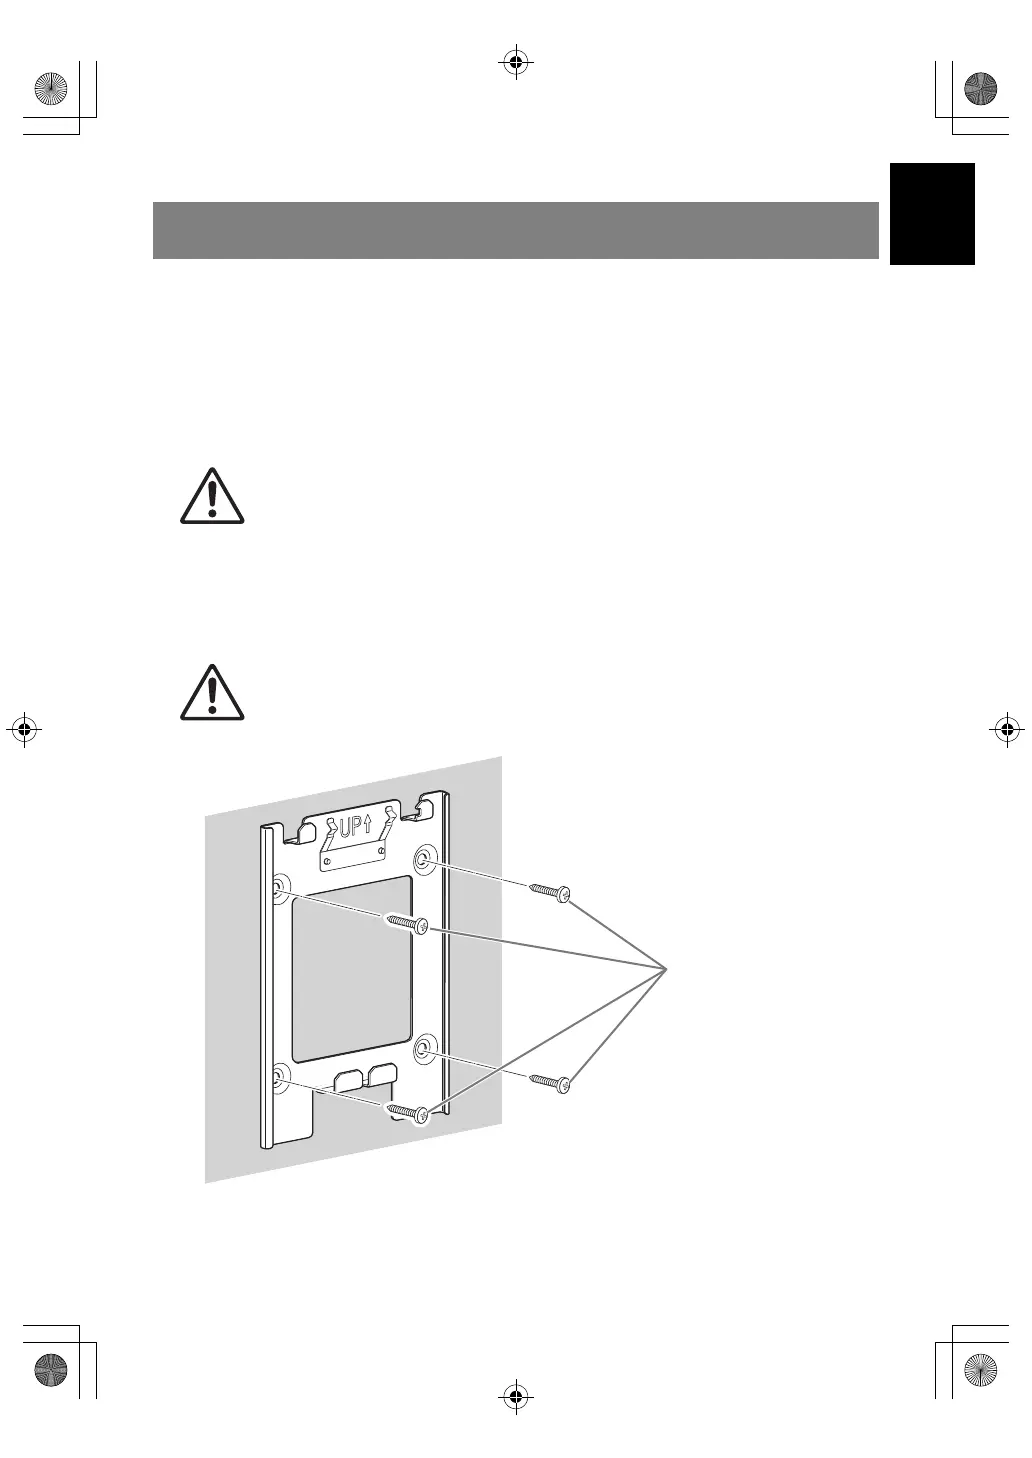
1. Attach the mounting bracket to the wall or ceiling with four commercially
available screws.
The diameter of the screw holes is five mm.
INSTALLING ON A WALL OR CEILING
CAUTION
: Be sure to use screws and safety wires that are appropriate for the
material of the wall or ceiling.
Using inappropriate hardware may cause the unit or mounting bracket
to fall, resulting in injuries or malfunctions.
CAUTION
: When attaching to a wall, make sure that the side marked “UP” is at
the top.
If it is at the bottom, the unit may fall, causing injuries or malfunctions.
RM-WAP-16_RM-WAP-8_om_7multi_A0.book 11 ページ 2021年2月5日 金曜日 午後3時28分