Do you have a question about the Yamaha RX-V385 and is the answer not in the manual?
Details on replacing components with identical specifications for safety and performance.
Procedure for verifying insulation and measuring leakage current on 120V models.
Covers rated power, dynamic power, damping factor, input sensitivity, and frequency response.
Details video signal types, levels, noise ratio, and monitor output frequency response.
Covers FM tuning range, sensitivity, signal-to-noise ratio, and harmonic distortion.
Specifies the AM tuning frequency range and antenna type.
Details power supply voltage, consumption, physical dimensions, and available finishes.
Covers handling high voltages and discharging capacitors before repair work.
Steps for removing the top cover, including screw and hook details.
Steps for removing the front panel unit, including screws and hooks.
Steps for removing the Bluetooth module and reusing its label.
Steps for removing the DIGITAL P.C.B., including connectors.
Steps for removing the AMP unit, including screws and connectors.
Summarizes checking firmware version and checksum using the self-diagnostic function.
Summarizes initializing the backup IC (EEPROM) after firmware update.
Covers necessary tools and steps for preparing the firmware on a USB device.
Details the steps for performing the firmware update via USB.
Procedure to activate the self-diagnostic mode by pressing specific keys.
Procedure to start diagnostics with protection functions disabled.
Procedure to exit the diagnostic mode, including memory preservation settings.
Describes display messages upon starting or exiting diagnostics based on power state.
Explains what happens when protection activates and its display messages.
Details history logging for excess current protection and its causes.
Explains protection triggered by abnormal DC output at speaker terminals.
Explains protection triggered by abnormal voltage in the power supply section.
Explains protection triggered by excessive heatsink or bridge diode temperature.
Explains protection triggered by abnormal USB power supply voltage.
Explains protection triggered by speaker terminal shorts.
Explains how to navigate the main and sub-menus of the diagnostic function.
Lists functions like power control, volume, muting, and input selection usable during diagnostics.
Describes the default settings for master volume, input, and menu state during diagnostics.
Checks audio signal route via DSP, including DSP THROUGH and INVALID ITEM.
Checks audio signal route in DIRECT mode for VH and VL settings.
Checks audio signal route for Center, Surround, and Subwoofer channels.
Checks audio signal route for HDMI IN/OUT, ARC, and eARC connections.
Checks speaker output routes, BI-AMP, and FULL MUTE functions.
Indicates that this item is not used for service.
Checks audio signal input to the YPAO MIC jack.
Checks the route of digital audio signal input to various jacks.
Outputs test noise generated by the built-in noise generator.
Indicates that this item is not used for service.
Checks the operation of the FL display, including segment conditions and shorts.
Checks the audio signal route from the USB storage device.
Indicates that this item is not used for service.
Indicates that this item is not used for service.
Indicates that this item is not used for service.
Displays Bluetooth information such as version, address, and line status.
Checks communication and bus line connections on the DIGITAL P.C.B.
Checks I2C, DIR BUS, and DSP BUS connections for communication.
Checks EEPROM reading, CEC, and Bluetooth module communication.
Indicates that this item is not used for service.
Indicates that this item is not used for service.
Checks the analog video signal route.
Checks the mute status of the video signal.
Checks the digital video signal route, including HDMI repeat and OSD output.
Indicates that this item is not used for service.
Description of invalid items for digital video check.
Displays operating time and frequency of the unit.
Covers power amp B, output level, power off time-out, microprocessor operation, reset, and protection lock.
Displays main zone volume and temperature readings.
Reports errors occurring in EEPROM backup contents.
Displays the history of key operations performed on the unit.
Displays the history of protection function activations.
Displays AD conversion values for panel keys and protection functions.
Covers THM temperature, Output Level, Limiter Control, and USB voltage checks.
Covers invalid items and panel key detection data.
Displays the history of protection function activations and allows clearing.
Indicates that this item is not used for service.
Indicates that this item is not used for service.
Displays model name, destination, and serial number.
Manages backup IC initialization, allowing reservation or inhibition.
Displays firmware version and checksums for microprocessor, flash ROM, and DSP.
Details voltage adjustment steps for power amplifier output across terminals.
Provides pin assignments for various ICs and connectors.
Defines grid assignments for segments on the display panel.
Describes the MN864788A IC, functioning as HDMI port processors.
Describes the D80YK113DPTP400 IC, functioning as a decoder/post processor.
Describes the TMPM462F15FG IC, functioning as a microprocessor.
Visual representation of the digital section's components and connections.
Visual representation of the power supply section's components and connections.
Illustrates the wiring connections for the overall assembly of the unit.
Shows the component layout for the DIGITAL PCB (Side A).
Shows the component layout for the DIGITAL PCB (Side B).
Shows the component layout for the OPERATION (1) PCB (Side A).
Shows the component layout for the OPERATION (5) PCB (Side A).
Shows the component layout for the OPERATION (13) PCB (Side A).
Shows the component layout for the OPERATION (1) PCB (Side B).
Shows the component layout for the MAIN (1) PCB (Side A).
Shows the component layout for the MAIN (1) PCB (Side B).
Shows the component layout for the MAIN (2) PCB (Side A).
Shows the component layout for the MAIN (3) PCB (Side A).
Shows the component layout for the MAIN (2) PCB (Side B).
Shows the component layout for the MAIN (3) PCB (Side B).
Diagrams showing pin assignments for various ICs.
Diagrams showing pin assignments for diodes and transistors.
Circuit diagram for the DIGITAL section, covering HDMI and ARC.
Circuit diagram for the DIGITAL section, detailing microprocessor and protection signals.
Circuit diagram for the DIGITAL section, detailing DSP and audio DAC connections.
Circuit diagram for the DIGITAL section, showing DACs and Bluetooth/USB interfaces.
Circuit diagram showing power supply distribution for various digital components.
Circuit diagram detailing USB and Bluetooth module connections.
Circuit diagram for the operation section, showing power and remote control circuits.
Circuit diagram for the operation section, detailing power supply and analog circuits.
Circuit diagram for the main section, showing analog input and speaker output stages.
Circuit diagram for the main section, detailing power supply and protection circuits.
Circuit diagram for the main section, showing various analog and digital interfaces.
List of replacement parts for the DIGITAL section, including capacitors and connectors.
List of replacement parts for the DIGITAL section, including capacitors and connectors.
List of replacement parts for the DIGITAL section, including capacitors and diodes.
List of replacement parts for the DIGITAL section, including capacitors, diodes, and ICs.
List of replacement parts for the DIGITAL section, including ICs and resistors.
List of replacement parts for the DIGITAL section, including resistors.
List of replacement parts for the DIGITAL section, including resistors.
List of replacement parts for the DIGITAL section, including resistors.
List of replacement parts for the OPERATION section, including connectors, capacitors, and diodes.
List of replacement parts for the OPERATION section, including diodes and fuses.
List of replacement parts for the OPERATION section, including transistors and resistors.
List of replacement parts for the OPERATION section, including resistors.
List of replacement parts for the MAIN section, including transistors and connectors.
List of replacement parts for the MAIN section, including capacitors and diodes.
List of replacement parts for the MAIN section, including transistors and ICs.
List of replacement parts for the MAIN section, including transistors and resistors.
List of replacement parts for the MAIN section, including transistors and resistors.
List of replacement parts for the MAIN section, including resistors.
List of replacement parts for the MAIN section, including transistors and connectors.
Diagrams showing the circuit and component layout of the remote control.
Describes the remote control's button layout and corresponding key codes.
| Display | - |
|---|---|
| HDCP version | 2.2 |
| Apple docking | No |
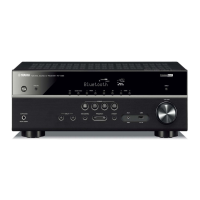
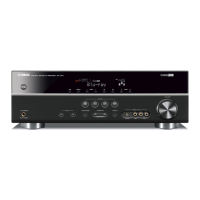
| Product color | Titanium |
| Audio decoders | DTS-HD Master Audio, Dolby Digital Plus, Dolby TrueHD |
| Volume control | Rotary |
| Bluetooth range | 10 m |
| DSP programs quantity | 17 |
| Digital Signal Processing (DSP) | Yes |
| Receiver type | Surround |
| Audio output channels | 5.1 channels |
| Dynamic power per channel (2 Ohm) | 150 W |
| Dynamic power per channel (4 Ohm) | 130 W |
| Dynamic power per channel (6 Ohm) | 110 W |
| Power output per channel (1KHz@6 Ohm) | 100 W |
| Power output per channel (20-20KHz@8 Ohm) | - W |
| Audio formats supported | AAC, MP3, WAV, WMA |
| Video formats supported | MPEG4 |
| Supported video modes | 2160p |
| Number of HDMI outputs | 1 |
| HDMI in | 4 |
| Composite video in | 3 |
| Digital audio coaxial in | 2 |
| Bluetooth version | 2.1+EDR |
| Bluetooth profiles | A2DP |
| Supported radio bands | AM, FM |
| Speakers connectivity type | Clamp terminals |
| Depth | 315 mm |
|---|---|
| Width | 435 mm |
| Height | 161 mm |
| Weight | 7700 g |