ELECTRICAL COMPONENTS
8-144
EAS29040
CHECKING THE FUEL LEVEL WARNING
LIGHT
This model is equipped with a self-diagnosis de-
vice for the fuel level detection circuit.
1. Check:
• Fuel level warning light “1”
(Turn the main switch to “ON”.)
Warning light comes on for a few seconds,
then goes off → Warning light is OK.
Warning light does not come on → Replace
the meter assembly 1.
Warning light flashes eight times, then goes
off for three seconds in a repeated cycle (mal-
function detected in fuel sender or thermistor)
→ Replace the fuel pump assembly.
EAS29050
CHECKING THE OIL LEVEL WARNING
LIGHT
This model is equipped with a self-diagnosis de-
vice for the oil level detection circuit.
1. Check:
• Oil level warning light “1”
(Turn the main switch to “ON”.)
Warning light comes on for a few seconds,
then goes off → Warning light is OK.
Warning light does not come on → Replace
the meter assembly 1.
Warning light flashes ten times, then goes off
for 2.5 seconds in a repeated cycle (malfunc-
tion detected in oil level switch) → Replace
the oil level switch.
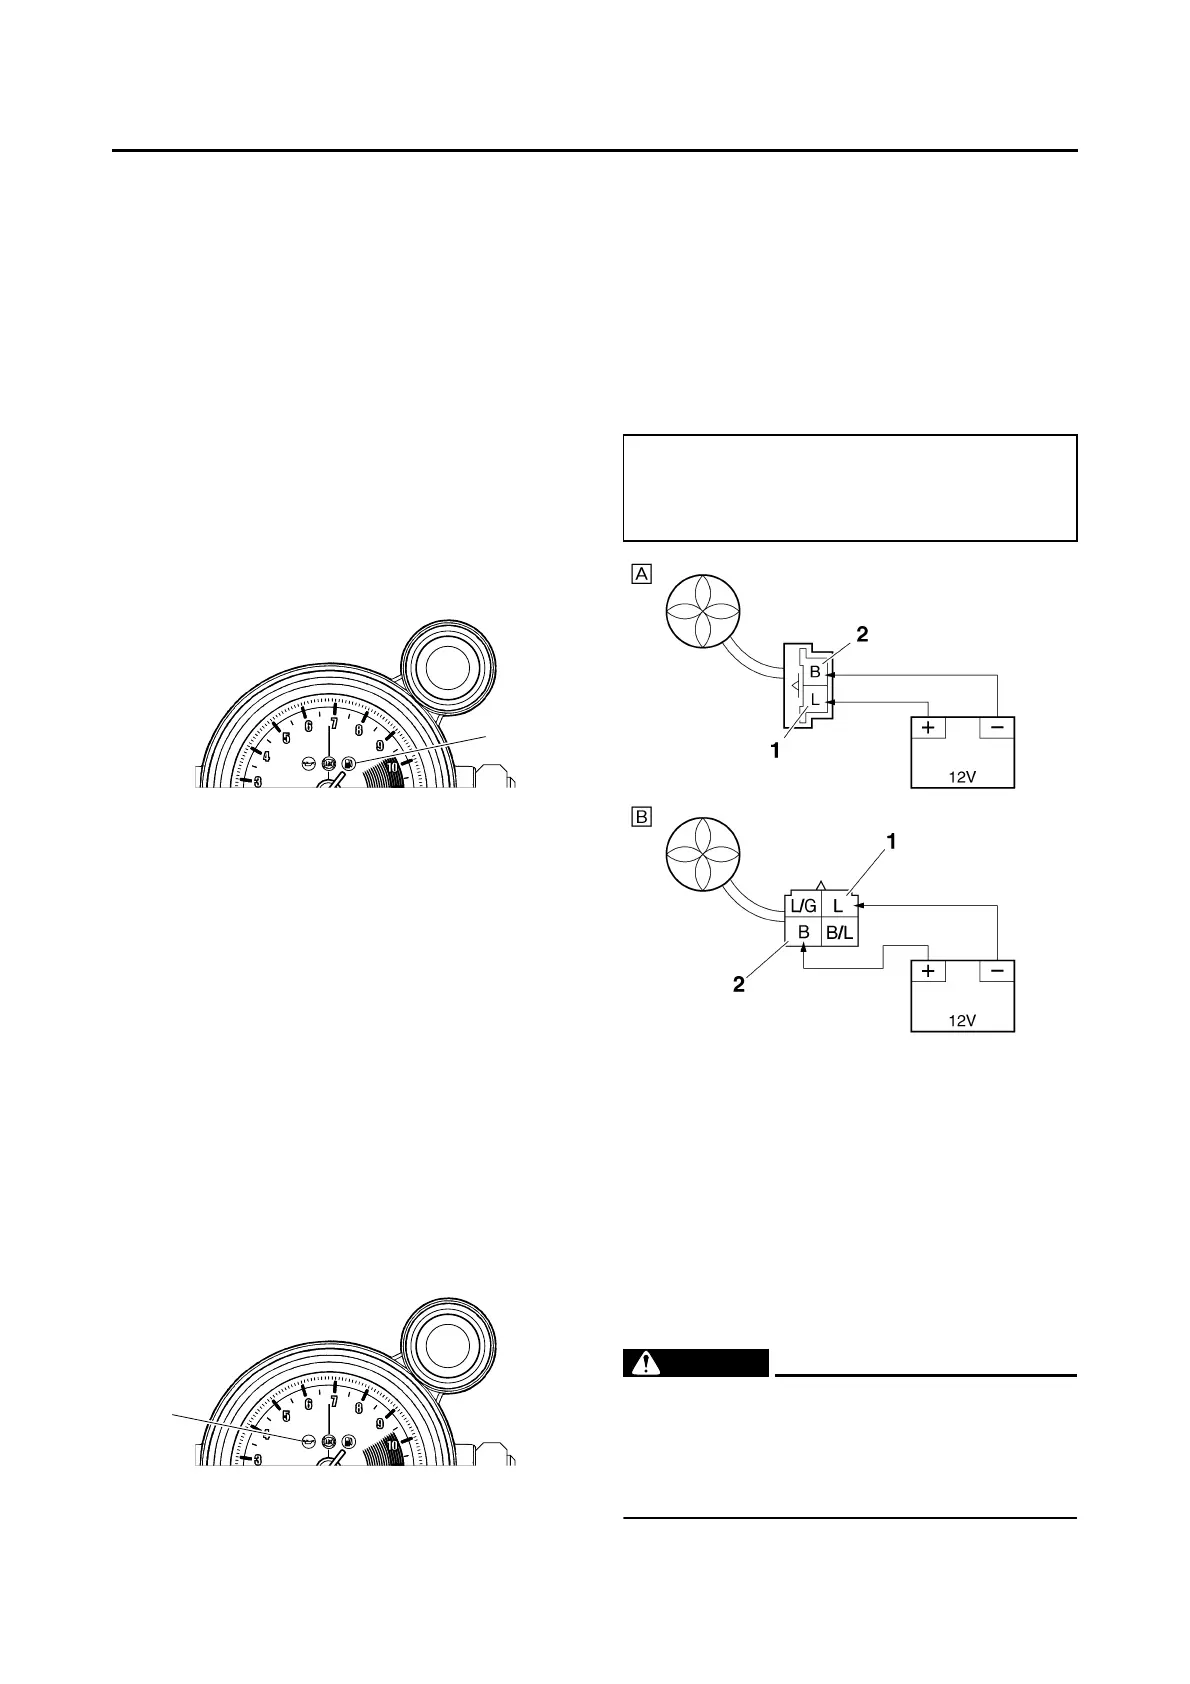
EAS28250
CHECKING THE RADIATOR FAN MOTORS
The following procedure applies to both of the
radiator fan motors.
1. Check:
• Radiator fan motor
Faulty/rough movement → Replace.
▼▼▼▼▼▼▼▼▼ ▼ ▼▼▼▼ ▼ ▼▼▼▼ ▼ ▼▼▼▼ ▼ ▼▼▼▼ ▼▼▼
a. Disconnect the radiator fan motor coupler
from the wire harness.
b. Connect the battery (DC 12 V) as shown.
c. Measure the radiator fan motor movement.
▲▲▲▲▲▲▲▲▲ ▲ ▲▲▲▲ ▲ ▲▲▲▲ ▲ ▲▲▲▲ ▲ ▲▲▲▲ ▲▲▲
EAS28260
CHECKING THE COOLANT TEMPERATURE
SENSOR
1. Remove:
• Coolant temperature sensor
Refer to “CYLINDER HEADS” on page 5-26.
WARNING
EWA14130
• Handle the coolant temperature sensor
with special care.
• Never subject the coolant temperature sen-
sor to strong shocks. If the coolant temper-
ature sensor is dropped, replace it.
1
1
• Positive battery terminal →
blue “1”
• Negative battery terminal →
black “2”
A. Sub radiator fan motor
B. Main radiator fan motor

 Loading...