REAR CONSTANT VELOCITY SHAFT ASSEMBLIES, FINAL
DRIVE ASSEMBLY AND REAR DRIVE SHAFT
8-26
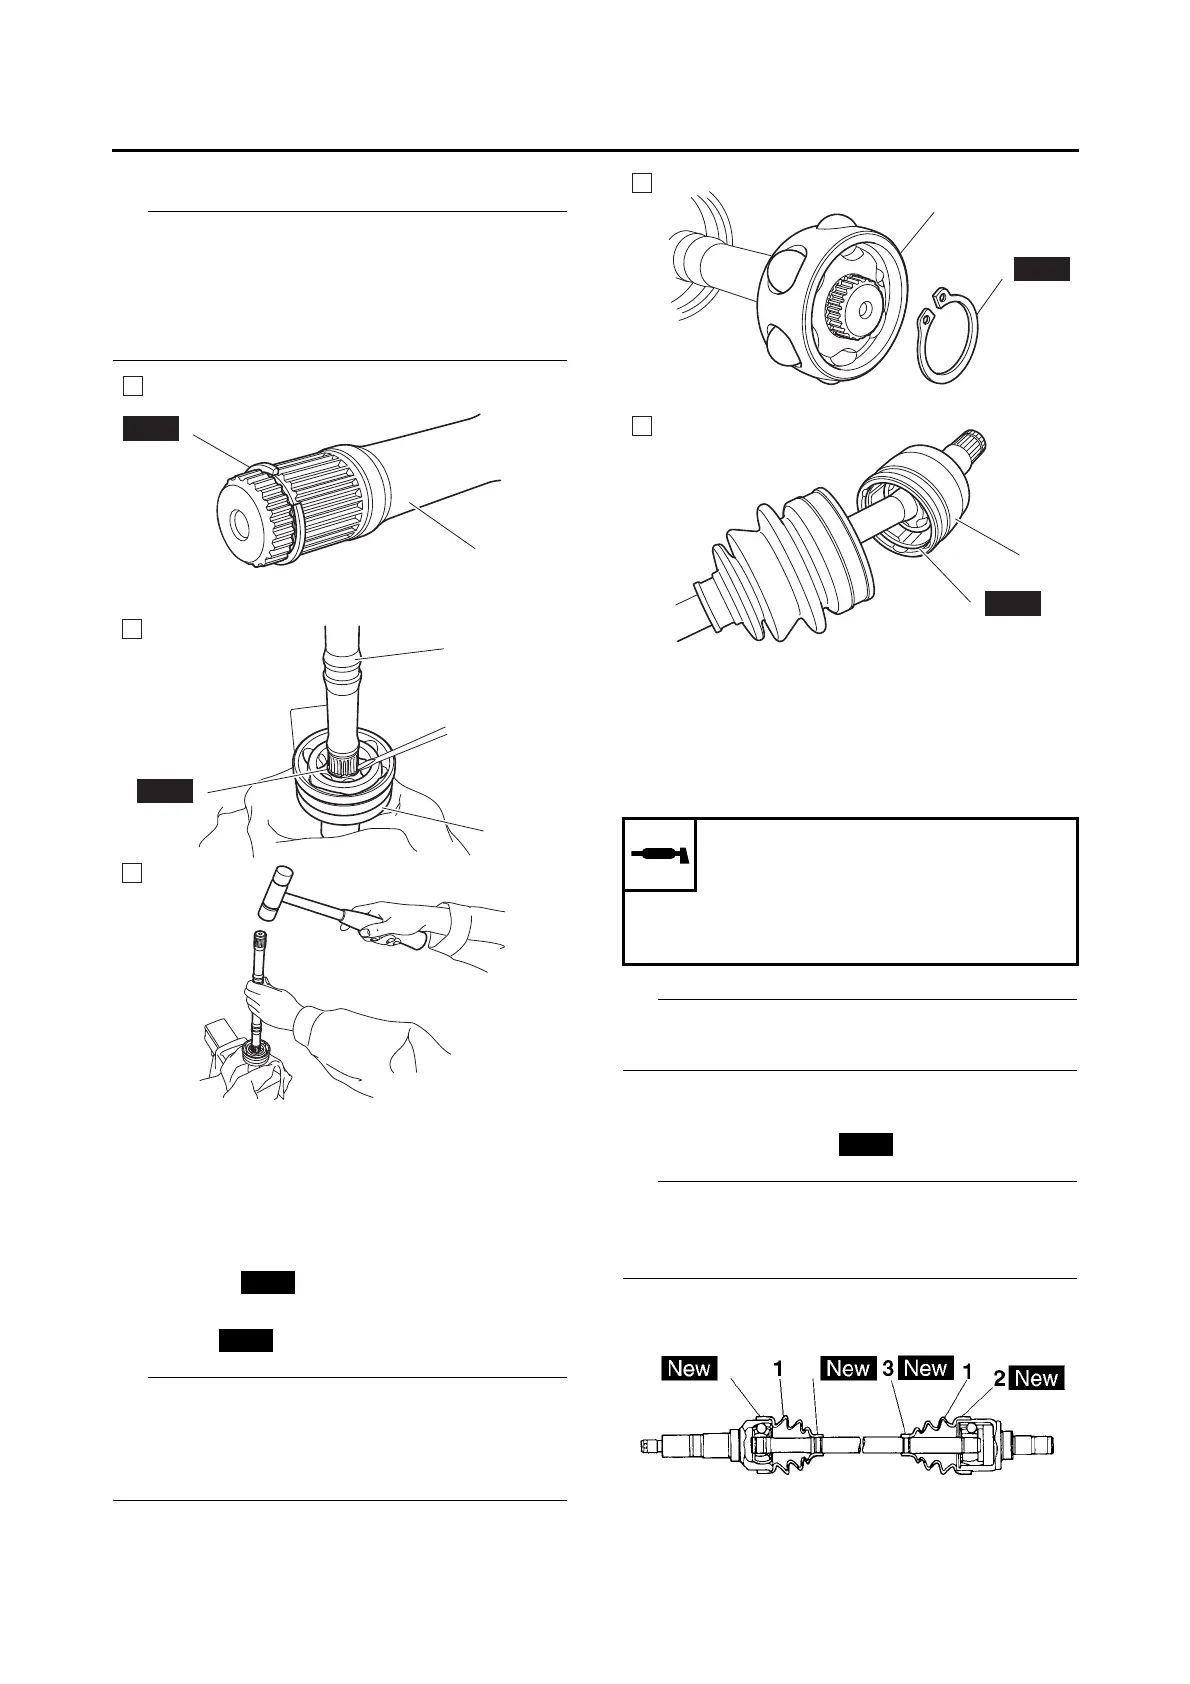
b. Install the constant velocity joint.
• Install the clip into the groove in the constant
velocity shaft as shown.
• Secure the constant velocity joint in a vise, and
then fit the constant velocity shaft into the con-
stant velocity joint using a soft-face hammer.
▲▲▲▲ ▲ ▲▲▲▲▲▲▲▲▲ ▲ ▲▲▲▲ ▲ ▲▲▲▲ ▲ ▲▲▲▲▲▲▲
2. Install:
• Dust boot
• Ball bearing “1”
• Circlip “2”
• Double offset joint “3”
• Clip “4”
• Securely install the circlip into the groove in the
constant velocity shaft.
• Securely install the clip into the groove in the
double offset joint.
3. Apply:
• Molybdenum disulfide grease
(into the double offset joint, constant velocity
joint, and dust boots)
Molybdenum disulfide grease is included in the
repair kit.
4. Install:
• Dust boots “1”
• Boot bands “2”, “3”
The dust boots should be fastened with the boot
bands “2” and “3” at the grooves in the constant
velocity shaft.
A. Wheel side
B. Final drive side
Molybdenum disulfide grease
60–80 g (2.1–2.8 oz) per dust
boot (wheel side)
55–75 g (1.9–2.6 oz) per dust
boot (final drive side)



 To Next Page