REAR CONSTANT VELOCITY SHAFT ASSEMBLIES, FINAL
DRIVE ASSEMBLY AND REAR DRIVE SHAFT
8-25
EBS30253
DISASSEMBLING THE REAR CONSTANT
VELOCITY SHAFT ASSEMBLIES
The following procedure applies to both of the
rear constant velocity shaft assemblies.
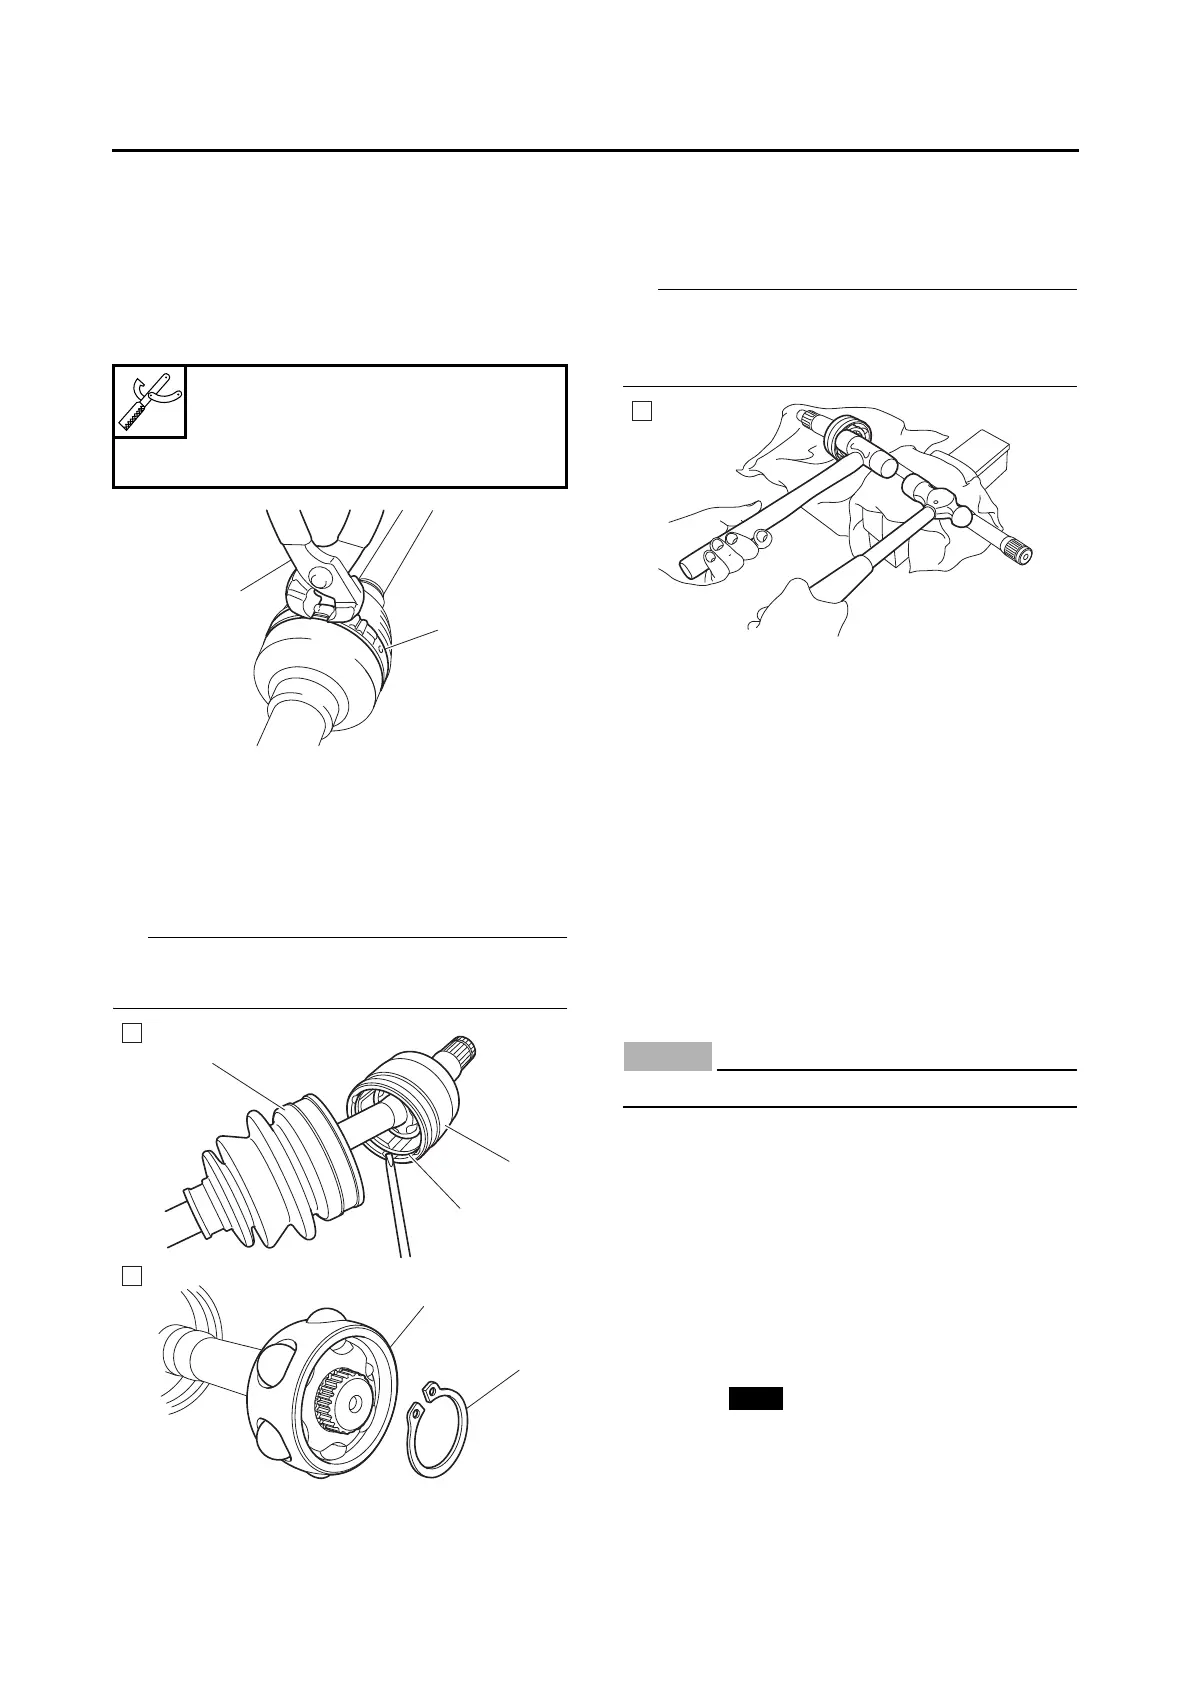
1. Remove:
• Boot bands “1”
Use the boot band installation tool “2”.
2. Remove:
• Clip “1”
• Double offset joint “2”
• Circlip “3”
• Ball bearing “4”
• Dust boot “5”
Before removing the clip, slide the dust boot
away from the double offset joint.
3. Remove:
• Dust boot
• Constant velocity joint
• Clip
Secure the constant velocity shaft in a vise, and
then remove the constant velocity joint using
hammers.
EBS30254
CHECKING THE REAR CONSTANT
VELOCITY SHAFT ASSEMBLIES
The following procedure applies to both of the
rear constant velocity shaft assemblies.
1. Check:
• Double offset joint splines
• Constant velocity joint splines
• Constant velocity shaft splines
Wear/damage → Replace.
2. Check:
• Dust boots
Cracks/damage → Replace.
ECB01590
Always use a new boot band.
3. Check:
• Balls and ball races
• Inner surface of double offset joint
Pitting/wear/damage → Replace.
EBS30255
ASSEMBLING THE REAR CONSTANT
VELOCITY SHAFT ASSEMBLIES
The following procedure applies to both of the
rear constant velocity shaft assemblies.
1. Install:
• Clip “1”
• Constant velocity joint “2”
• Constant velocity shaft “3”
• Dust boot
▼▼▼▼ ▼ ▼▼▼▼▼▼▼▼▼ ▼ ▼▼▼▼ ▼ ▼▼▼▼ ▼ ▼▼▼▼ ▼▼▼
a. Install a new clip.
Boots band installation tool
90890-01526
Boots band installation tool
YM-01526
A. Final drive side
B. Wheel side