Do you have a question about the Yamaha XJR1300(L) 99 and is the answer not in the manual?
Describes how to find the Vehicle Identification Number (VIN) and model code on the motorcycle.
Covers general preparation, precautions, and specific instructions for disassembly and assembly.
Procedures for checking electrical leads, couplers, and connectors for optimal function.
Lists and illustrates specialized tools required for maintenance and repair procedures.
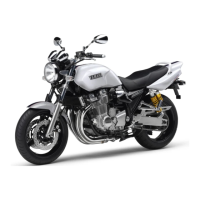
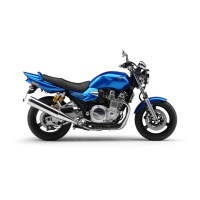
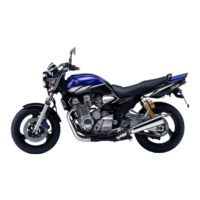
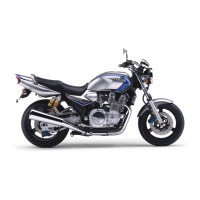
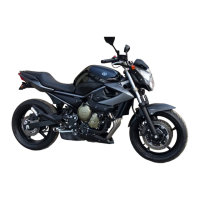
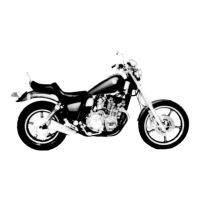
Provides basic dimensions, engine type, displacement, and fuel capacity of the XJR1300.
Details wear limits, clearances, and tolerances for engine, chassis, and electrical components.
Converts metric unit measurements to their imperial unit equivalents for easy reference.
Specifies standard torque values for common fasteners used throughout the motorcycle.
Identifies lubrication points for engine and chassis parts and recommended lubricants.
Illustrates the oil flow paths within the engine for various components.
Illustrates the proper routing for electrical wiring harnesses and cables on the motorcycle.
Overview of recommended inspections and adjustments for ensuring reliable operation and longevity.
Outlines recommended service intervals and lubrication tasks based on mileage or time.
Details the procedure for removing and installing the seat, side covers, and fuel tank.
Covers periodic checks and adjustments for engine components like valves and carburetors.
Details periodic checks and adjustments for chassis components like brakes and forks.
Covers periodic checks and troubleshooting for battery, ignition, and lighting systems.
Procedures for removing engine-related components and the engine assembly itself.
Details the removal, checking, and installation procedures for the camshafts and related parts.
Covers disassembly, checking, and assembly of the cylinder head and its components.
Procedures for checking and replacing valves, valve guides, and valve springs.
Details checking and installing the cylinders, pistons, and piston rings.
Covers inspection, disassembly, and assembly of the clutch and its related components.
Procedures for checking and assembling the oil pump and its related parts.
Covers removal, checking, and installation of the shift shaft and stopper lever.
Details the removal and installation of the timing plate and pickup coil assembly.
Procedures for removing, checking, and installing the oil pan and oil strainer.
Details disassembly, checking, and assembly of the crankcase halves and crankshaft bearings.
Covers checking the starter clutch components and installation procedures.
Details checking and installing the crankshaft, connecting rods, and bearings.
Covers disassembly and installation of the transmission, shift forks, and drum assembly.
Procedures for removing, disassembling, and assembling the carburetors.
Explains how to check and adjust the fuel level in the carburetor float chambers.
Details the procedure for checking and adjusting the throttle position sensor (TPS).
Covers inspection and operation of the fuel cock to ensure proper fuel flow.
Covers removal, checking, and installation of the front wheel and brake discs.
Procedures for maintenance of the rear wheel, brake disc, and sprocket assembly.
Details replacement of brake pads, master cylinders, and calipers for both systems.
Covers removal, disassembly, checking, and assembly of the front fork legs.
Procedures for removing, checking, and installing the handlebar and related controls.
Covers disassembly, checking, and installation of the steering head bearings and components.
Details maintenance of the rear suspension, swingarm, and drive chain.
Overview and illustration of the motorcycle's electrical system components.
Checks for switch continuity, damage, wear, and proper connections.
Procedures for checking the condition and continuity of bulbs and their sockets.
Circuit diagram and troubleshooting procedures for the ignition system.
Circuit diagram and troubleshooting procedures for the electric starting system.
Circuit diagram and troubleshooting procedures for the charging system.
Circuit diagram and troubleshooting procedures for lighting components.
Circuit diagram and troubleshooting procedures for signaling components.
Explains the motorcycle's self-diagnosis system for specific electrical circuits.
Lists common starting issues and their potential causes related to engine, fuel, and electrical systems.
Addresses issues causing incorrect engine idling speed and related component checks.
Discusses issues affecting engine performance at medium and high speeds.
Covers problems related to gear shifting, including difficulty and pedal movement.
Lists issues related to clutch slipping, dragging, and assembly.
Discusses causes and solutions for engine overheating related to various systems.
Troubleshooting steps for issues related to braking system performance.
Addresses problems with the front fork legs, such as oil leaks and damage.
Covers issues related to unstable motorcycle handling, including steering and suspension.
Troubleshooting for failures in headlights, taillights, turn signals, and horn.
| Year | 1999 |
|---|---|
| Manufacturer | Yamaha |
| Model | XJR1300(L) |
| Compression Ratio | 9.7:1 |
| Starter | Electric |
| Transmission | 5-speed |
| Final Drive | Chain |
| Engine Type | Air-cooled, 4-stroke, DOHC, 4-cylinder |
| Displacement | 1251 cc |
| Bore x Stroke | 79.0 mm x 63.8 mm |
| Maximum Power | 98 hp (72 kW) @ 8000 rpm |
| Maximum Torque | 108 Nm @ 6000 rpm |
| Fuel System | 4x Mikuni BD36 carburetors |
| Ignition | TCI |
| Frame | Steel, double cradle |
| Rear Suspension | Swingarm with dual shocks, adjustable preload |
| Front Brake | Dual 298 mm discs, 4-piston calipers |
| Rear Brake | 267 mm disc, 2-piston caliper |
| Front Tire | 120/70 ZR17 |
| Rear Tire | 180/55 ZR17 |
| Fuel Capacity | 21 liters |