- 12 -
3. Assembly of the cutting head and
Pole
f. Take out the Pole Assembly and the Cutting
Head Assembly.
g. Unscrew the Shaft Coupling 3(2) by anti- clock-
wise direction and pull out the prong-less side
of Extension Pole 4 until the desired length and
screw by clockwise to lock the Shaft Coupling
3(2).
NOTE: the extended pole 4 should be longer than
15cm.
h. Unscrew the Shaft Coupling 3(1) on Cutting
Head by anti-clockwise direction on handle,
Make the pin on Aluminum Pole align with the
hole on the Cutting Head for next step.
i. Plug the extended Aluminum Pole into the Cut-
ting Head. Now the pin has been locked in the
hole of handle and Cutting Head won’t come
j. Screw tighten the shaft coupling 3(1) by clock-
wise direction. At this step, the connection be-
4. Cutting Operation:
a. Unscrew the Shaft Coupling 3(2) & 3(3) to pull
out the Extension Pole to desired length for prop-
er cutting height. The machine is designed to
maximum cut 9’2” height of branches.
b. The tool is design to allow 3 angle of cutting,
-30degree to +30degree. Adjust the cutting angle
to suit cutting purpose.
c. Press the Cutting Angle Adjusting Knob(2) to set
the angle for cutting. (item 1) tensioning device
clockwise to increase the tension and anticlock-
wise to loosen the tension.
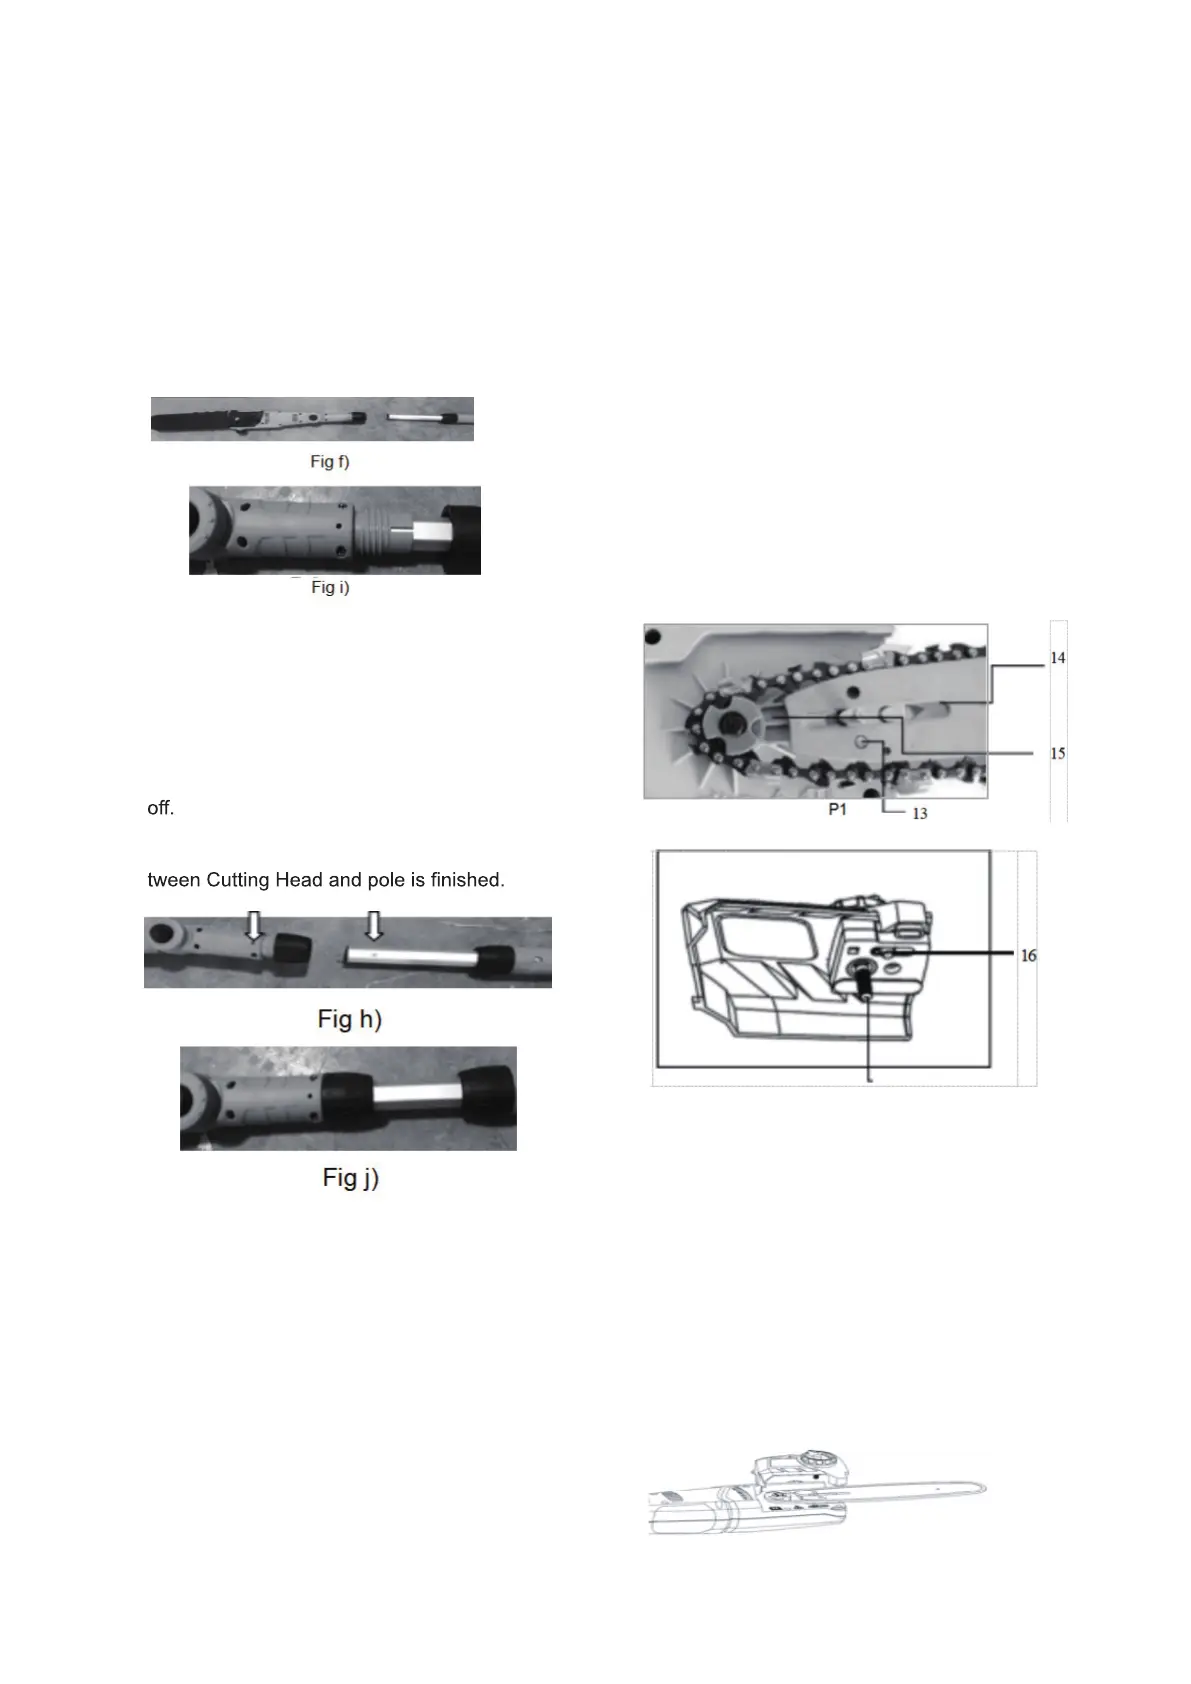
5. Assembling the saw bar and saw
chain
a. Loosen the fastening knob (12) on the chain
wheel guard (11) and remove chain wheel
guard.
b. Place Saw Chain (9) on the guide bar (10) with
the guide groove (14) (P1)
c. Place the saw chain (9) around the chain wheel
(15). Heed the assembly direction.
d. Place the guide bar (10) around the guide
groove(14)) i) Attach the chain wheel guard
(11).
e. Tighten the fastening knob (12) only slightly
f. Hole (13) on the guide bar is the holder for chain
tensioning pin( 16).
g. Thread (17) is the holder for bar fastening
knob(12)
h. Ensure that chain tensioning pin (16) is posi-
tioned in hole (13) on the bar. The pin must be
completely inserted into the hole.
6. Tensioning the saw chain
a. Turn the guide bar fastening knob (12) an-
ti-clockwise slightly to loosen the the guide bar.
b. Set the tension of saw chain using chain ten-
sioning ring (2). Turn this quick tensioning device
anticlockwise to increase the tension and clock-
wise to loosen the tension.
c. Tighten the fastening knob(12) to tighten the
guide bar. Where saw chain has been newly
tensioned, re-adjust the chain tension after short
period in operation. Check the chain tension
before each use of the Pole Saw.