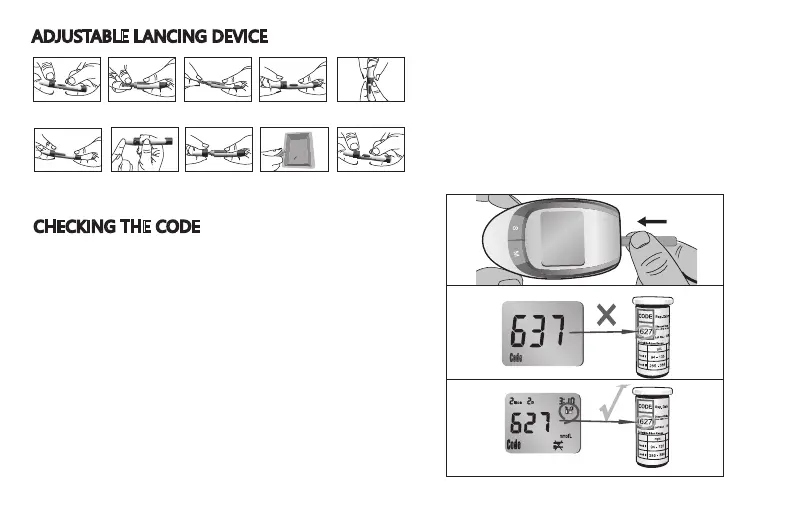
CHECKING THE CODE
Before you perform your first blood glucose
test or every time you open a new box of
test strips, you need to verify that the meter
“matches” the strips.
1. Insert the test strip into the meter in the
direction of the arrows. The meter turns
on and beeps. The code number appears
briefly.
2. Make sure the code number on the
display matches the code number on the
test strip container.
If you miss seeing the code number,
remove the test strip and reinsert it into the
meter.
If the two numbers match you may begin
blood testing.
If the two numbers do not match, please
contact us or your local distributor.
ADJUSTABLE LANCING DEVICE
1.Remove the depth
adjustment cap.
8.Carefully remove off the
adjustment cap.
9.Push forward the exit button
to discard the lancet in a
puncture resistant container.
7.Hold the device firmly
against the side of your finger.
Press the release button.
6.Pull back the cocking
control until it makes a click,
then release. If it does not
click, the device may have
been cocked when you
inserted the lancet.
2.Insert a lancet into the
lancet holder and push
down until it is fully seated.
3.Twist off the protective disk
until it separates from the
lancet.
4.Replace the depth
adjustment cap.
5.Set the puncture depth
to the desired number.
Note: the larger the number
setting the deeper the puncture.
10.Replace the adjustment
cap again.
8
 Loading...