Before you begin, to avoid personal injury, it is HIGHLY
recommended that at TWO people are available to install this kit.
Items included in kit:
• (2) Stainless Steel Hinge Shims
• (4) Stainless Steel Flat Head Phillips Screws, #10 x 3/4” Long
• (2) Seal Strip, 1/2” wide x 29-1/2” long
• (2) Seal Strip, 1/2” wide x 21-1/2” long
Items required for installation:
• Food Safe Citrus-Based Degreaser/Cleaner
• Mineral Spirits
• Denatured Alcohol
• Clean Rags
• #2 Phillips Screwdriver
• 3/8” Box Wrench or Socket Wrench
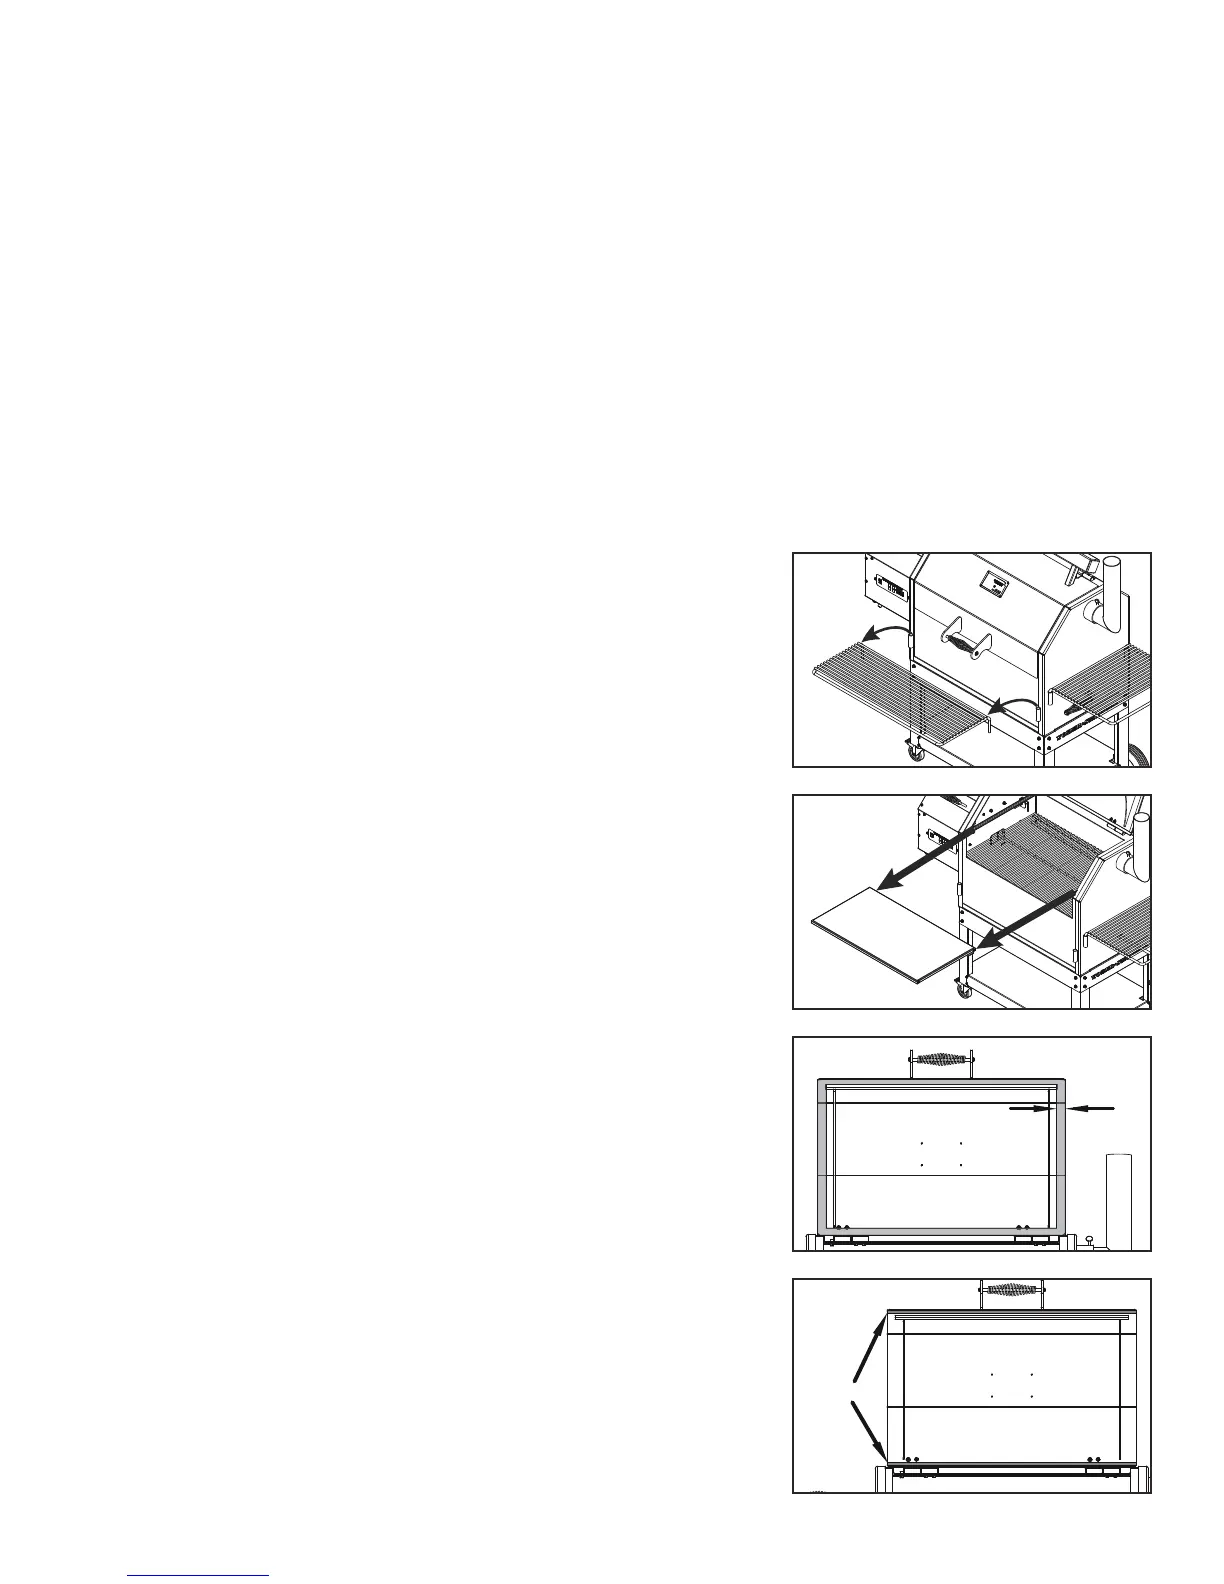
Step 1 – To ease the process, remove the front shelf from the
front of the smoker.
Step 2 – Open Lid and remove the Second Shelf.
Step 3 – Using Clean Rags and Food Safe Citrus Based
Degreaser/Cleaner, clean inside of lid. Minimum of 1” from edge,
as shown. Follow up cleaning with Mineral Spirits and then
Denatured Alcohol. This will provide a clean surface for the seal
to adhere to.
Note: Failure to properly clean surface will cause adhesive on
seal to fail.
Step 4 – Find the 1/2” wide x 29-1/2” long Seal Strips, and
adhere (1) along the top and (1) along the bottom of lid, as
shown.
Note: On YS480 Models, install these and trim to length