7
Yoder YS 640
Smoker Assembly
Smoker Arrival
Your Yoder Smoker will arrive on a pallet wrapped and held on with bands. Cut the
bands and remove the plastic wrap and foam from the smoker. Remove the smoker
from the pallet. It is recommended that two people remove the Yoder from the pallet
due to its size and weight. Open the hopper lid and remove the grease bucket that
contains the power cord and a spare fuse and set aside. Open the cooking chamber
and remove all of the wrapped components. There will be a front shelf, a side shelf, two
cooking grates, a heat diuser plate, burn grate, and smoke stack.
NOTE: If a second shelf and a bag of pellets were ordered, they will be in the cooking
chamber as well.
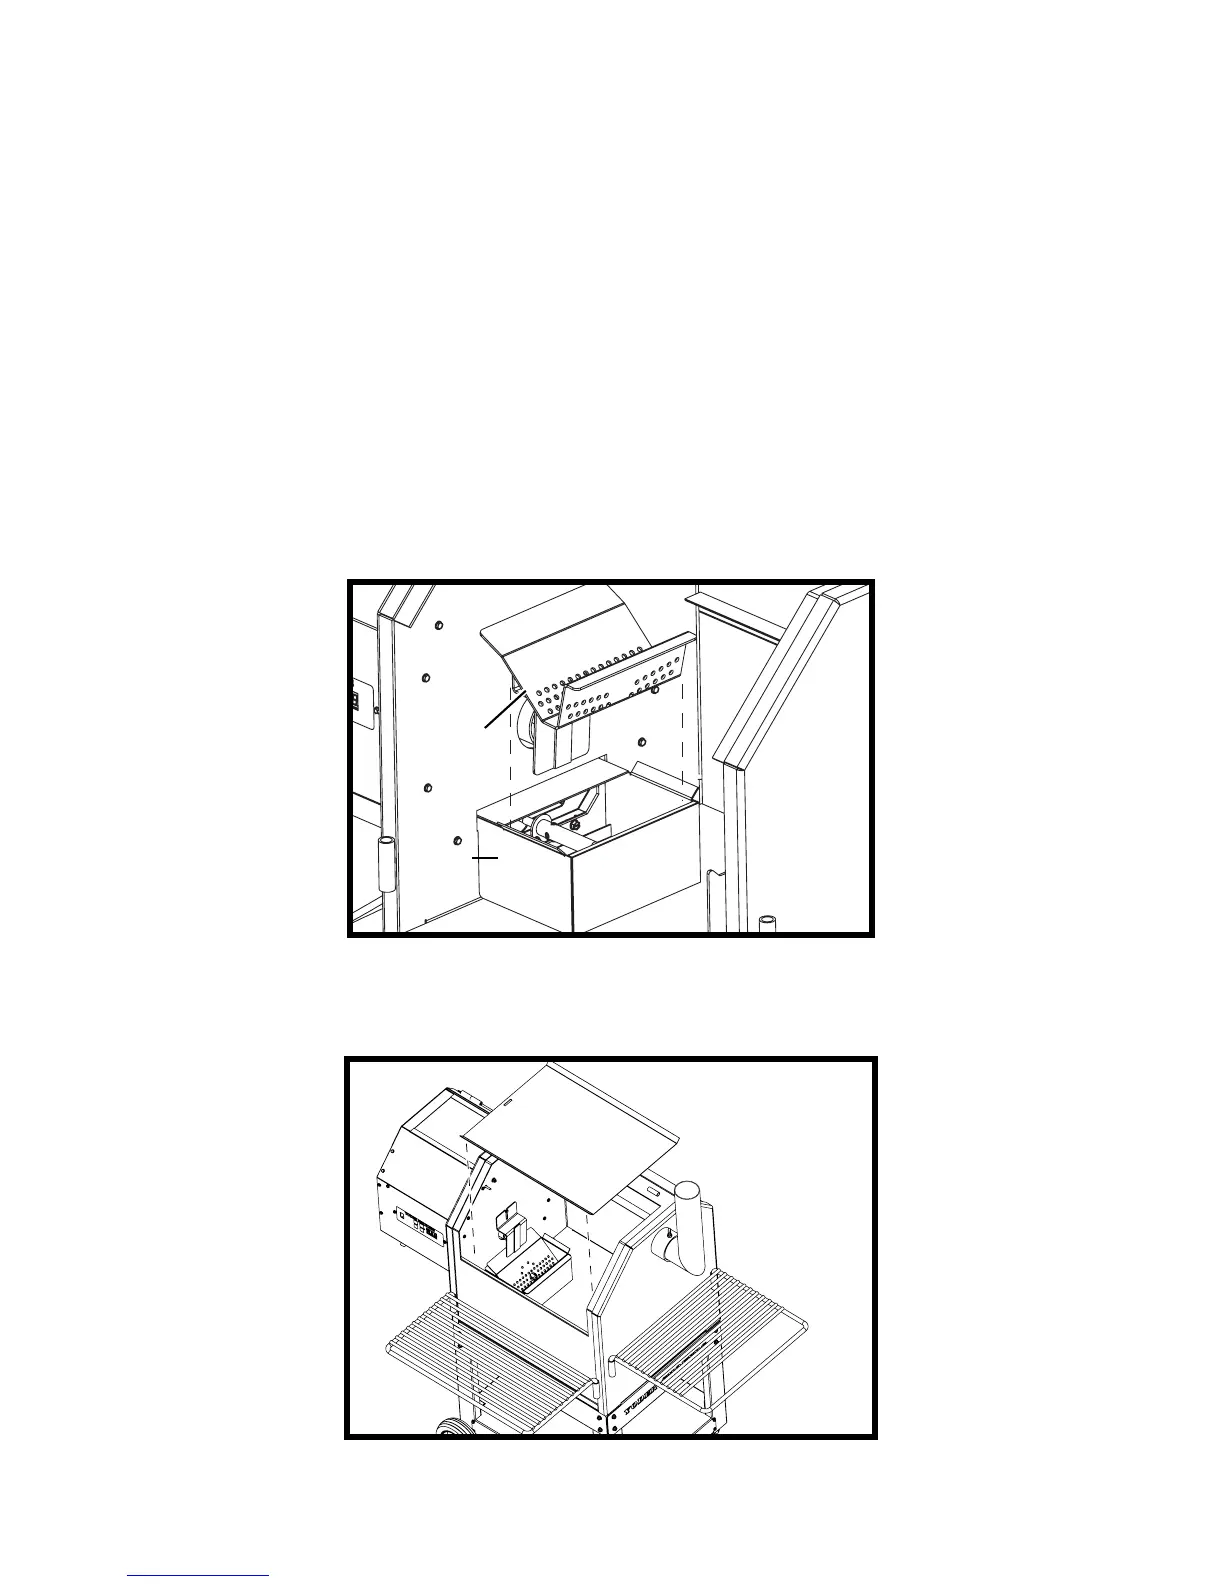
Assembly of your new Yoder starts by installing the burn grate inside the rebox. See
FIG 1.
BURN GRATE
FIREBOX
Install the heat diuser plate and smoke stack next. The smoke stack installs ush to
the inside of the cooking chamber with the long leg pointed straight up. Tighten the
thumb screw securely. See FIG 2.
FIG 1
FIG 2