EasyManua.ls Logo

Yoli LITETREK 36 User Manual

Default Icon
2 pages
To Next Page IconTo Next Page
Page #1 background imageLoading...
Page #1 background image
SET UP & TAKE DOWN INSTRUCTIONS
LITETREK 36 7’
7’ INSTANT CANOPY
SECURING THE CANOPY TOP TO THE FRAME
SET UP
THANK YOU FOR PURCHASING A YOLI INSTANT CANOPY!
Please carefully review the following instructions and familiarize yourself with parts included
and how to operate your YOLI canopy. Reference parts list for names of each part noted in instructions.
Parts Included: Fully Assembled Frame (1) Canopy Top with Integrated Wall (1) Backpack Carry Bag (1) Stakes (4)
1
2
Place the canopy in the desired location (Fig. 1A).
(Fig. 2A).
Unfold the canopy top and place it over the open frame (Fig.3A). Secure each corner by attaching the corn
of the canopy top to the
black fastening strip (Fig.3B). Pull all 4 corners down until completely over black fastening strip.
Your canopy top
now secure to the frame.
3
1
2AFig. 3AFig. 3BFig. 1AFig.
1AFig. 1BFig. 2AFig.
3A
Fig.
4A
Fig.
2
3
4
Place the canopy in the desired location for shade. Position one hand on any frame leg just below the black fastening strip and
place your other hand on the lower eaves bar as shown (Fig. 1A)
off the ground so all legs except the
leg directly across bearing the weight clears the ground. Take steps backwards to open the frame as much as possible (Fig. 1B).
until it locks into position as
pictur (Fig.2A). Repeat on other 3 legs.
slide out
inner leg (Fig. 3A). Repeat for other 3 legs.
Secure integrated wall to frame by wrapping fastening strips around legs (Fig.4A).
djust until taught.
Question and Answer IconNeed help?

Do you have a question about the Yoli LITETREK 36 and is the answer not in the manual?

Yoli LITETREK 36 Specifications

General IconGeneral
BrandYoli
ModelLITETREK 36
CategoryTent
LanguageEnglish

Summary

Securing the Canopy Top to the Frame

Place Canopy in Desired Location

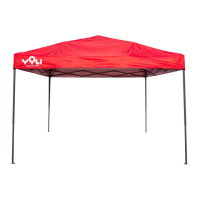
Position canopy on the ground in the intended spot for shade.

Extend Frame at Full Arm's Length

Lift canopy legs slightly and step backward to fully extend the frame.

Attach Canopy Top to Frame

Unfold canopy over frame, securing corners to black fastening strips.

Setting Up the Instant Canopy

Position Hands and Lift Frame Leg

Place hands on frame leg and eaves bar, lift leg to clear ground for opening.

Lock Canopy Leg Latches

Push down on leg top and lift latch slider to lock frame in place.

Adjust Telescoping Legs

Lift outer leg and slide inner legs out to adjust height.

Secure Integrated Wall

Wrap fastening strips around legs to secure the integrated wall.

Taking Down the Instant Canopy

Unfasten Wall Straps

If wall is attached, unfasten the wall straps around the frame legs.

Retract Canopy Legs

Lift leg, depress button, and push inner legs into outer legs to retract.

Unlock Ceiling Assembly

Pull the ring at the latch slider to unlock the ceiling assembly.

Fold Frame and Store

Walk frame towards opposite leg, fold completely, then store in carry bag.

YOLI Carry & Storage Bag Instructions

Close Canopy and Tuck Wall

Ensure canopy is fully closed and the integrated wall is tucked inside.

Place Carry Bag Over Canopy

Unzip the carry bag and place its open end over the canopy top.

Slide Bag and Zip Shut

Slide the carry bag down to cover the canopy completely and zip it closed.

Related product manuals