YSI ProDSS Meter Calibration and Routine Maintenance
K:\Streamkeepers\Communication\Website\To load onto Web\ProDSS calibration.docx
YSI ProDSS calibration and routine maintenance rev 5/29/2018
Pressure (Barometer) calibration
Temperature calibration check
These procedures are to be performed by Streamkeepers staff or trained volunteers. Check
and/or calibrate all parameters at least prior to every quarterly monitoring session, and it’s also a
good idea to check calibrations during the month-long monitoring window. If the instrument is
used between seasonal sampling months, additional checking and/or calibration is recommended.
For further details about frequency of calibrations/checks, see “Equipment Calibration &
Calibration-Check General Information.”
Be sure the primary reference standards used in the office for calibration are within their
expiration dates (last day of listed month). The ProDSS will automatically store calibration
information into a GLP (good lab practices) file. This includes what was calibrated, who
calibrated it, and when it was calibrated.
Calibration checks and QC criteria: All calibration checks are tied to QC criteria specified in
the Quality Assurance Project Plan (QAPP) for either Streamkeepers or whichever special
investigation is being conducted. Where check results do not meet QC criteria, data gathered for
the parameter(s) in question with that sensor since the time of the last calibration or check must
be qualified per QAPP specifications. It’s important to notify program staff when calibration
checks do not meet QC criteria.
Prior to calibrating:
• Make sure all sensors, sensor guard, and calibration cup are clean. If possible, use a
dedicated sensor guard and calibration cup, used for calibration purposes only. For proper
cleaning procedures, see the ProDSS Assembly & Maintenance protocol. Make sure the
sensor guard is in place before installing the calibration cup.
• Fill the calibration cup with a moderate amount of water and rinse the sensor guard and
sensors by gently shaking the sealed cup. Discharge the water and repeat if necessary.
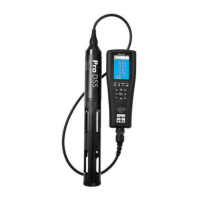
• Below is a schematic of the calibration cup (note the different fill lines), and a picture of the
sensor tips. You may need to reference this image during calibration.