Do you have a question about the YSI YSI-ProDSS and is the answer not in the manual?
Instructions for charging the ProDSS battery using AC adapter or USB.
Procedure for placing the probe in the stream and allowing it to stabilize.
How to enable and configure the Auto Stable feature for accurate readings.
Performing a DO drift check to ensure reading accuracy and stability.
Detailed instructions for installing sensors, port plugs, and sensor guards.
Steps for diagnosing and resolving issues with the battery pack not powering the unit.
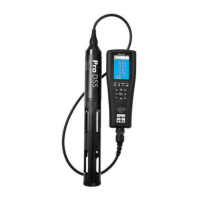
The YSI-ProDSS is a sophisticated multimeter designed for environmental monitoring, specifically for measuring various water quality parameters. Its primary function is to provide accurate and reliable data for dissolved oxygen, temperature, conductivity, salinity, and pH in aquatic environments. The device is built for field use, emphasizing robust construction and user-friendly operation, though careful handling and maintenance are crucial for its longevity and data accuracy.
The YSI-ProDSS multimeter measures a comprehensive suite of water quality parameters. It can simultaneously measure temperature, barometric pressure, dissolved oxygen (both percentage saturation and concentration in mg/L), conductivity, salinity, turbidity, and pH. The device is equipped with multiple sensor ports, allowing for the installation of various sensors to suit specific monitoring needs. A key feature is its ability to compensate for temperature and dissolved oxygen data based on conductivity readings, ensuring higher accuracy. The instrument also includes an Auto Stable feature that helps users identify when readings have stabilized, which is critical for obtaining reliable data. Data logging capabilities are integrated, allowing users to record measurements and associate them with specific sites and data IDs (e.g., primary sample or replicate). This ensures organized data collection and facilitates subsequent analysis. The device's internal Li-Ion battery pack provides extended field operation, with varying battery life depending on the instrument's configuration and LCD brightness settings.
The YSI-ProDSS is designed for ease of use in the field, with several features that streamline data collection.
Cable Connection: The device features a secure cable connection between the handheld meter and the sensor assembly. Users must ensure connectors are clean and dry, align the keys, push firmly, and twist the outer ring clockwise until it locks. A metal pin should "snap" into place and be visible through a small hole, indicating a secure connection.
Sensor Guard and Sensor Check: Before deployment, users must remove the calibration cup and inspect the sensor guard and sensors. The calibration cup is removed by twisting its retaining nut counterclockwise. The sensor guard is unthreaded clockwise from the bulkhead. Once exposed, sensors should be visually inspected for debris and carefully cleaned with a lint-free cloth and rinsed with water if necessary. Users should gently "test" each sensor's connection by grasping its upper portion and attempting to twist it; sensors should be firmly in place. If a sensor moves, it indicates a loose connection that needs to be reconnected. It's crucial that all empty sensor slots have a port plug or sensor installed to prevent bulkhead damage.
Battery Management: The device is powered by an internal Li-Ion battery pack. Charging is recommended using YSI-designated equipment, either an AC adapter, a computer USB connection, or an external portable USB battery pack. The instrument must be turned on to recognize it's charging, but can be turned off to complete the charge. For optimal battery life, it's advised to keep the battery 40% to 80% charged and to prefer larger discharges (e.g., to 50%) over small ones (e.g., to 90%) between recharges.
Power On/Off: The meter is turned on by pushing the power key. To turn it off, the power key must be held down for 1.5 seconds.
Main Display (Run Screen): Upon powering on, the main display shows the battery life percentage. Users should confirm that the date, time, and logging settings (e.g., "log one sample") are correct. If not, these can be adjusted in the "Settings and Troubleshooting" section.
Site and Data ID Selection: The device allows users to select specific sites and data IDs (e.g., primary sample, replicate) for their measurements. This is done through the System Button, ensuring that the "Use Site List" and "Use Data ID List" checkboxes are selected.
Probe Placement and Stabilization: When taking measurements, the probe should be inserted downstream or to the side of the current, facing downstream, in an area with steady flow, adequate depth, good mixing, and no surface turbulence. It should remain in this location for approximately 10 minutes to acclimate to stream conditions.
Auto Stable Feature: After acclimation, the Auto Stable feature is activated via the probe button. Users confirm that parameters are set to "on," "Continuous Mode" and "Log Samples" are checked, and "Sample Period(s)" and "Sample Count" are set as desired. The device then indicates when readings have stabilized, typically by flashing red symbols turning green.
Recording Readings: Once stabilized, users press enter to log a reading. Readings for temperature, DO % saturation, DO concentration, conductivity, salinity, pH, and turbidity are recorded to specific decimal places as per the quality assurance protocol.
Replicate Readings: For replicate readings, the probe is removed from the stream, shaken off, and replaced. Before taking a second reading, users navigate to the Logging menu via the System Button, select "Data ID," and choose "Replicate." A replicate barometer reading should also be taken.
DO Drift Check: After initial measurements, a DO drift check is performed. The calibration cup is filled with ~2″ of clean water and loosely tightened onto the bulkhead (not completely tightened for atmospheric venting). The meter and probe are kept in the shade, if possible, and allowed to stabilize for 2 minutes. During this period, both DO Sat % and temperature (°C) should remain within 0.1 of their initial readings. The DO % Saturation reading should be between 98-102%; if not, recalibration is necessary.
Proper maintenance is essential for the YSI-ProDSS to ensure accurate readings and extend its lifespan.
Connector Cleaning: Before connecting any cables or installing sensors/port plugs, all connectors (on the handheld, cable, sensors, and bulkhead) must be clean and dry. This prevents damage and ensures proper electrical contact.
Sensor and Port Plug Installation: Sensor and port plug installation should be performed in a clean, dry environment, not in the field. The bulkhead port should be inspected for contamination and dried with a lint-free cloth if wet. A thin coat of Krytox o-ring lubricant should be applied to sensor o-rings, with any excess wiped off. Sensors are carefully aligned and inserted into the port, then the retaining nut is finger-tightened clockwise. An installation/removal tool is used to tighten the nut further until snug, about a ¼ to ½ additional turn. Over-tightening must be avoided to prevent damage. If an empty slot exists, a port plug must be installed. The bulkhead should never be submerged without all ports having a sensor or port plug installed.
Sensor Guard Installation: The sensor guard is carefully slid over the bulkhead and attached sensors/port plugs, pushed towards the bulkhead until threads align, and then finger-tightened clockwise. Any resistance indicates cross-threading, which must be avoided.
Battery Pack Troubleshooting: If the instrument does not turn on, users should first attempt to charge it. If this fails, the battery pack cover can be removed (by unscrewing four screws counter-clockwise) to inspect the battery pack and its connection. The battery pack connector should be grasped with two fingers and pulled straight up to disconnect. Both the battery pack and instrument pin connectors should be inspected for debris or damage. If they appear properly connected, the battery pack should be reconnected, and the cover reinstalled. If the unit still doesn't turn on, the battery pack may need replacement. It is critical not to remove the battery pack if it is hot to the touch, producing an odd odor, or leaking fluid; such situations require professional assistance. Battery pack removal and examination should always be done with extreme care by a team leader in a dry, clean place, preferably not in the field.
Date/Time and Logging Settings Adjustment: If the date, time, or logging settings are inaccurate, they can be adjusted through the system button. For date and time, users navigate to the "Date/Time" submenu, select "Date" or "Time," and use arrow keys to adjust. For logging settings, the "logging" submenu allows users to uncheck "Continuous Mode" if necessary.
Sensor Display Details Adjustment: If a parameter is not displayed on the Run Screen or if units do not match, users should inform the team leader. The sensor installation should be checked, and if units are incorrect, they can be adjusted via the probe button, navigating to the "Display" submenu, selecting the desired parameter, and choosing the proper unit.
| Category | Multiparameter Water Quality Meter |
|---|---|
| Dissolved Oxygen Range | 0 to 50 mg/L |
| Conductivity Range | 0 to 200 mS/cm |
| Display | Color LCD |
| Data Logging | Yes |
| Connectivity | USB, Bluetooth |
| Waterproof | Yes |
| IP Rating | IP67 |
| Measurement Parameters | pH, ORP, Conductivity, Dissolved Oxygen, Turbidity, Nitrate, Chloride, Ammonium, Temperature |
| pH Range | 0 to 14 |
| Temperature Range | -5 to 50°C |
| Accuracy | Varies by parameter |
| Power Supply | Rechargeable battery |
| Measurement Range (µS/cm) | 0 to 200, 000 µS/cm |
| Memory | Up to 100, 000 data sets |
| Battery Life | Up to 48 hours |