Page 4
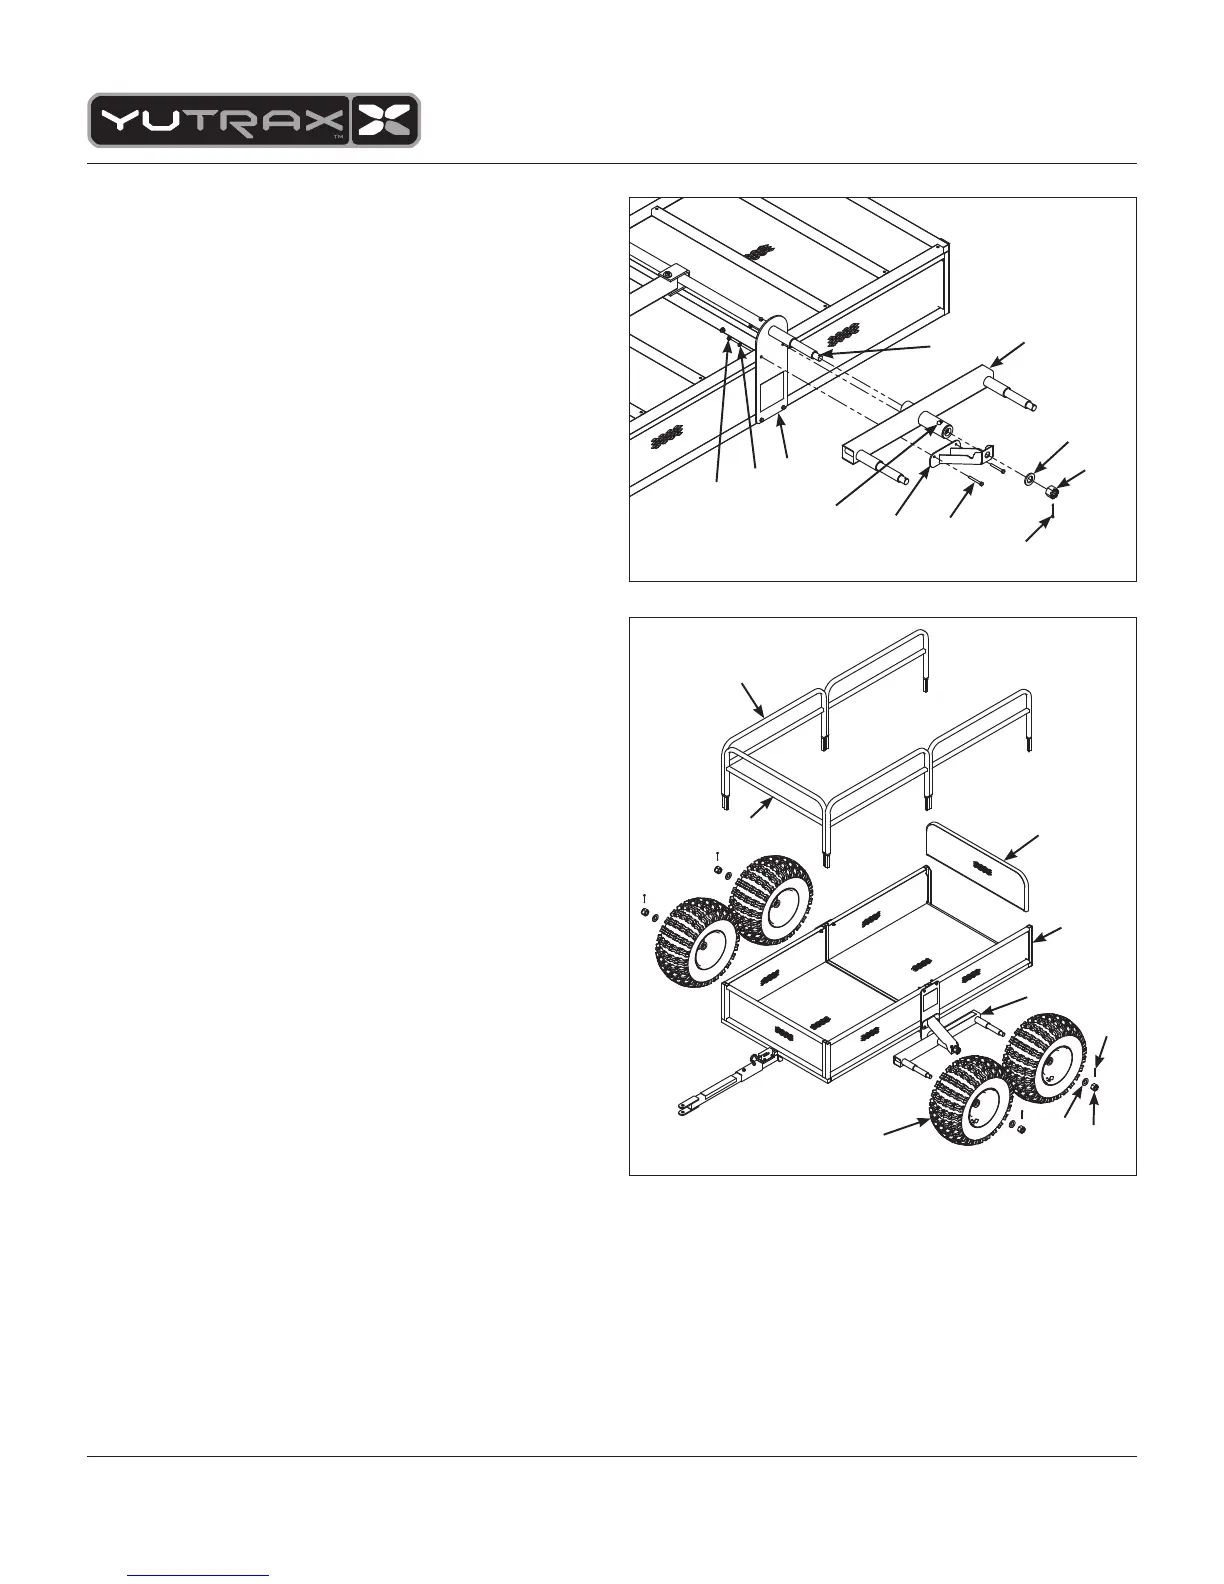
8. Slide the tracking beams (14) onto the axle spindles
(6). The axles of the tracking beams should be facing
outwards. SEE FIGURE 5
9. Slide the tracking beam braces (12) over the axle spindles
(6) and secure to the trailer frame and axle mounting
plates (4) with four M6x50mm bolts (20), M6 steel washers
(28) and M6 locknuts (24). The grease fittings of the
tracking beams must be facing away from the braces for
access. SEE FIGURE 5
10. Secure the tracking beams (14) and tracking beam braces
(12) to the axle assembly with two 20mm castle nuts (23)
and 20mm steel washers (26). Tighten the castle nuts until
snug and then back off slightly to allow free movement of
the tracking beams and alignment of the cotter pins (29).
SEE FIGURE 5
11. Insert the cotter pins (29) through the axle spindles (6)
and castle nuts (23) so that the head of the cotter pins are
seated in the castle nuts. Using a pair of pliers, bend the
prongs around the other side of the castle nuts so that the
cotter pins cannot fall out. SEE FIGURE 5
12. You must now tighten all nut and bolt assemblies.
Be sure not to over tighten or crush tubing when
tightening.
13. Slide the four wheels (13) onto the tracking beam axles
(14) with grease fittings and air valves facing outward.
Secure with four 20mm castle nuts (23) and 20mm steel
washers (26). Tighten the castle nut until snug and then
back off slightly to allow free movement of the wheels (13)
and cotter pin (29) alignment. SEE FIGURE 6
14. Insert the four cotter pins (29) through the tracking beam
axles (14) and castle nuts (23) so that the head of each
cotter pin is seated in the corresponding castle nut. Using
a pair of pliers, bend the prongs of the two cotter pins
around the other side of the castle nuts so that the cotter
pin cannot fall out. SEE FIGURE 6
15. Grease all wheels with a grease gun and high quality
bearing grease. Check the grease level frequently to
prevent bearings from excessive wear or failure.
16. Slide the removable tailgate (3) into the channels on
the rear trailer frame (2). Slide the four side containment
racks (8) and the one front containment rack (9) into the
corresponding tubes on the trailer frame assembly.
SEE FIGURE 6
NOTE: Make sure the tire pressure does not exceed the
maximum rating written on the tire. Recommended
operating pressure is 7 psi.
OPTIONAL ACCESSORIES
TX112 2" Ball Hitch Kit
FIGURE 6
13
14
23
26
29
3
2
8
9
FIGURE 5
14
6
12
4
20
24
28
29
26
23
grease
fitting
 Loading...