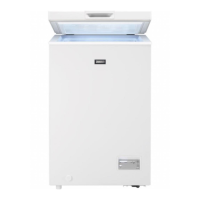
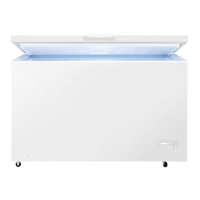
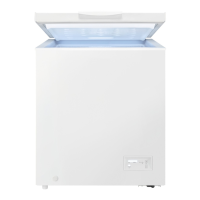
This document is a user manual for Zanussi Chest Freezers, models ZCF 220, ZCF 310, and ZCF 410. It provides comprehensive information on the appliance's function, technical specifications, usage, and maintenance.
Function Description
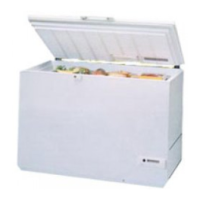
The Zanussi Chest Freezer is designed for the freezing and storage of food. It operates by maintaining a consistently low temperature to preserve food quality over extended periods. The freezer utilizes a thermostat for temperature control and includes features for efficient freezing of fresh food. It is intended for domestic use and requires proper installation and ventilation to function optimally. The freezing process involves lowering the temperature of food rapidly to prevent spoilage, and the freezer is equipped to handle varying amounts of food for freezing, with specific guidelines to ensure effective preservation.
Important Technical Specifications
The manual provides detailed technical specifications for the three models: ZCF 220, ZCF 310, and ZCF 410.
Volume:
- ZCF 220: Gross volume of 220 litres, net volume of 215 litres.
- ZCF 310: Gross volume of 313 litres, net volume of 306 litres.
- ZCF 410: Gross volume of 414 litres, net volume of 404 litres.
Dimensions (Height without/with roller, Width, Depth):
- Height (all models): 86.1 cm without roller, 86.8 cm with roller.
- Width: ZCF 220 is 79.5 cm, ZCF 310 is 105 cm, ZCF 410 is 132.5 cm.
- Depth (all models): 66.5 cm.
Weight:
- ZCF 220: 39 kg.
- ZCF 310: 49 kg.
- ZCF 410: 56 kg.
Energy Consumption:
- ZCF 220: 2.36 kWh/24h.
- ZCF 310: 2.64 kWh/24h.
- ZCF 410: 3.16 kWh/24h.
Freezing Capacity:
- ZCF 220: 11 kg/24h.
- ZCF 310: 14 kg/24h.
- ZCF 410: 16 kg/24h.
Hold-over Time:
- ZCF 220: 17 hours.
- ZCF 310: 19 hours.
- ZCF 410: 21 hours.
Rated Power:
- ZCF 220: 150 W.
- ZCF 310: 160 W.
- ZCF 410: 250 W.
The appliance complies with EC Directives 73/23/EEC (Low-Voltage Directive) and 89/336/EEC (EMC Directive, including Amendment Directive 92/31/EEC). Testing is carried out in accordance with ISO 5155.
Usage Features
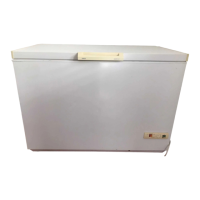
Installation:
- The freezer should be placed horizontally on a firm surface, resting on all four plastic feet.
- Ensure adequate ventilation and avoid placing it near heat sources or in direct sunlight.
- Room temperature should be between freezing point and 43°C for proper function.
- If handled standing on end, allow 12 hours in normal position before switching on.
- The appliance must be earthed, and the voltage supply must match the rating plate.
Switching On:
- Clean the interior before switching on.
- Set the thermostat button to the middle position and allow the freezer to run for several hours before placing food inside.
Temperature Control:
- The thermostat button, adjusted with a coin, controls the temperature. Turning towards '7' makes it colder, and towards '1' makes it warmer.
- The ideal temperature for the top package in the middle of the freezer should not exceed -18°C.
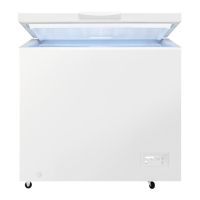
Opening/Closing the Lid:
- The lid has a tight sealing strip. A vacuum may form after closing, making it hard to open immediately; wait a few minutes before gently pulling the handle.
Control Panel:
- Green light: Indicates the freezer is connected to power.
- Yellow light: Illuminates when the "Super" button is depressed for freezing.
- Red light (alarm): Illuminates when the temperature is higher than the thermostat setting, possibly due to large amounts of fresh food, prolonged lid opening, or a system defect.
Freezing:
- For freezing more than 3-4 kg of food, press the "Super" button (yellow light on) 6-24 hours before placing food inside.
- Leave the "Super" button on for about 24 hours after placing food, then press it again to turn off the yellow light and return to normal storage.
- Ensure food is cold before freezing, packed in airtight, moisture-proof packaging, and placed close to cold sides, not touching already frozen food.
- Never fill to more than 5 mm below the top edge.
- Do not exceed the stated freezing capacity (kg/24 hours) on the data plate.
Lock:
- (Optional accessory) The lock mechanism is shown in the drawings. Keep the key out of reach of children.
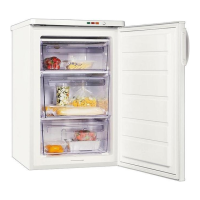
Baskets:
- Designed for storing already frozen food. Handles can be placed in two positions.
- Baskets can be placed inside the freezer or hung on the edge of the casing.
Helpful Hints (Storage & Freezing):
- Store frozen food at least 5 mm below the top edge.
- Do not exceed maximum storage time for purchased frozen food.
- Buy frozen food with correct temperature and intact packaging.
- Place purchased products quickly into the freezer, preferably using an insulated bag for transport.
- Avoid placing bottles, warm objects, or fizzy drinks in the freezer.
- Use only fresh, high-quality food for freezing.
- Cool hot dishes to room temperature quickly before freezing.
- Wrap food carefully in freezer foil or special freezer containers/bags.
- Divide food into small portions for rapid freezing and to allow defrosting only what is needed.
- Do not re-freeze defrosted food, except for dishes made from defrosted food.
- Mark packaging with the freezing date and keep a record of contents.
- If freezing is too slow, food quality deteriorates; do not freeze larger amounts than specified.
- Keep the lid closed during freezing.
Defrosting Food:
- Generally, defrost large portions of meat/poultry in the refrigerator.
- Small portions can be cooked from frozen.
- Observe product packaging instructions.
- Microwave ovens can be used for rapid defrosting.
Accessories:
- Spare baskets are available from service centres. Illustrations show basket configurations for different freezer lengths (300mm, 595mm, 795mm, 935mm, 1050mm, 1190mm, 1325mm, 1600mm).
Maintenance Features
Defrosting the Freezer:
- Frost formation is unavoidable; open the lid only when necessary.
- A thin layer of frost does not affect function and can be removed with the provided scraper.
- Defrost when the frost/ice layer is 10-15 mm thick, ideally when the freezer is low on food.
- Switch off power, remove contents, wrap them in newspapers, and store in a cold place.
- Speed up defrosting by placing bowls of hot (not boiling) water inside and closing the lid.
- Collect defrost water in a bowl.
- Do not use sharp implements or anything other than hot water to speed up defrosting.
- Remember to replace the plug in the drip water drain after defrosting.
Cleaning the Freezer Inside:
- Remove the plug and all loose accessories before cleaning.
- Clean after defrosting and before reconnecting power.
- Use a damp cloth with hot water and a mild, non-aromatic cleaning agent.
- Clean baskets before replacing them.
- Do not use strong cleaning agents, scouring powder, or strongly aromatic agents, as they can damage the interior and leave a smell.
External Cleaning:
- Wash the outer cabinet with warm soapy water. Do not use abrasive products.
When Not in Use:
- Disconnect from electricity supply.
- Remove all goods.
- Clean as described.
- Leave the lid slightly open.
Troubleshooting (If Something Does Not Work):
- Freezer not cold enough: Check plug, fuse, power, lid closure, thermostat setting, and "Super" function.
- Freezer too cold: Check "Super" function and thermostat setting.
- Too much frost formed: Check lid closure, room moisture, and food packaging.
- If problems persist, contact authorised service staff.
- The freezer exterior may feel warm due to the freezing process, which is normal.
- The compressor may not start immediately after a brief power-off, which is normal.
Power Failure or Breakdown:
- The hold-over period indicates how long food remains frozen without power. Do not open the lid during this time.
- If the freezer is half full or the lid is opened, hold-over time is reduced.
- After a breakdown, check food condition. Do not re-freeze thawed food.
- Guidelines for thawed food: Ice cream should be discarded. Fruits & vegetables, if soft, should be cooked and used up. Breads & cakes can be re-frozen. Cooked dishes should be refrigerated and used up, or cooked and re-frozen. Small joints and chicken should be cooked and re-frozen.
How to Change the Bulb:
- Disconnect from electricity supply.
- Unscrew the old bulb and replace with a new one (max. 15W).
- Reconnect electricity supply.
- Extra bulbs are available from Zanussi Service Force Centre.
Guarantee Conditions and Service:
- Zanussi Ltd. provides a 12-month guarantee against faulty workmanship or materials, offering free repair or replacement.
- Conditions include correct installation, domestic use, adherence to instructions, no unauthorised servicing, and original ownership.
- Service work must be undertaken by a Zanussi Service Force Centre.
- Exclusions include damage from transport, improper use, neglect, replacement of light bulbs or removable parts, costs for improper installation or calls outside the UK, commercial use, rental agreements, and products not marketed by Zanussi Ltd.
- For EEC countries, the standard guarantee applies but requires the owner to ensure compliance with local standards.