Do you have a question about the Zanussi ZCV48300BA and is the answer not in the manual?
Safety guidelines for children and vulnerable individuals to prevent harm.
Essential rules for safe operation and maintenance of the appliance.
Instructions for safe installation and careful handling of the appliance.
Critical warnings regarding electrical connections, fire, and shock hazards.
Safety warnings and precautions for general appliance use.
Precautions against fire, explosion risks, and preventing appliance damage.
Guide to identifying and resolving common appliance issues.
Guidance on appliance placement, levelling, and electrical connection.
Details on hob energy consumption and tips for saving energy.
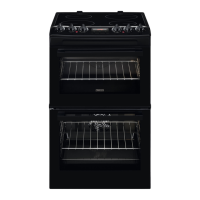
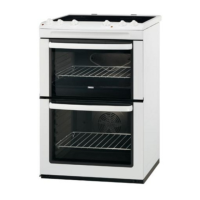
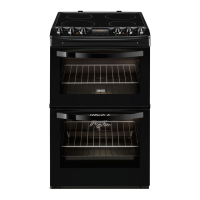
This document is a user manual for a Zanussi freestanding cooker, model numbers ZCV48300BA, ZCV48300WA, and ZCV48300XA. It provides comprehensive instructions for safe installation, daily use, maintenance, and troubleshooting of the appliance.
The cooker features a hob with four radiant heating zones and two ovens (top and main). The control panel includes knobs for the hob, top oven functions, and main oven functions, as well as an electronic programmer for setting clock functions.
Before installation and use, it is crucial to read and understand all safety instructions to prevent injuries and damages. The manufacturer is not responsible for issues arising from incorrect installation or use. The manual emphasizes keeping children and vulnerable people safe, advising supervision for children aged 8 and above, and keeping packaging, the appliance during operation, and during cooling away from them. Cleaning and user maintenance should not be performed by children without supervision.
General safety guidelines include:
Installation should only be performed by a qualified person. All packaging must be removed, and a damaged appliance should not be installed or used. The appliance is heavy, so safety gloves should be worn during movement. The kitchen cabinet and recess must have suitable dimensions, and minimum distances from other appliances and units should be maintained. The appliance must be installed below and adjacent to safe structures, and its sides should be adjacent to units of the same height. It should not be installed on a platform, near a door, or under a window to prevent hot cookware from falling. A stabilizing means must be installed to prevent tipping.
All electrical connections must be made by a qualified electrician, and the appliance must be earthed. The electrical information on the rating plate must match the power supply. A correctly installed shockproof socket should always be used, and multi-plug adapters or extension cables are prohibited. Mains cables should not touch or come near the appliance door, especially when hot. Shock protection for live and insulated parts must be secured. The mains plug should only be connected after installation, ensuring access to it. If the mains socket is loose, do not connect the plug. Do not pull the mains cable to disconnect the appliance; always pull the plug. Correct isolation devices (line protecting cut-outs, fuses, earth leakage trips, and contactors) must be used, with an isolation device allowing disconnection from the mains at all poles, with a minimum contact opening width of 3 mm. The appliance door must be fully closed before connecting the mains plug.
The appliance is for household cooking only, and its specifications should not be altered. Ventilation openings must not be blocked. Do not leave the appliance unattended during operation and deactivate it after each use. Be cautious when opening the oven door during operation, as hot air can release. Do not operate with wet hands or when in contact with water. The appliance should not be used as a work or storage surface.
Fats and oils release flammable vapors when heated; keep flames and heated objects away. Very hot oil vapors can cause spontaneous combustion. Used oil, especially with food remnants, can catch fire at lower temperatures. Do not place flammable products or items wet with flammable products in, near, or on the appliance. Avoid sparks or open flames when opening the oven door. Open the door carefully, as alcohol-containing ingredients can create an alcohol-air mixture.
To prevent damage or discoloration to the enamel, do not place ovenware or objects directly on the bottom, or pour water directly into a hot appliance. Do not keep moist dishes or food in the appliance after cooking. Be careful when removing or installing accessories. Enamel discoloration does not affect performance and is not a defect. Use a deep pan for moist cakes, as fruit juices can cause permanent stains. Do not place hot cookware on the control panel or let cookware boil dry. Avoid dropping objects or cookware on the appliance to prevent surface damage.
Before maintenance, deactivate the appliance and disconnect the mains plug. Ensure the appliance is cold before cleaning, as glass panels can break. Replace damaged door glass panels immediately via an Authorized Service Centre. Be careful when removing the heavy oven door. Clean the appliance regularly to prevent material deterioration, as remaining fat or food can cause fire. Use a moist soft cloth and neutral detergents; avoid abrasive products, cleaning pads, solvents, or metal objects. When using oven spray, follow packaging instructions. Do not clean catalytic enamel with any detergent.
The light bulb or halogen lamp used is for household appliances only, not general house lighting. Before replacing the lamp, disconnect the appliance from the power supply. Only use lamps with the same specifications.
Disconnect the appliance from the mains supply, cut and discard the mains cable, and remove the door catch to prevent children and pets from getting trapped.
For repairs, contact an Authorized Service Centre and use only original spare parts.
The cooker includes a control panel, air vents for the cooling fan, heating elements, lamps, fans, and shelf positions. The cooking surface has four radiant heating zones with varying wattages and a residual heat indicator. The control panel features knobs for the hob, top oven functions, and main oven functions, along with an electronic programmer.
Remove all accessories, clean the appliance, and then return accessories to their initial positions. The time must be set before operating the oven; only the top oven works without the set time. The time of day indicator flashes when the appliance is connected, after a power cut, or if the timer is not set. Use the + or - buttons to set the time. The time cannot be changed if the Duration or End function is active.
Preheat the empty appliance to burn off remaining grease. Preheat both ovens, one at a time, by setting the maximum temperature, selecting a function, and letting it operate for 15 minutes (top oven) or 1 hour (main oven). Accessories may become hotter than usual, and the appliance may emit an odor and smoke, which is normal.
The hob has heat settings from 1 to 6, with 0 being the off position. The residual heat indicator illuminates when a cooking zone is hot. Cookware should have a thick, flat bottom. Enamelled steel, aluminum, or copper-bottomed cookware can cause discoloration on the glass-ceramic surface.
To save energy, deactivate cooking zones 5-10 minutes before cooking is complete to use residual heat. Turn the knob to the desired heat setting, and to off when finished.
Clean the hob after each use with a special cleaner and scraper. Immediately remove melted plastic, foil, or sugary food, as these can damage the hob. Remove limescale, water rings, fat stains, and metallic discoloration when the hob is cool using a moist cloth and detergent, then dry with a soft cloth.
To activate an oven, turn the knob to select a function. To deactivate, turn the knob to the off position. The indicator lights up when the oven heats, and the lamp comes on during operation. The symbol shows if the knob controls cooking zones, oven functions, or temperature.
Top Oven Functions:
Main Oven Functions:
The cooling fan activates automatically during operation and may continue after deactivation until the appliance cools down.
The trivet can be used with the deep pan for roasting larger pieces of meat or poultry (supports up) or for grilling flat dishes and toasting (supports down).
The electronic programmer works only with the main oven. The display shows function indicators, time, and a function indicator. Buttons include MINUS, CLOCK, and PLUS for setting time and clock functions.
Clock Functions:
Duration and End functions can be used together to delay appliance activation. To set clock functions, press the clock button until the desired function indicator flashes, then use + or - to set the time. An acoustic signal sounds when the time ends. To cancel, press the clock button until the indicator flashes, then press and hold the clock button.
Baking temperatures and times are guidelines and depend on recipes and ingredients. The manufacturer recommends using lower temperatures initially. Baking times can be extended for multiple shelf positions. Browning differences equalize during baking. For longer baking, deactivate the oven 10 minutes before the end and use residual heat. Trays may twist when cooking frozen food but return to normal when cool.
Troubleshooting tips for baking results are provided, addressing issues like insufficient browning, sinking cakes, dryness, and uneven browning, with suggested remedies such as adjusting shelf position, temperature, or baking time.
Always grill with the oven door closed and at the maximum temperature setting. Set the shelf and deep pan as recommended in the grilling table, with the deep pan on the first shelf to collect fat. Grill only flat pieces of meat or fish. Preheat an empty oven with grill functions for 5 minutes. The grilling area is in the center of the shelf.
Remove food packaging and place food on a plate. Do not cover with a bowl or plate, as this can extend defrost time. Use the first shelf position (bottom).
Clean the front with a soft cloth and warm water. For metal surfaces, use a usual cleaning agent. Clean the interior after each use, as fat accumulation can cause fire. Clean stubborn dirt with a special oven cleaner. Clean all accessories after each use and let them dry. Nonstick accessories should not be cleaned with aggressive agents, sharp objects, or in a dishwasher.
Stainless Steel or Aluminium Appliances: Clean the oven door with a wet sponge and dry with a soft cloth. Avoid steel wool, acids, or abrasive materials.
Catalytic Cleaning: Do not clean catalytic surfaces with oven sprays, abrasive cleaning agents, or soap, as this will damage the surface. Spots or discoloration do not affect catalytic properties. To support self-cleaning, heat the empty oven regularly: clean the floor with warm water and washing-up liquid, then set the oven to 250°C for 1 hour. Clean with a soft, moist sponge when cool. Keep children away during high-temperature cleaning. Always turn on the oven light during catalytic cleaning.
Removing the Oven Door (Top Oven): To make cleaning easier, remove the door. Open the door one-third of the way, hold the top trim at the sides, and push inwards to release the clip seal. Pull the trim forward, then remove the glass panels. To reinstall, reverse the steps, ensuring the A trim part is attached to the door before lowering the trim.
Removing and Cleaning the Oven Glasses (Main Oven): Push the door trim at one side to remove it. Pull up the trim, then remove the glass panels. To reinstall, reverse the steps.
Replacing the Lamp: Place a cloth on the oven floor to protect the lamp glass cover and cavity. Disconnect the appliance from the power supply (fuses or circuit breaker) before replacing the lamp, as the lamp and cover can be hot. For the back lamp, turn the glass cover counterclockwise, clean it, replace the oven lamp with a suitable 300°C heat-resistant oven lamp of the same type, and then install the glass cover.
The manual provides a table for common problems, possible causes, and remedies, such as:
For unresolved issues, contact the dealer or an Authorized Service Centre. The rating plate, located on the front frame of the appliance cavity, contains necessary service data and should not be removed.
The manual includes product information for the hob and ovens according to EU regulations, detailing model identification, hob type, number of cooking zones, heating technology, diameter of cooking zones, and energy consumption.
Hob - Energy Saving:
Oven - Energy Saving:
The manual encourages recycling materials and appliances, advising users to dispose of packaging in applicable containers and return marked appliances to local recycling facilities or municipal offices, rather than with household waste.
| Type | Freestanding Cooker |
|---|---|
| Fuel Type | Electric |
| Hob Type | Ceramic |
| Number of Cooking Zones | 4 |
| Number of Ovens | 1 |
| Oven Type | Conventional |
| Energy Efficiency Class | A |
| Width | 60 cm |
| Colour | Black |
| Grill | Yes |
| Convection Fan | Yes |
| Door Cooling System | Yes |
| Child Lock | Yes |
| Product Type | Electric Cooker |
| Oven Capacity | 58 liters |
| Dimensions (H x W x D) | 90 x 60 x 60 cm |
| Oven Functions | Grill |
| Cleaning System | Catalytic |